Returning the SRX5800 Chassis or Components
Contacting Customer Support
Once you have located the serial numbers of the firewall or component, you can return the firewall or component for repair or replacement. For this, you need to contact Juniper Networks Technical Assistance Center (JTAC).
You can contact JTAC 24 hours a day, 7 days a week, using any of the following methods:
On the Web: Using the Service Request Manager link at https://support.juniper.net/support/
By telephone:
From the US and Canada: 1-888-314-JTAC
From all other locations: 1-408-745-9500
Note:If contacting JTAC by telephone, enter your 12-digit service request number followed by the pound (#) key if this is an existing case, or press the star (*) key to be routed to the next available support engineer.
Return Procedure for the SRX5800 Firewall
If a problem cannot be resolved by the JTAC technician, a Return Materials Authorization (RMA) is issued. This number is used to track the returned material at the factory and to return repaired or new components to the customer as needed.
Do not return any component to Juniper Networks, Inc. unless you have first obtained an RMA number. Juniper Networks, Inc. reserves the right to refuse shipments that do not have an RMA. Refused shipments will be returned to the customer via collect freight.
For more information about return and repair policies, see the customer support Web page at https://www.juniper.net/support/guidelines.html .
To return a firewall or component to Juniper Networks for repair or replacement:
For more information about return and repair policies, see the customer support webpage at https://www.juniper.net/support/guidelines.html .
For product problems or technical support issues, open a support case using the Case Manager link at https://support.juniper.net/support/ or call 1-888-314-JTAC (within the United States) or 1-408-745-9500 (outside the United States).
Listing the SRX5800 Firewall Component Serial Numbers with the Command-Line Interface
Before contacting Juniper Networks, Inc. to request a Return Materials Authorization (RMA), you must find the serial number on the firewall or component. To display all of the firewall components and their serial numbers, enter the following command-line interface (CLI) command:
user@host> show chassis hardware
Hardware inventory:
Item Version Part number Serial number Description
Chassis JN10B7ACDAGA SRX 5800
Midplane REV 03 710-013698 TR0813 SRX 5800 Backplane
FPM Board REV 03 710-014974 KC3418 Front Panel Display
PDM Rev 03 740-013110 QCS1122501L Power Distribution Modu
le
PEM 1 Rev 03 740-013682 QCS1130409T PS 1.7kW; 200-240VAC in
PEM 2 Rev 03 740-013682 QCS1130409M PS 1.7kW; 200-240VAC in
Routing Engine 0 REV 06 740-015113 1000697051 RE-S-1300
CB 0 REV 07 710-013385 KC0433 SRX5k SCB
CB 1 REV 07 710-013385 KC0259 SRX5k SCB
FPC 6 REV 03 750-020235 JS4722 SRX5k DPC 40x 1GE
CPU REV 06 710-013713 JZ4019 DPC PMB
PIC 0 BUILTIN BUILTIN 10x 1GE RichQ
Xcvr 0 REV 01 740-011782 PAQ2K01 SFP-SX
Xcvr 1 REV 01 740-014132 61531018 SFP-T
Xcvr 2 REV 01 740-013111 7303709 SFP-T
Xcvr 4 REV 01 740-011782 PAQ2JZP SFP-SX
Xcvr 5 REV 01 740-013111 8043356 SFP-T
Xcvr 6 REV 01 740-013111 8043257 SFP-T
Xcvr 7 REV 01 740-013111 8043300 SFP-T
Xcvr 8 REV 01 740-013111 8043215 SFP-T
Xcvr 9 REV 01 740-013111 8043184 SFP-T
PIC 1 BUILTIN BUILTIN 10x 1GE RichQ
Xcvr 0 0 NON-JNPR AM0619193B SFP-SX
Xcvr 9 0 NON-JNPR AJ054100PH SFP-SX
PIC 2 BUILTIN BUILTIN 10x 1GE RichQ
Xcvr 1 REV 01 740-014132 61522010 SFP-T
Xcvr 2 REV 01 740-013111 7303481 SFP-T
Xcvr 4 REV 01 740-011782 PAQ2K0H SFP-SX
Xcvr 5 REV 01 740-013111 8043179 SFP-T
Xcvr 6 REV 01 740-013111 7522572 SFP-T
Xcvr 7 REV 01 740-013111 8043157 SFP-T
Xcvr 8 REV 01 740-013111 7522678 SFP-T
Xcvr 9 REV 01 740-013111 7522683 SFP-T
PIC 3 BUILTIN BUILTIN 10x 1GE RichQ
Xcvr 0 0 NON-JNPR AJ06080TKC SFP-SX
Xcvr 9 0 NON-JNPR AJ06020HSJ SFP-SX
FPC 7 BB_P2_28 710-013699 JS4812 SRX5k SPC
CPU REV 06 710-013713 KA7426 DPC PMB
PIC 0 BUILTIN BUILTIN SPU Cp
PIC 1 BUILTIN BUILTIN SPU Flow
Fan Tray 0 REV 04 740-014971 TP1433 Fan Tray
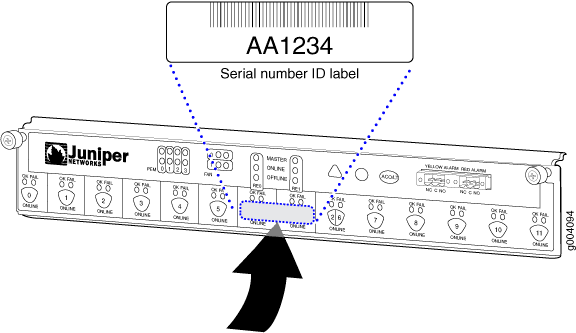
Fan Tray 1 REV 04 740-014971 TP1636 Fan TrayMost components also have a small rectangular serial number ID label (see Figure 1) attached to the component body.

Locating the SRX5800 Firewall Chassis Serial Number Label
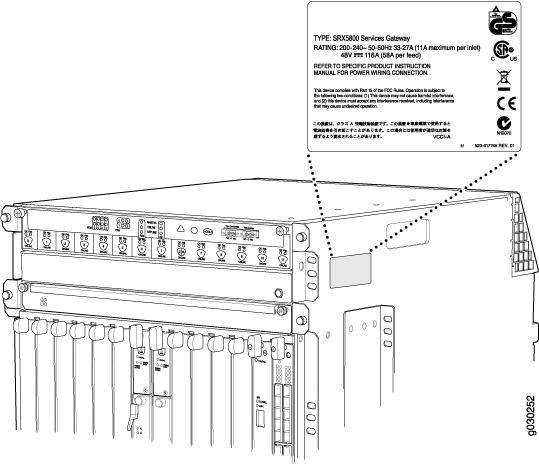
The chassis serial number label is located on the side of the chassis (see Figure 2).
Locating the SRX5800 Firewall Power Supply Serial Number Label
If you are returning an AC or a DC power supply to Juniper Networks for repair or replacement, you must locate the serial number of the component. You must provide the serial number to the Juniper Networks Technical Assistance Center (JTAC) when you contact them to obtain Return Materials Authorization (RMA).
The location of the serial number labels on Standard-Capacity and High Capacity AC or DC power supplies is explained below:
AC Power Supplies:
-
Standard-Capacity AC Power Supply—The serial number label is on the AC power supply faceplate under the on/off switch. See Figure 3.
Figure 3: Standard-Capacity AC Power Supply Serial Number Label
-
High-Capacity AC Power Supply—The serial number label is on the top of the AC power supply. See Figure 4.
Figure 4: High-Capacity AC Power Supply Serial Number Label
-
High-Capacity Second-Generation AC Power Supply—The serial number label is under the on/off switch of the power supply. See Figure 5.
Figure 5: High-Capacity Second-Generation AC Power Supply Serial Number Label
-
High-Voltage Second-Generation Universal (HVAC/HVDC) Power Supply—The serial number label is under the on/off switch of the power supply. See Figure 6.
Figure 6: High-Voltage Second-Generation Universal (HVAC/HVDC) Power Supply Serial Number Label
DC power Supplies:
Standard-Capacity DC Power Supply—The serial number label is on the DC power supply faceplate under the circuit breaker switch. See Figure 7.
Figure 7: Standard-Capacity DC Power Supply Serial Number Label
High-Capacity DC Power Supply—The serial number label is on the top of the DC power supply. See Figure 8.
Figure 8: High-Capacity DC Power Supply Serial Number Label
-
Locating the SRX5800 Firewall Craft Interface Serial Number Label
The serial number is located on the back of the craft interface panel (see Figure 9).
Information You Might Need to Supply to JTAC
When requesting support from JTAC by telephone, be prepared to provide the following information:
Your existing case number, if you have one
Details of the failure or problem
Type of activity being performed on the firewall when the problem occurred
Configuration data displayed by one or more
showcommandsYour name, organization name, telephone number, fax number, and shipping address
Required Tools and Parts for Packing the SRX5800 Firewall
To remove components from the firewall or the firewall from a rack, you need the following tools and parts:
2.5-mm flat-blade (–) screwdriver, for detaching alarm relay terminal block
7/16-in. (11 mm) nut driver
Blank panels to cover empty slots
Electrostatic bag or antistatic mat, for each component
Electrostatic discharge (ESD) grounding wrist strap
Flat-blade (–) screwdriver
Mechanical lift, if available
Phillips (+) screwdrivers, numbers 1 and 2
Rubber safety cap for fiber-optic interfaces or cable
Wire cutters
Packing the SRX5800 Firewall for Shipment
To pack the firewall for shipment:
Packing SRX5800 Firewall Components for Shipment
Follow these guidelines for packing and shipping individual components of the firewall:
When you return a component, make sure that it is adequately protected with packing materials and packed so that the pieces are prevented from moving around inside the carton.
Use the original shipping materials if they are available.
Place the individual component in an electrostatic bag.
Write the Return Materials Authorization (RMA) number on the exterior of the box to ensure proper tracking.
Do not stack any of the firewall components during packing.