Mist Access Assurance Endpoints
Follow these steps to register endpoints, assign attributes and labels, and use them in auth policy rules for controlled network access.
Network Access Control (NAC) Endpoints page provides you with a database of all endpoints identified by their MAC addresses. Here, you can assign each endpoint with various attributes, such as Name, VLAN, Role, Client Label, and Description. After creating an endpoint, you can reference its Client Label directly in the match criteria of auth policy rules for MAB-based authentication. By utilizing client labels in auth policy rules, you can dynamically assign policy actions such as VLAN assignments, roles, and more.
In the following example, an endpoint is registered, assigned a client label and name, and the label is used in the auth policy match criteria to override the username returned in the RADIUS Access-Accept.
Register Endpoints
Use the following steps to set up endpoints for NAC:
From the left menu of the Juniper Mist portal, select Organization > Access > Endpoints. Click Add Endpoint.
You can also import endpoints by uploading a CSV file. See Import Endpoints.
In the Add Endpoint page, enter the following details and click Save:
Name (Optional)—Name of the endpoint. You can use this value to override the User-Name attribute in RADIUS Access Accept during authentication on a per-endpoint basis for better visibility.
MAC Address (Required)—The unique MAC address of the endpoint.
Role (Optional)—A role that can be associated with the endpoint. Specify a value only if it is necessary to override role assignment during authentication on a per-endpoint basis.
VLAN (Optional)—VLAN ID between 1 to 4094 or VLAN name that can be assigned to an endpoint. Specify a value only if it is necessary to override VLAN assignment during authentication on a per-endpoint basis.
Client Labels (Optional)—One or more labels (tags) applied to the endpoint. These labels can be used in the match criteria of auth policy rules.
Description (Optional)—Additional information that helps identify or provide context for the endpoint.

Import Endpoints
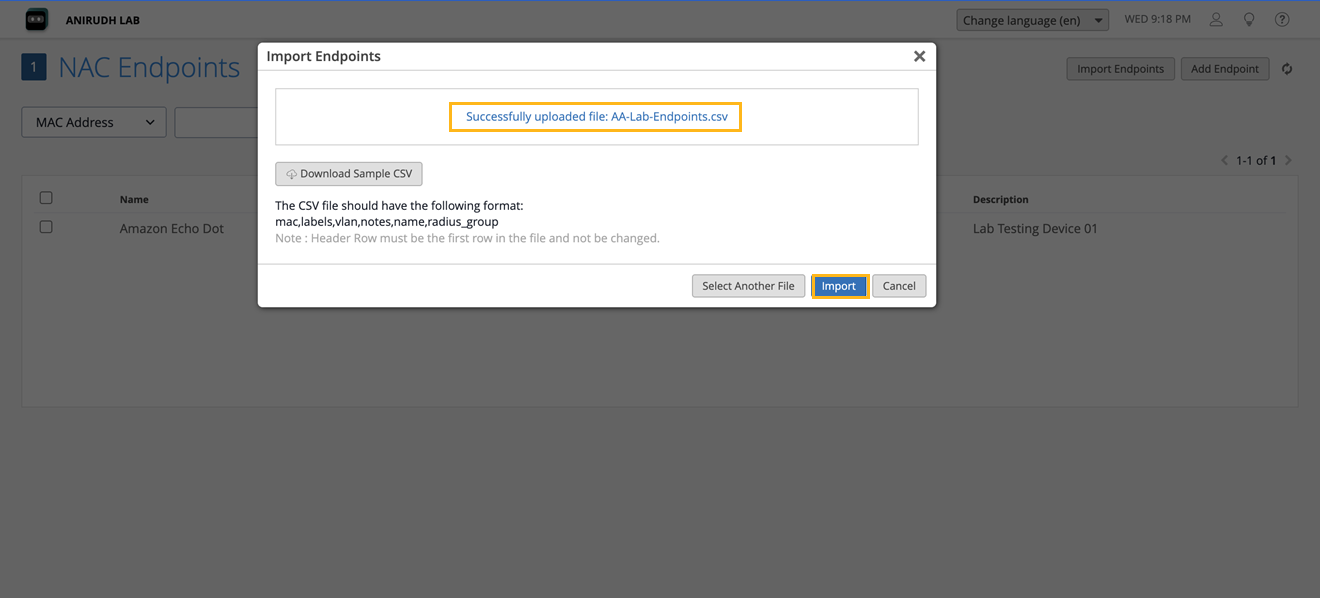
To import endpoints:
- Click Import Endpoints on the upper-right corner of the NAC
Endpoint page.

Upload the CSV file to the portal using the Drag and Drop or Click to Upload CSV File option. You can click Download Sample CSV to download a sample CSV file with correct headers and format.
Click Import.
Configure Auth Policy Labels
In the previous step, you have registered an endpoint. Now, you can use Client Label in the match criteria of the auth policy rules.
From the left menu of the Juniper Mist portal, select Organization > Access > Auth Policy Labels.
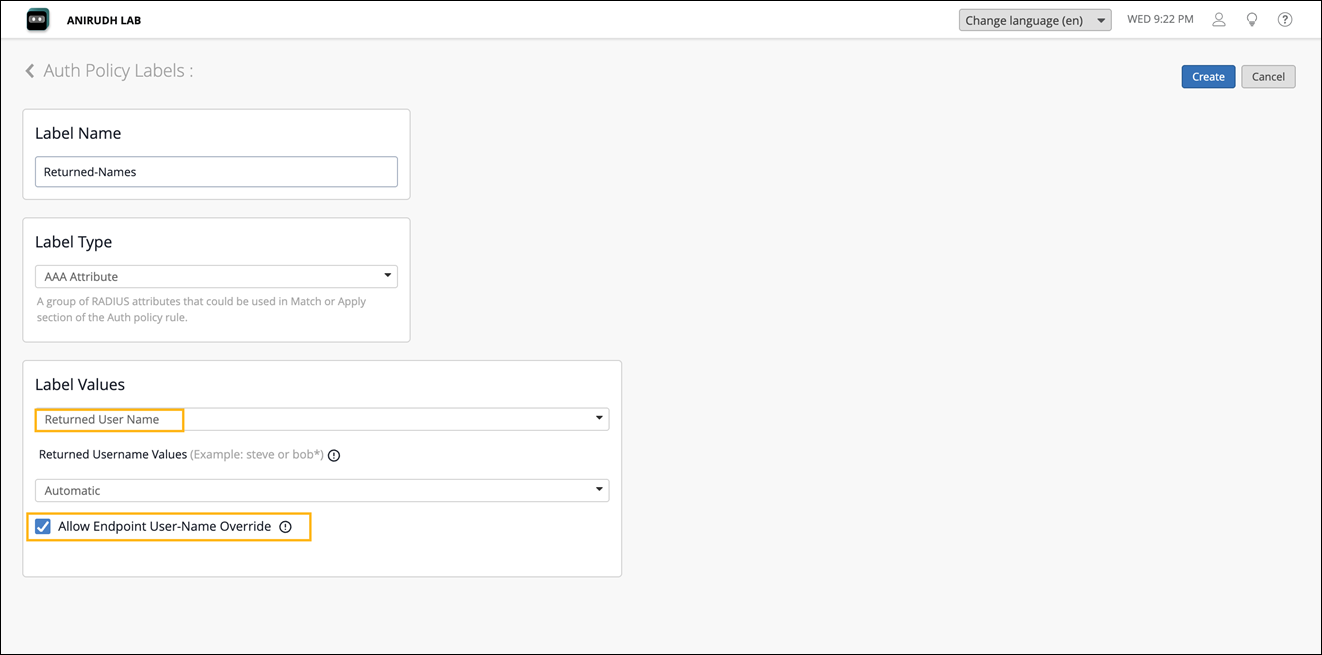
On the Auth Policy Labels page, click Add Label and enter the details.
- Label Name—Enter the label name.
- Label Type—Select the type as Client Label.
- Label Values—Enter the labels that you assigned when adding a new NAC endpoint.
Click Create.

Create a Label with the Label Value Returned User Name and enable Allow Endpoint User-Name Override to override the User-Name returned in the RADIUS Access-Accept with the Endpoint Name.
Configure Auth Policy Rules
Navigate to Organization>Access>Auth Policies. Click Add Rule and assign the Client Label in the match criteria of the auth policy rule. In the assigned policies section, add the Returned User Name labels. Also add VLAN, Role labels as needed.

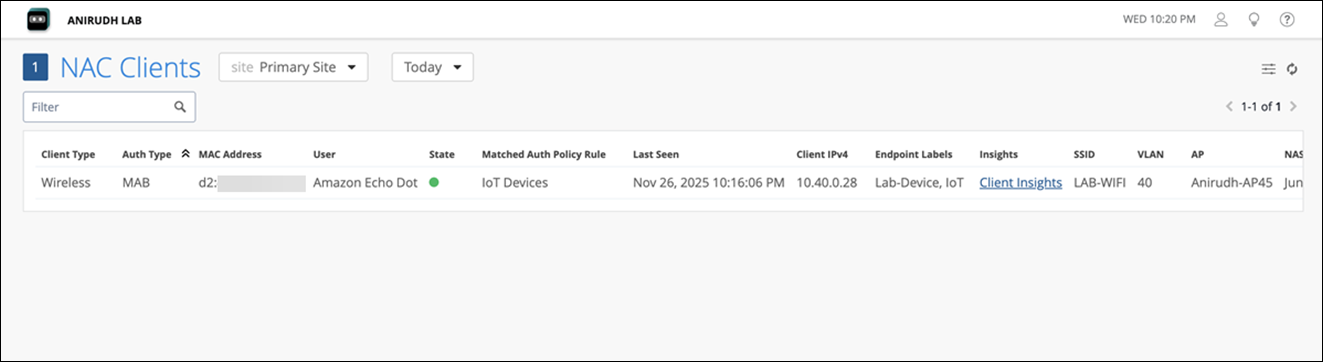
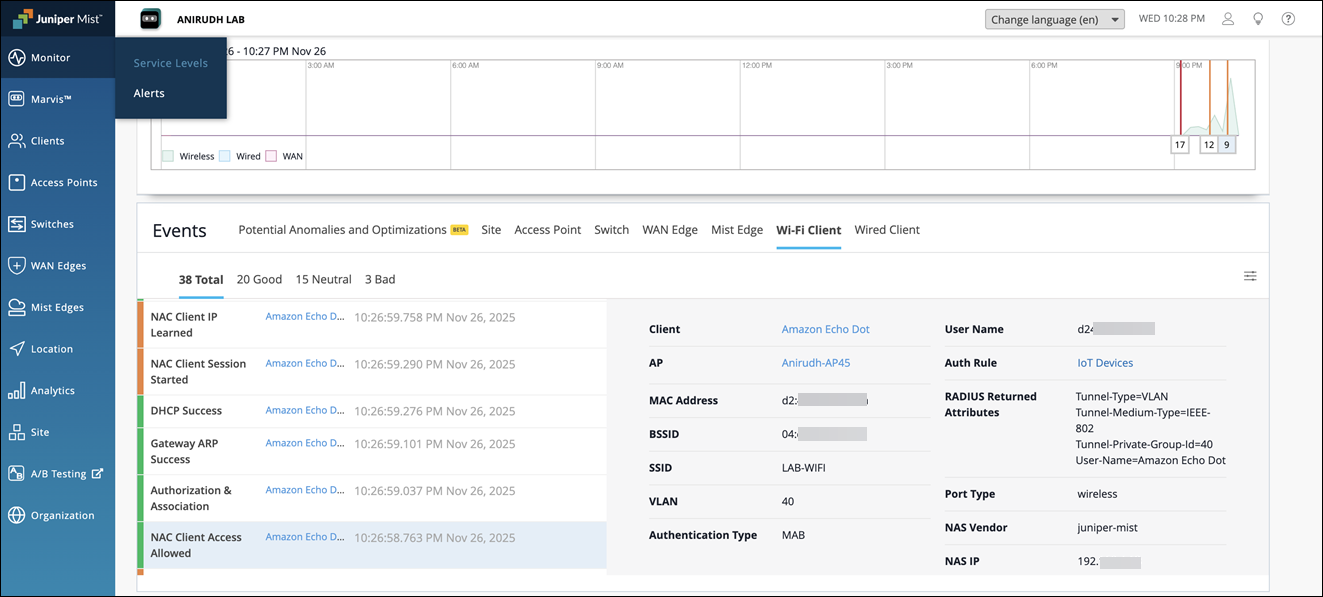
Client Connection and Verification
Navigate to Monitor>Service Levels>Events>Wi-Fi Client to review client connectivity and confirm assigned attributes in the NAC Events.
You can also use the NAC Clients page to view the client connectivity status along with the assigned User-Name, VLAN and Role.