Adding Multiple Tunnels Between Areas
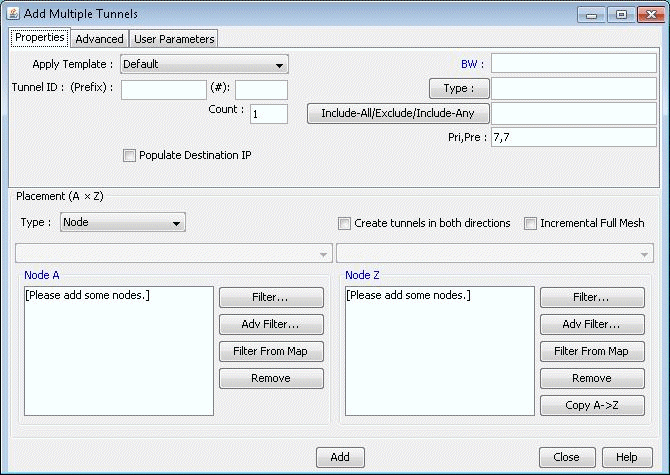
To add tunnels, first make sure you are in Modify mode. For this example, choose Modify > Elements > Tunnels, Add > Multiple Tunnels to add multiple tunnels between area 1 and area 2. (To add just a single tunnel, you could also use Add > One Tunnel)
In the lower half of the Add Multiple Tunnels window, select Area from the Type selection box. Then, in the selection boxes below that, choose “2” (the name of the Area 2 group) and “1” (the name of the Area 1group). The Node A and Node Z lists automatically become populated with the nodes belonging to the respective areas. Fill in a Tunnel ID prefix, bandwidth (BW), and any other desired characteristics of the LSP Tunnels using the top half of the window.

