- play_arrow Introduction
- play_arrow Router Data Extraction
- play_arrow Routing Protocols
- play_arrow Equal Cost Multiple Paths
- play_arrow Static Routes
- play_arrow Policy-Based Routes
- play_arrow Border Gateway Protocol
- NorthStar Planner Border Gateway Protocol Overview
- Border Gateway Protocol Recommended Instructions
- BGP Data Extraction
- BGP Reports
- BGP Options
- BGP Map
- BGP Live Status Check
- BGP Routing Table
- BGP Routes Analysis
- BGP Information at a Node
- BGP Neighbor
- Apply, Modify, or Add BGP Polices
- BGP Subnets
- Getipconf Usage Notes
- BGP Report
- play_arrow GRE Tunnels
- play_arrow Multicast
- NorthStar Planner Multicast Overview
- NorthStar Planner Recommended Multicast Instructions
- Creating Multicast Groups
- Creating Multicast Demands
- Viewing Multicast Demands in the Network
- Comparing Multicast with Unicast
- Multicast SPT Threshold
- Multicast Reports
- Multicast Simulation
- Collecting Multicast Path Data from Live Network
- Importing Multicast Path Data
- Multicast Data Processing
- Viewing Multicast Trees
- play_arrow Class of Service
- NorthStar Planner Class of Service Overview
- NorthStar Planner Recommended CoS Instructions
- The QoS Manager
- Define Class Maps
- Create Policies for Classes
- Attach Policies to Interfaces
- Adding Traffic Inputs
- Using the Text Editor
- Reporting Module
- IP Flow Information
- Link information
- Traffic Load Analysis
- Traffic Load by Policy Class
- CoS Alias File
- Bblink File
- Policymap File
- Demand File
- Traffic Load File
- play_arrow Routing Instances
- play_arrow Traffic Matrix Solver
- play_arrow LSP Tunnels
- NorthStar Planner LSP Tunnels Overview
- Viewing Tunnel Info
- Viewing Primary and Backup Paths
- Viewing Tunnel Utilization Information from the Topology Map
- Viewing Tunnels Through a Link
- Viewing Demands Through a Tunnel
- Viewing Link Attributes/Admin-Group
- Viewing Tunnel-Related Reports
- Adding Primary Tunnels
- Adding Multiple Tunnels
- Mark MPLS-Enabled on Links Along Path
- Modifying Tunnels
- Path Configuration
- Specifying a Dynamic Path
- Specifying Alternate Routes, Secondary and Backup Tunnels
- Adding and Assigning Tunnel ID Groups
- Making Specifications for Fast Reroute
- Specifying Tunnel Constraints (Affinity/Mask or Include/Exclude)
- Adding One-Hop Tunnels
- Tunnel Layer and Layer 3 Routing Interaction
- play_arrow Optimizing Tunnel Paths
- play_arrow Tunnel Sizing and Demand Sizing
- play_arrow Tunnel Path Design
- Tunnel Path Design Overview
- Tunnel Path Design Instructions
- Designing Tunnel Paths Overview
- Backup Path Configuration Options
- Default Diversity Level
- Evaluate/Tune Options
- Advanced Options
- Viewing Design Results
- Tunnel Modifications
- Exporting and Importing Diverse Group Definitions
- Advanced Path Modification
- play_arrow Inter-Area MPLS-TE
- play_arrow Point-to-Multipoint (P2MP) Traffic Engineering
- NorthStar Planner P2MP Traffic Engineering Overview
- Point-to-Multipoint Traffic Engineering Instructions
- Import a Network That Already has Configured P2MP LSP Tunnels
- Examine the P2MP LSP Tunnels
- Create P2MP LSP Tunnels and Generate Corresponding LSP Configlets
- Examine P2MP LSP Tunnel Link Utilization
- Perform Failure Simulation and Assess the Impact
- play_arrow Diverse Multicast Tree Design
- Diverse Multicast Tree Design Overview
- Diverse Multicast Tree Instructions
- Open a Network That Already Has a Multicast Tree
- Set the Two P2MP Trees of Interest to be in the Same Diversity Group
- Using the Multicast Tree Design Feature to Design Diverse Multicast Trees
- Using the Multicast Tree Design Feature
- play_arrow DiffServ Traffic Engineering Tunnels
- DiffServ Traffic Engineering Tunnels Overview
- Using DS-TE LSP
- Hardware Support for DS-TE LSP
- NorthStar Planner Support for DS-TE LSP
- Configuring the Bandwidth Model and Default Bandwidth Partitions
- Forwarding Class to Class Type Mapping
- Link Bandwidth Reservation
- Creating a New Multi-Class or Single-Class LSP
- Configuring a DiffServ-Aware LSP
- Tunnel Routing
- Link Utilization Analysis
- play_arrow Fast Reroute
- NorthStar Planner Fast Reroute Overview
- Fast Reroute Supported Vendors
- Import Config and Tunnel Path
- Viewing the FRR Configuration
- Viewing FRR Backup Tunnels
- Viewing Primary Tunnels Protected by a Bypass Tunnel
- Modifying Tunnels to Request FRR Protection
- Modifying Links to Configure Multiple Bypasses (Juniper only)
- Modifying Links to Trigger FRR Backup Tunnel Creation (Cisco)
- FRR Design
- FRR Auto Design
- FRR Tuning
- Viewing Created Backup Tunnels
- Generating LSP Configlets for FRR Backup Tunnels
- Failure Simulation—Testing the FRR Backup Tunnels
- Exhaustive Failure
- Link, Site and Facility Diverse Paths
- play_arrow Cisco Auto-Tunnels
- play_arrow Integrity Check Report
- play_arrow Compliance Assessment Tool
- Compliance Assessment Tool Overview
- Using The Compliance Assessment Tool
- CAT Testcase Design
- Creating a New Project
- Loading the Configuration Files
- Creating Conformance Templates
- Reviewing and Saving the Template
- Saving and Loading Projects
- Run Compliance Assessment Check
- Compliance Assessment Results
- Publishing Templates
- Running External Compliance Assessment Scripts
- Scheduling Configuration Checking in Task Manager
- Building Templates
- Special Built-In Functions
- Paragon Planner Keywords For Use Within a Rule
- More on Regular Expressions
- IP Manipulation
- play_arrow Virtual Local Area Networks
- play_arrow Overhead Calculation
- play_arrow Router Reference
Route-Target Export/Import Relationships
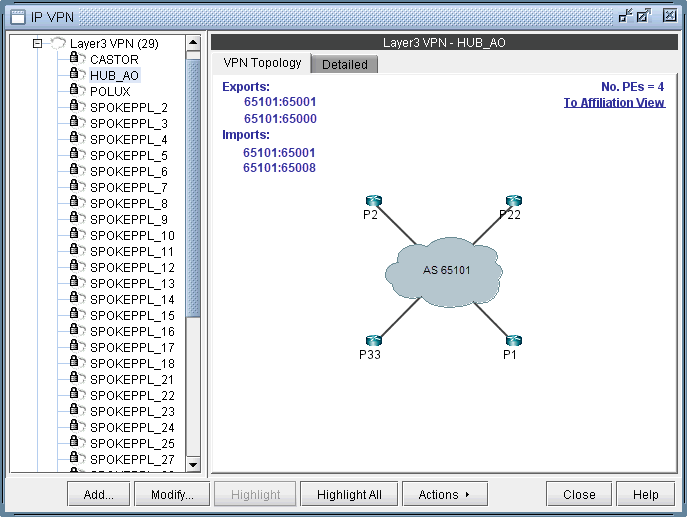
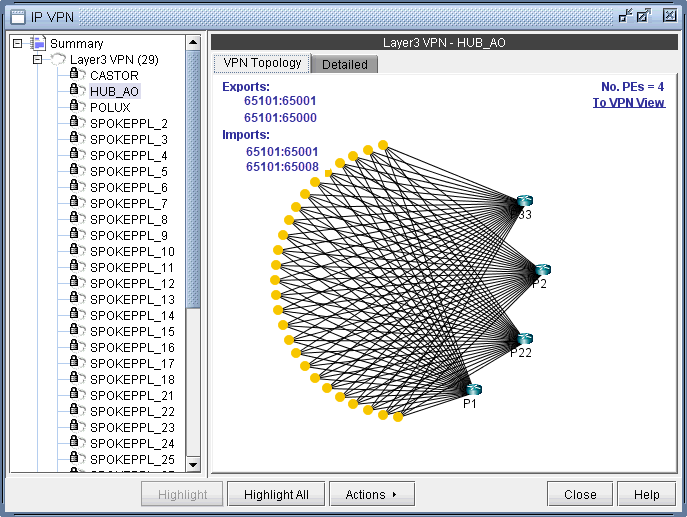
The VPN View also shows route target export/import relationships that exist between VPNs. A visual picture helps the network planner or engineer to clearly and quickly identify relationships between VPNs (e.g. hub-and-spoke or extranet VPN relationships). When there are export/import relationships with other VPNs, then the To Import/Export Relation View selection in the upper right-hand corner of the VPN View becomes visible. The following figure shows that VPN HUB_AO has export/import relationships with other VPNs, since the To Import/Export Relation View selection is visible.
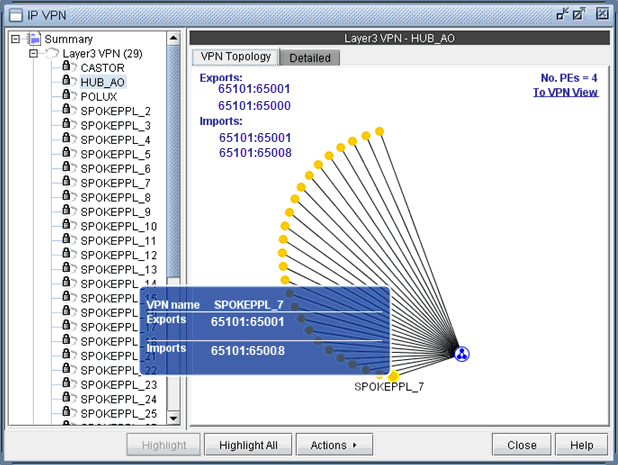
Click on To Import/Export Relation View to get to the Import/Export Relation View. The blue circle icon with a triangle inside is a grouping icon represents the current VPN (HUB_A0), while the yellow dot icons represent other VPNs (in this example, the SPOKEPPL_* VPNs) that have export/import relationships with the current VPN.
To see how other VPNs (the yellow dots) are related to the current VPN, you can click on a yellow dot to see the route targets that are being exported and imported. For instance the following figure shows that VPN SPOKEPPL_7 is exporting 65101:65001 and importing 65101:65008, while HUB_A0 is exporting 65101:65008 and importing 65101:65001. The Import/Export Relation View allows you to clearly see relationships between VPNs. Note that you can go back to the regular VPN View by clicking on To VPN View.
The right-click menu of the Import/Export Relation View gives you the option to expand the currently collapsed VPN (HUB_AO) which is represented by the blue circle icon with a triangle in it. Selecting Expand All would reveal all the nodes with in the VPN.
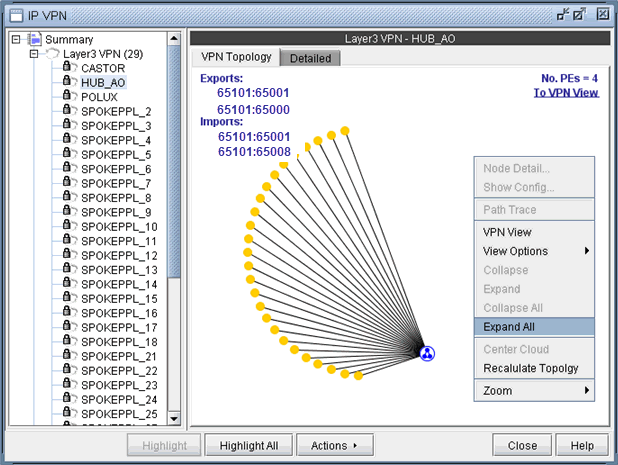
The following figure shows you the Import/Export Relation View with the nodes in VPN HUB_AO expanded.
You can also move the icons around. Control-click to select multiple icons.
Instead of the visual display showing the import/export relationships that is in the Import/Export Relation View, you can also access the same information in table form. As shown in the following figure, you would choose Show Relations in Table Form from the right-click menu.
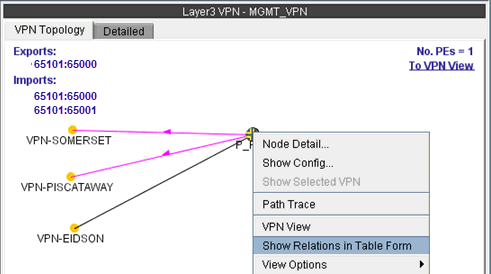
Once Show Relations in Table Form is chosen, the Export/Import table for the VPN is shown.

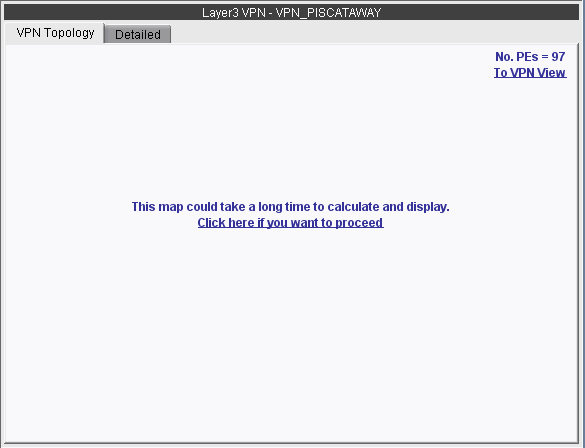
In instances when there are a large number of export/import relations and you click on To Import/Export Relation View, you will be prompted with the “This map could take a long time to calculate and display.” message. If you would be willing to wait and still want to see the export/import relations in graphical form, then click on “Click here if you want to proceed.” Instead, you may choose to view the import/export relations in table form, as described in the previous step.
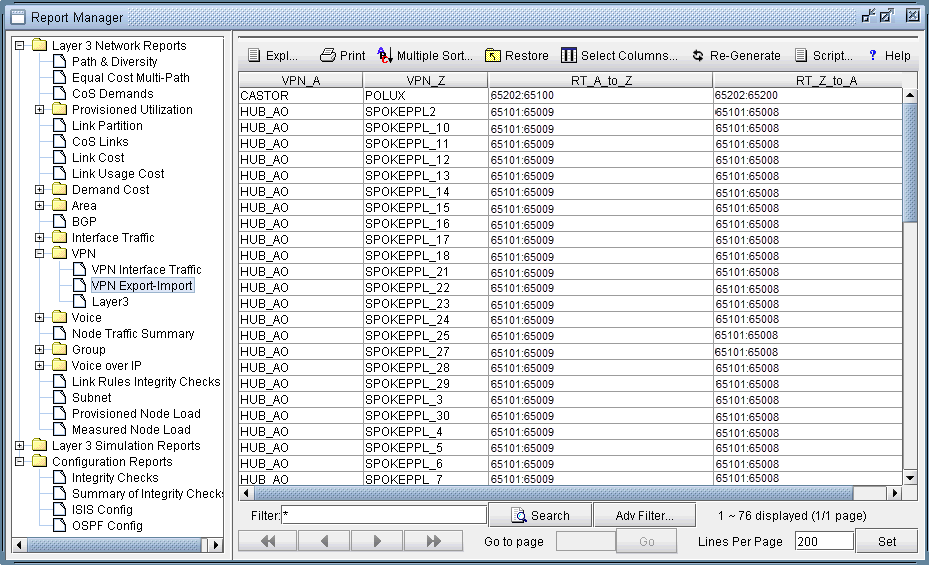
The Report Manager includes a VPN Export-Import report under Network Reports > VPN, as shown in the following figure, that shows all of the route target export/import relationships that exist between VPNs in the network.