Importing Cisco Auto-Tunnel Information from Router Configuration Files
To import the router configuration files, select File>Import Data and follow the Import Network Wizard. Alternatively, you may run the getipconf program in text mode. See Router Data Extraction Overview for more detailed information. The following table lists those mesh group auto-tunnel and backup auto-tunnel related statements that are parsed during configuration import:
mesh group auto-tunnel statements
mpls traffic-eng auto-tunnel mesh
mpls traffic-eng auto-tunnel mesh tunnel-num min num max num
interface auto-template interface-num
tunnel destination access-list num
tunnel destination access-list num
mpls traffic-eng auto-tunnel backup
mpls traffic-eng auto-tunnel backup nhop-only
mpls traffic-eng auto-tunnel backup tunnel-num [min num] [max num]
mpls traffic-eng auto-tunnel backup config unnumbered-interface interface
mesh group auto-tunnel statements |
|---|
mpls traffic-eng auto-tunnel mesh |
mpls traffic-eng auto-tunnel mesh tunnel-num min num max num |
interface auto-template interface-num |
tunnel destination access-list num |
backup auto-tunnel statements |
mpls traffic-eng auto-tunnel backup |
mpls traffic-eng auto-tunnel backup nhop-only |
mpls traffic-eng auto-tunnel backup tunnel-num [min num] [max num] |
mpls traffic-eng auto-tunnel backup config unnumbered-interface interface |
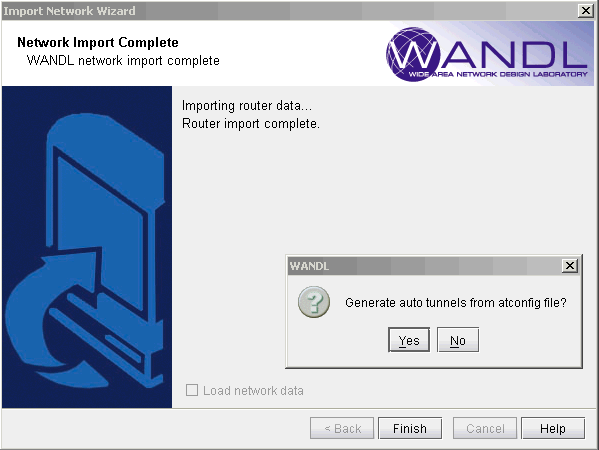
Once all of the options in the different tabs of Import Network Wizard have been selected, click Next> to begin importing the router config files. As you reach the end of configuration import, you will be prompted with a dialog box asking if you want to "Generate auto tunnels from atconfig file?", as shown in the following figure. If you wish the tool to generate auto-tunnels, then click on Yes.

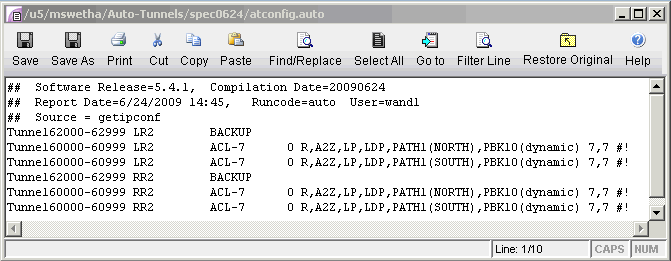
The atconfig files store the auto-tunnels information parsed during configuration import. The following figure shows an atconfig file that was created during configuration import for a network that has both mesh group and backup auto-tunnels configured.

In the above figure, the lineTunnel62000-62999
LR2 BACKUP
corresponds to the following backup auto-tunnel configuration statements:
mpls traffic-eng auto-tunnel backup
mpls traffic-eng auto-tunnel backup tunnel-num min 9000 max 9099
In the above figure, the lineTunnel60000-60999
LR2 ACL-7 0 R,A2Z,LP,LDP,PATH1(NORTH),PBK10(dynamic) 7,7 #!
corresponds to the following mesh group auto-tunnel configuration statements:
mpls traffic-eng auto-tunnel mesh
mpls traffic-eng auto-tunnel mesh tunnel-num min 60000 max 60999
…
interface Auto-Template1
 ip unnumbered Loopback0
mpls ip
tunnel destination access-list 7
tunnel mode mpls traffic-eng
tunnel mpls traffic-eng autoroute announce
tunnel mpls traffic-eng path-option 1 explicit name NORTH
tunnel mpls traffic-eng path-option 10 dynamic
tunnel mpls traffic-eng fast-reroute
!
