Provision Fabric Devices Using End-to-End ZTP
From Contrail Networking Release 5.1, you can provision fabric devices using Zero Touch Provisioning (ZTP).
ZTP allows you to provision new Juniper Networks devices in your network automatically, with minimal manual intervention.
This topic provides steps to provision fabric devices using ZTP and configure underlay network via Contrail Command UI.
You must complete Installing Contrail Command before proceeding.
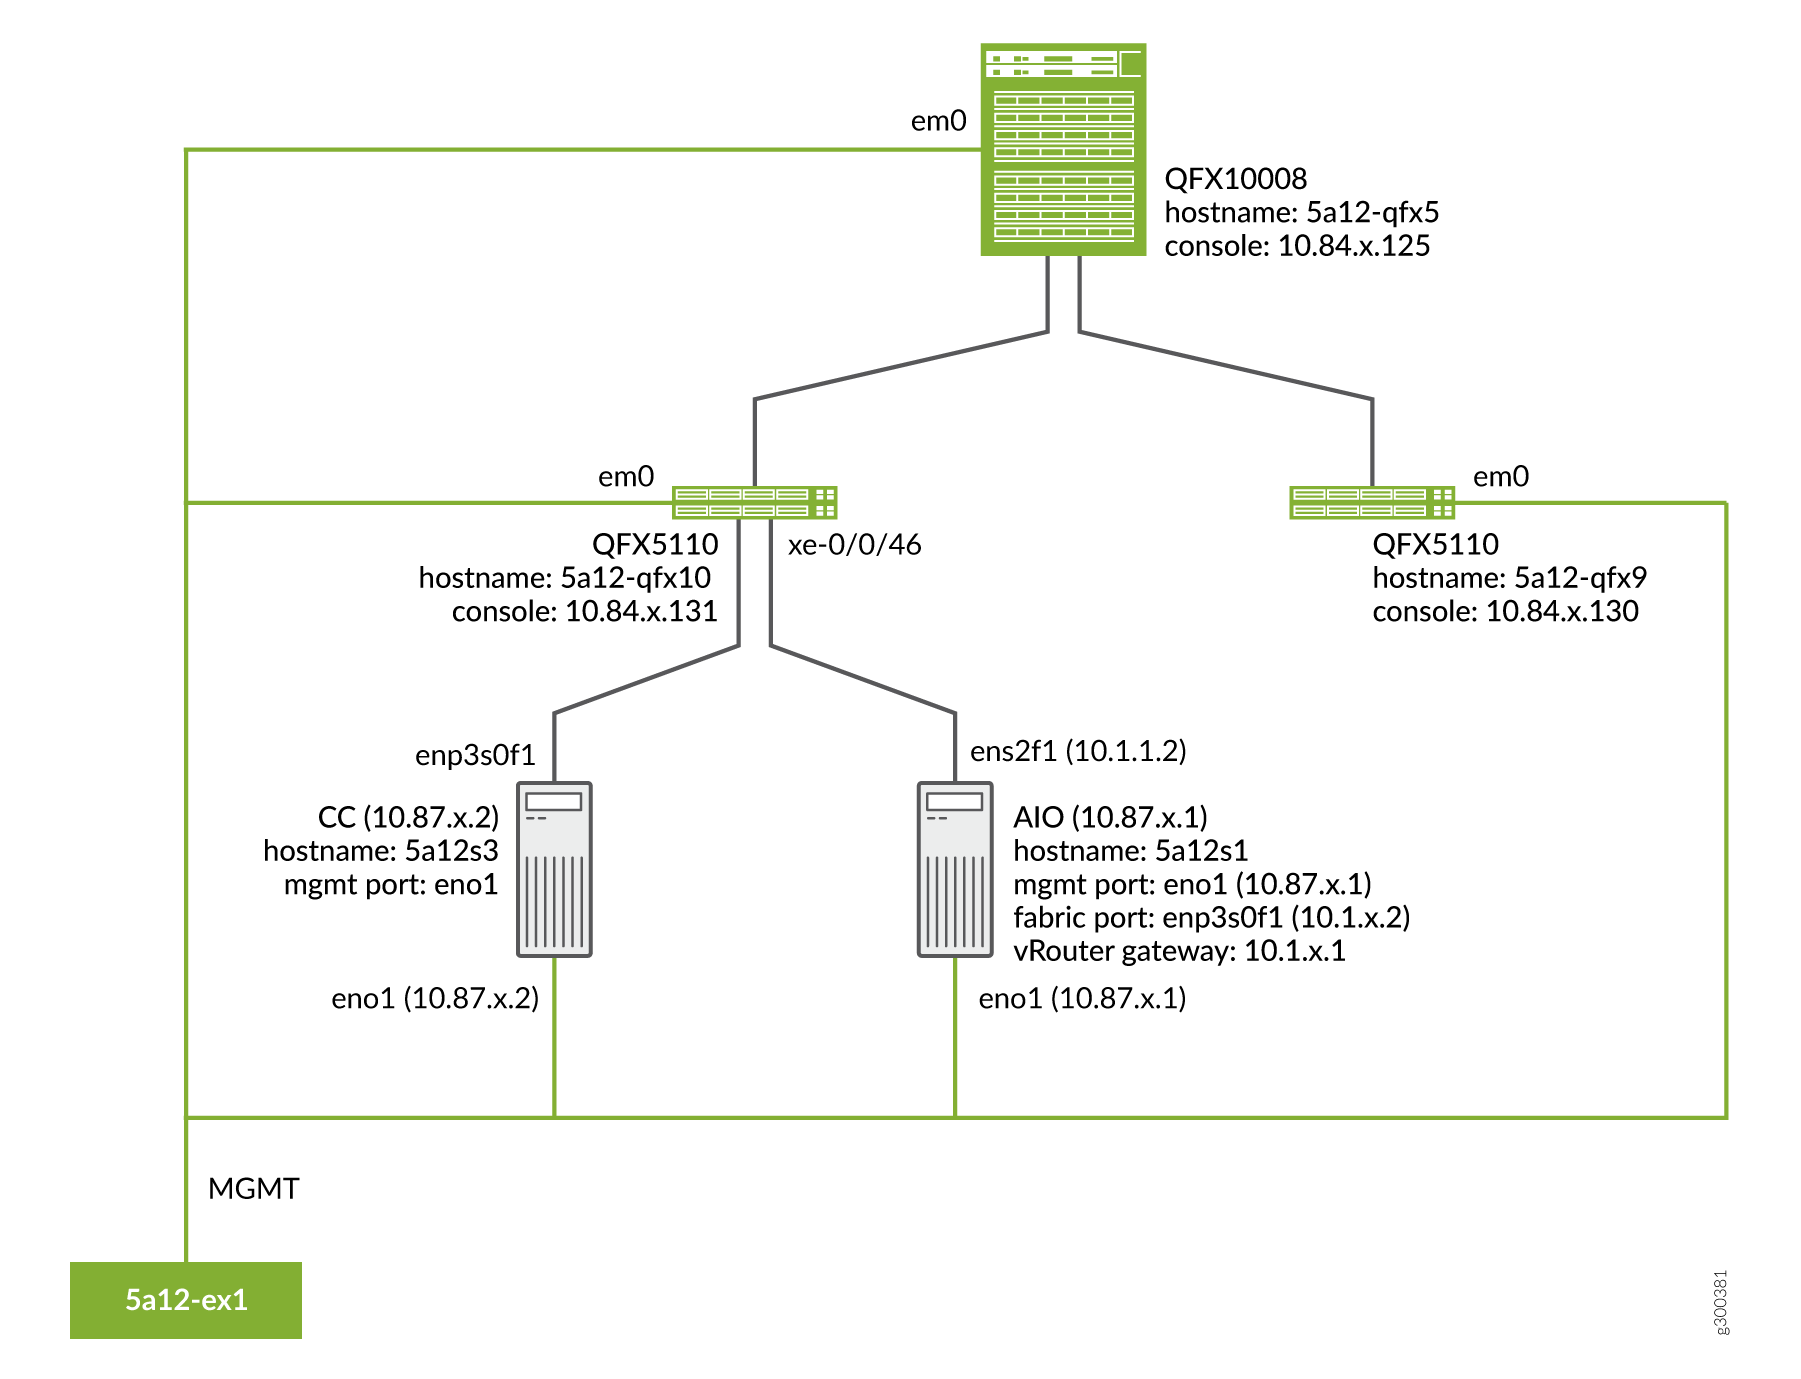
An All-in-One (AIO) Contrail cluster is a single Contrail Networking server with multiple VMs that supply controller, orchestrator, and, compute nodes.AIO cluster node responds to DHCP requests to zeroize devices. Hence, AIO cluster node must be in the same subnet as of the management subnet.
The minimum required version of Junos OS for QFX5000 and QFX10000 Series devices is 18.1R3-S5 or higher. The minimum required version of Junos OS for the MX devices is 18.4R2-S3. Also, all MX Series Routers must be zereoized for ZTP to work.
The following example illustrates the process for provisioning fabric devices using end-to-end ZTP.
Sample Topology
Prerequisites
-
Contrail Command server:
-
Install CentOS 7.6.
-
-
AIO Contrail cluster node:
-
Install CentOS 7.6.
-
Configure eno1 port with the static IP 10.87.x.1/27.
HWADDR=0c:xx:xx:xx:xx:4a
NM_CONTROLLED=no
BOOTPROTO=none
DEVICE=eno1
ONBOOT=yes
IPADDR=10.87.x.1
NETMASK=255.255.255.224
GATEWAY=10.87.6.30
-
Configure ens2f1 port with the static IP 10.1.x.2/24.
HWADDR=90:xx:xx:xx:xx:a1
NM_CONTROLLED=no
BOOTPROTO=none
DEVICE=ens2f1
ONBOOT=yes
IPADDR=10.1.x.2
NETMASK=255.255.255.0
GATEWAY=10.1.x.1
-
command_servers.yml example file:
---
command_servers:
    server1:
        ip: 10.87.x.2
        connection: ssh
        ssh_user: root
        ssh_pass: password
        sudo_pass: password
        ntpserver: x.x.x

        # Specify either container_path
        # or registry details and container_name
        container_registry: x.x.x:5010
        container_name: contrail-command
        container_tag: master-720
        config_dir: /etc/contrail

        # contrail command container configurations given here go to /etc/contrail/contrail.yml
        contrail_config:
            # Database configuration. MySQL/PostgreSQL supported
            database:
                # MySQL example
                host: localhost
                user: root
                password: password
                name: contrail_test
                type: postgres
                dialect: postgres

                # Max Open Connections for DB Server
                max_open_conn: 100
                connection_retries: 10
                retry_period: 3s

            # Log Level
            log_level: debug

            # Server configuration
            server:
              enabled: true
              read_timeout: 10
              write_timeout: 5
              log_api: true
              address: ":9091"
              enable_vnc_replication: true

              # TLS Configuration
              tls:
                  enabled: true
                  key_file: /usr/share/contrail/ssl/cs-key.pem
                  cert_file: /usr/share/contrail/ssl/cs-cert.pem

              # Enable GRPC or not
              enable_grpc: false

              # Static file config
              # key: URL path
              # value: file path. (absolute path recommended in production)
              static_files:
                  /: /usr/share/contrail/public

              # API Proxy configuration
              # key: URL path
              # value: String list of backend host
              #proxy:
              #    /contrail:
              #    - http://localhost:8082

              notify_etcd: false

            # Keystone configuration
            keystone:
                local: true
                assignment:
                    type: static
                    data:
                      domains:
                        default: &default
                          id: default
                          name: default
                      projects:
                        admin: &admin
                          id: admin
                          name: admin
                          domain: *default
                        demo: &demo
                          id: demo
                          name: demo
                          domain: *default
                      users:
                        admin:
                          id: admin
                          name: Admin
                          domain: *default
                          password: password
                          email: admin@x.com
                          roles:
                          - id: admin
                            name: Admin
                            project: *admin
                        bob:
                          id: bob
                          name: Bob
                          domain: *default
                          password: bob_password
                          email: bob@x.com
                          roles:
                          - id: Member
                            name: Member
                            project: *demo
                store:
                    type: memory
                    expire: 3600
                insecure: true
                authurl: https://localhost:9091/keystone/v3

            # disable authentication with no_auth true and comment out keystone configuration.
            #no_auth: true
            insecure: true

            etcd:
              endpoints:
                - localhost:2379
              username: ""
              password: ""
              path: contrail

            watcher:
              enabled: false
              storage: json

            client:
              id: admin
              password: password
              project_id: admin
              domain_id: default
              schema_root: /
              endpoint: https://localhost:9091

            compilation:
              enabled: false
              # Global configuration
              plugin_directory: 'etc/plugins/'
              number_of_workers: 4
              max_job_queue_len: 5
              msg_queue_lock_time: 30
              msg_index_string: 'MsgIndex'
              read_lock_string: "MsgReadLock"
              master_election: true

              # Plugin configuration
              plugin:
                  handlers:
                      create_handler: 'HandleCreate'
                      update_handler: 'HandleUpdate'
                      delete_handler: 'HandleDelete'

            agent:
              enabled: true
              backend: file
              watcher: polling
              log_level: debug
cache:
  enabled: true
  timeout: 10s
  # how long revision deleted event preserved.
  max_history: 100000
  rdbms:
    enabled: true
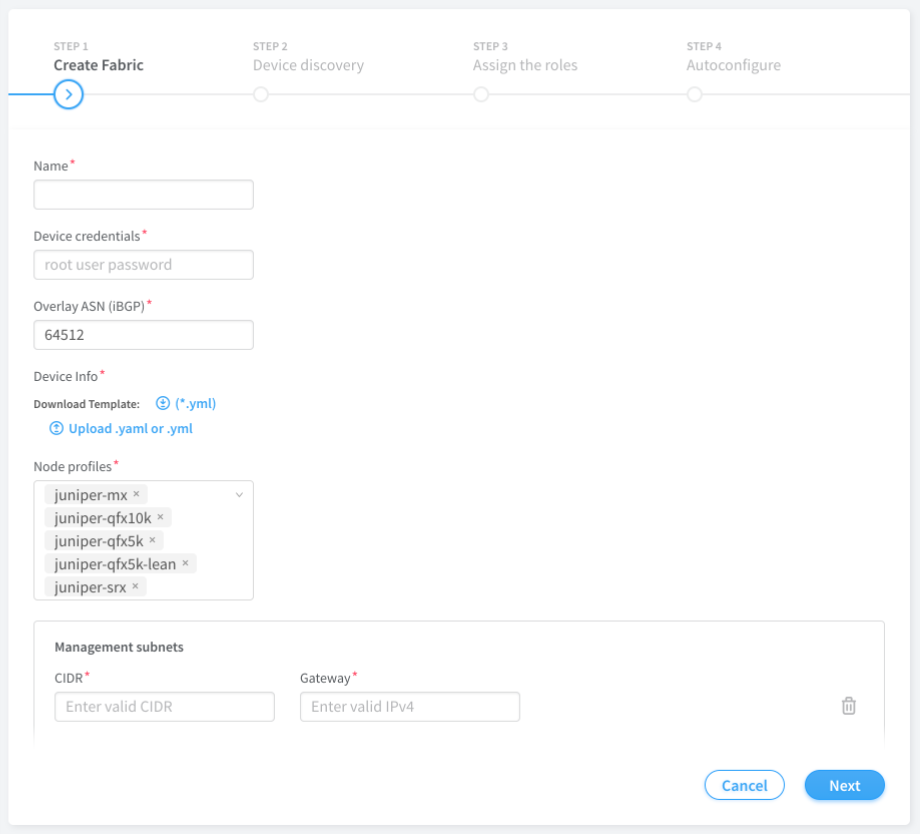
To provision fabric devices using ZTP via Contrail Command UI:
-
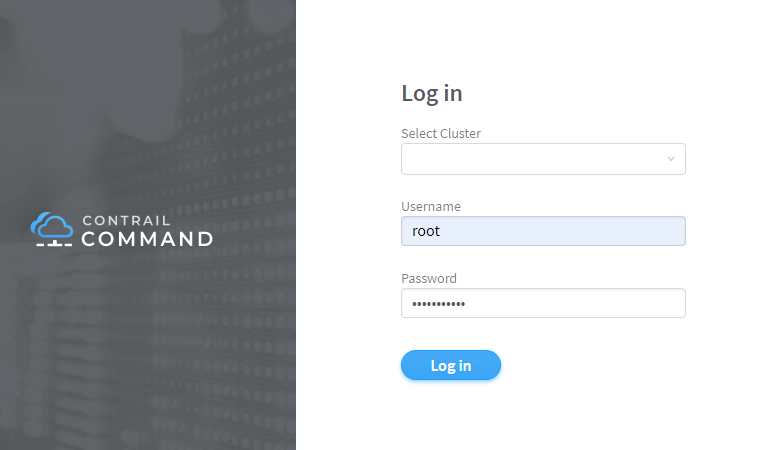
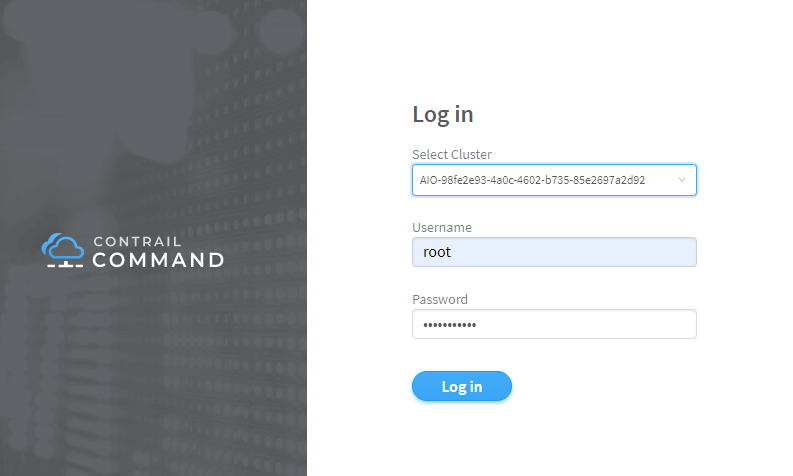
Log in to Contrail Command UI as a super user using root user credentials.
-
Install bootstrap server.
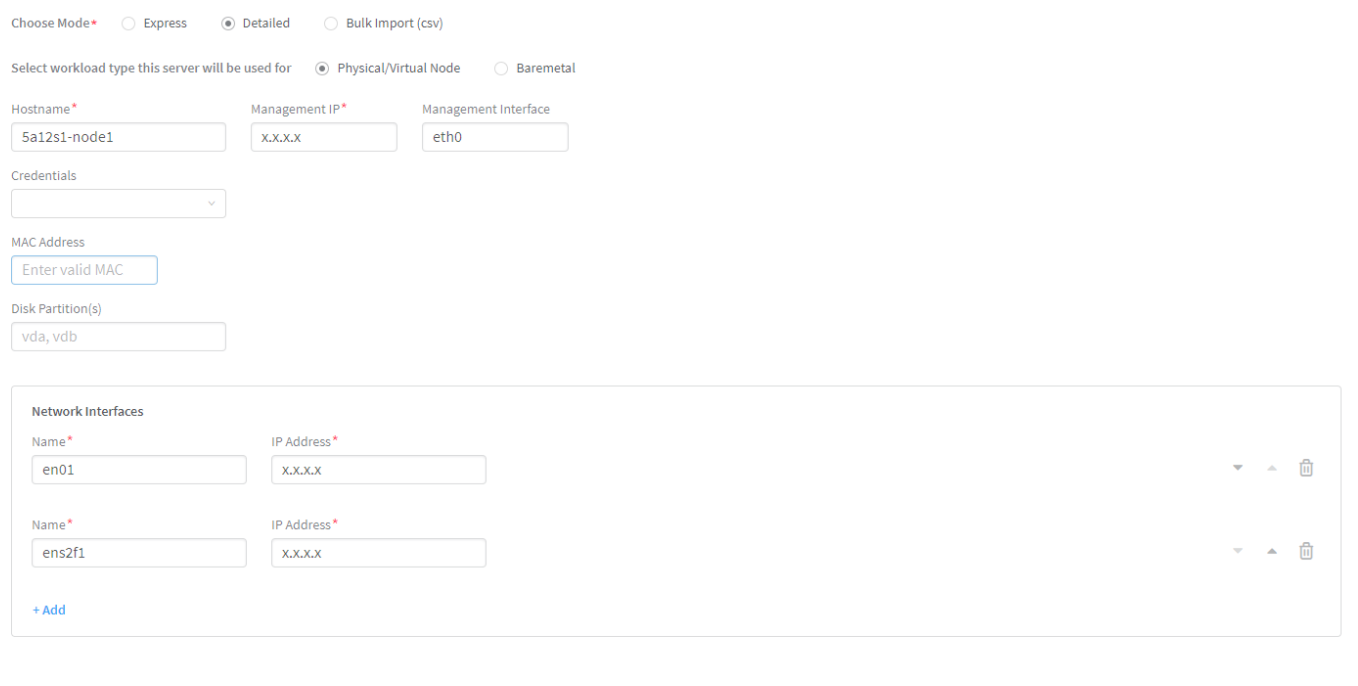
Click Servers.
- Click Create.
- Enter the required details.
- Click Create.
-
Port eno1 is connected to management VLAN.
-
Port ens2f1 is connected to QFX ToR.
-
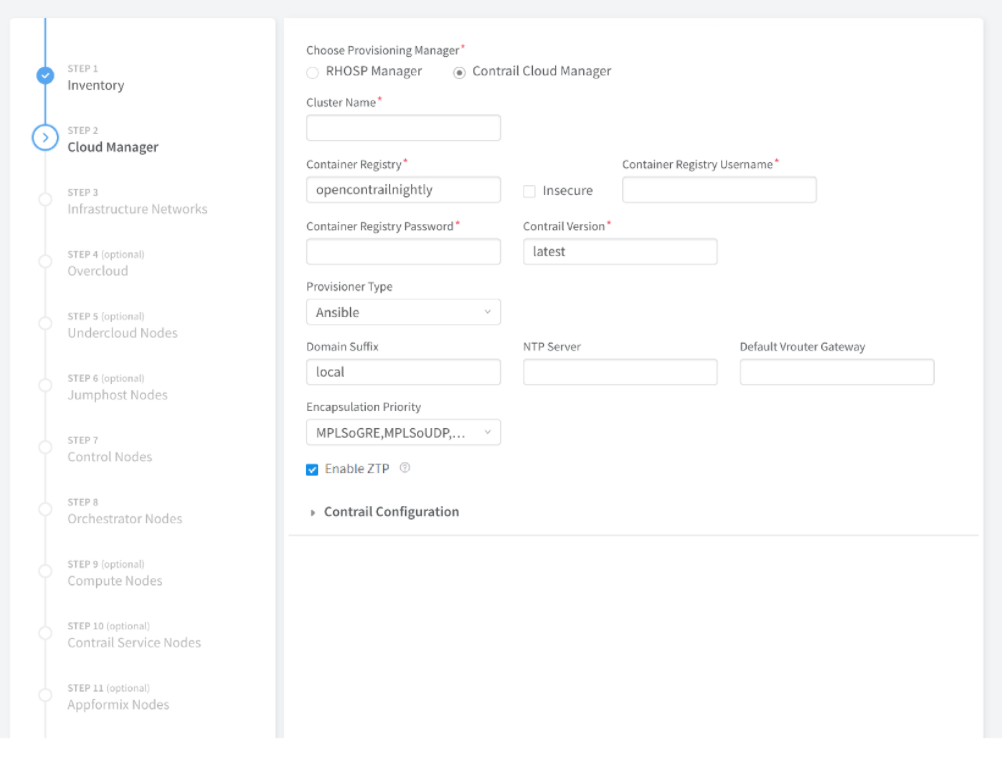
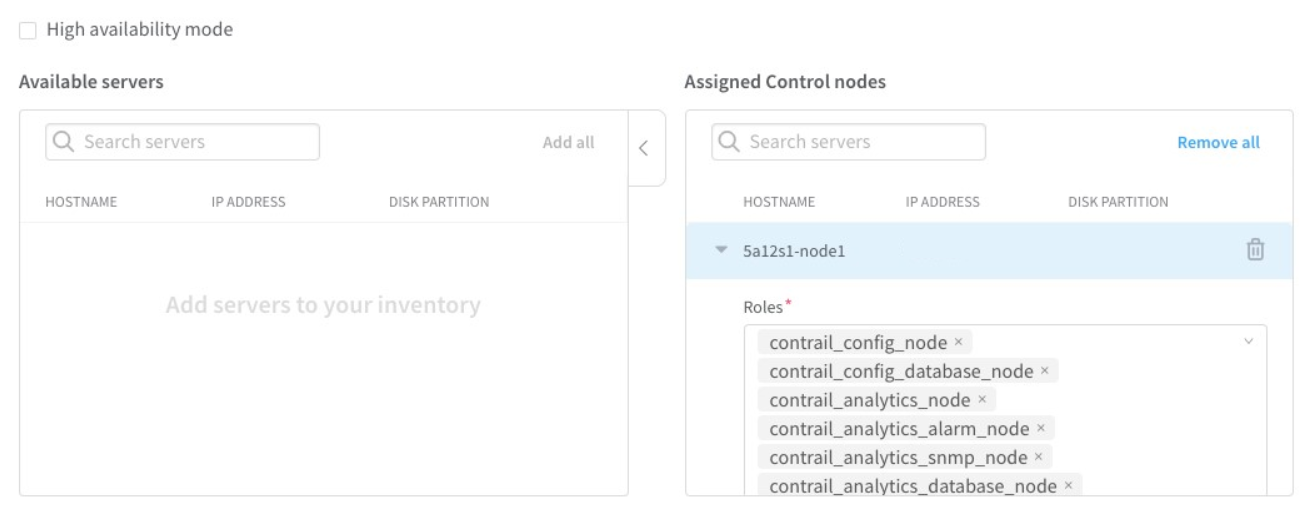
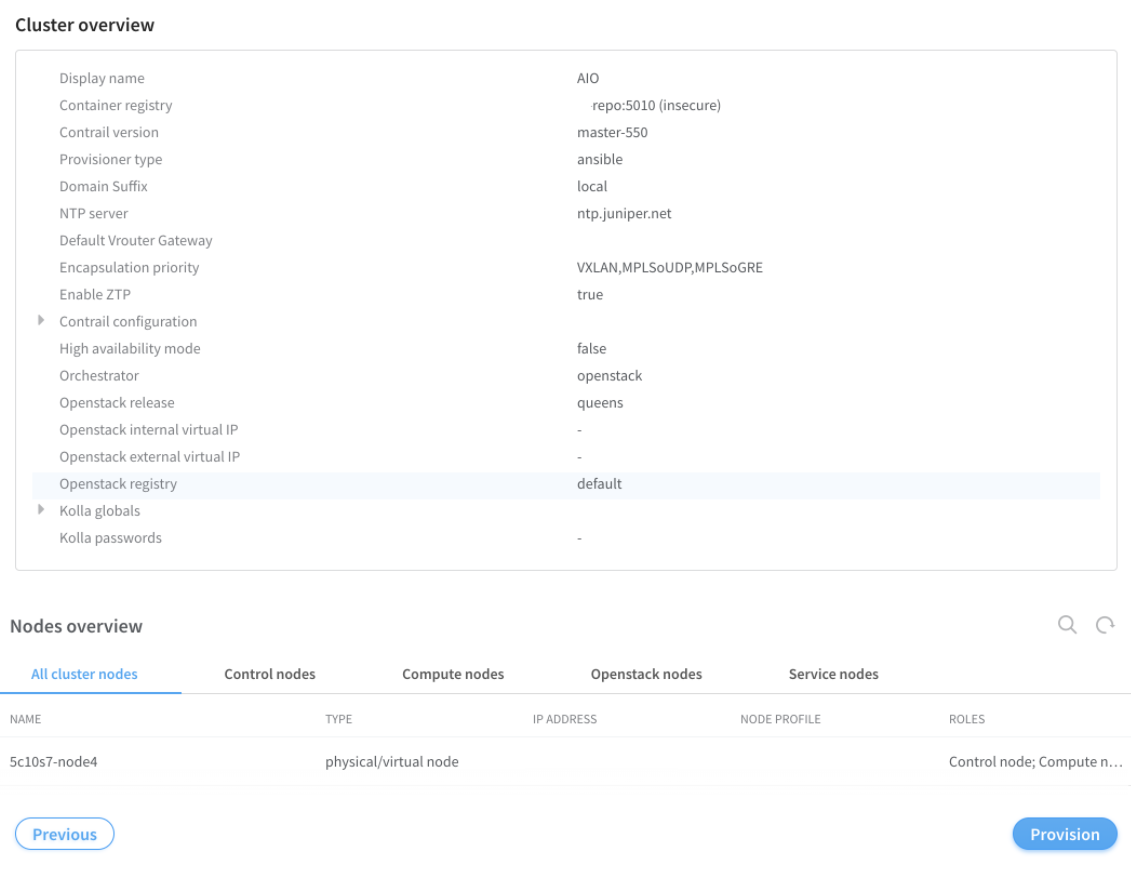
Create cluster by entering the required details.
-
Enter the required details including Inventory, Cloud Manager, Infrastructure Networks, Overcloud, etc.
Check Enable ZTP checkbox.
-
Default Vrouter Gateway is the QFX ToR IRB IP. The IP is used for provisioning the network.
CONTROLLER_NODES and CONTROL_NODES are a part of Contrail Networking Configuration.
-
CONTROLLER_NODES IP is a static IP configured on port eno1.
-
CONTROL_NODES IP is a static IP configured on port ens2f1.
 Note:
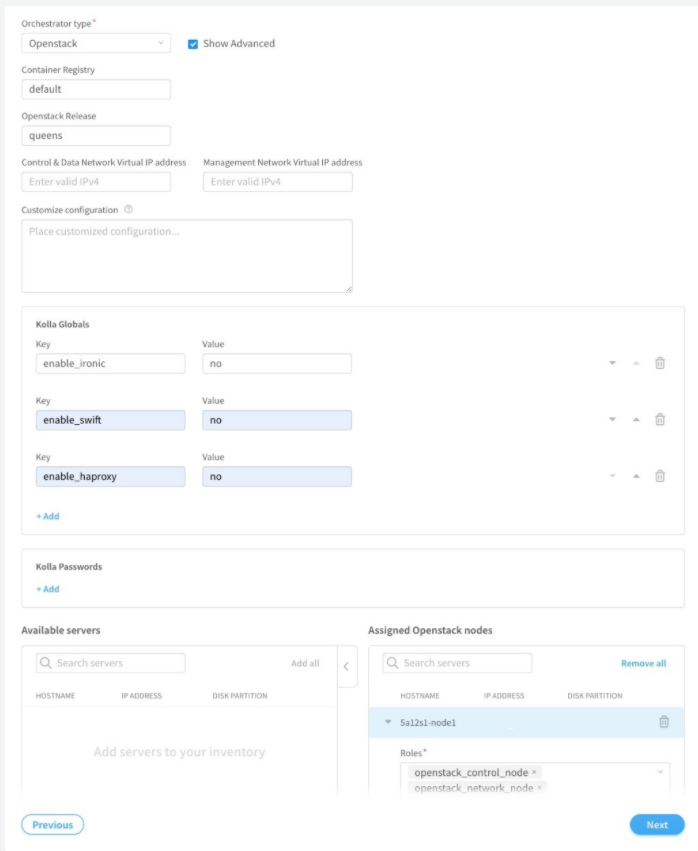
Note:Set enable_swift to yes if the cluster will be used for any image management tasks on the fabric devices. Otherwise, set enable_swift to no.
-
enable_ironic is used for life cycle management of Bare Metal Servers (BMS).
-
enable_swift is used to provision Swift containers (object storage). All the images used during different fabric related tasks are stored in these containers.
-
enable_haproxy is used when OpenStack controllers are set up in high availability (HA) mode.

-
-
Enter the required details including Inventory, Cloud Manager, Infrastructure Networks, Overcloud, etc.
-
After creating the cluster, log in to the cluster using
root user credentials.
-
Run fabric ZTP workflow to onboard the fabric devices
-
Enter the required details.
Table 1: Required Fields for creating Fabric Field
Details
Overlay ASN (iBGP)
IBGP ASN pool for Contrail Networking overlay network. List of the ASN pools that can be used to configure the IBGP peers for the IP fabric
Underlay ASNs (eBGP)
EBGP ASN pool for fabric underlay network. List of the ASN pools that can be used to configure the EBGP peers for the IP fabric
Management subnet
List of the management network subnets for the fabric
Fabric subnet
List of subnet prefixes that can be used for the P2P networks between fabric devices
Loopback subnet
List of the subnet prefixes that can be allocated to fabric device loopback IPs
supplemental_day_0_cfg: - name: "cfg1" cfg: | set system ntp server 167.99.20.98 device_to_ztp: - serial_number: "DK588" supplemental_day_0_cfg: "cfg1" hostname: ’5a12-qfx5’ - serial_number: "VF3717350117" hostname: ’5a12-qfx9’ - serial_number: "11675330144" - serial_number: "74656088411"Note:The YAML file lists the devices used for ZTP during a greenfield onboarding of devices. Contrail Networking Release 1907 introduces the ability to configure hostnames to the devices being onboarded. If the hostnames attribute is not specified, the device serial number is used as the hostname by default.
-
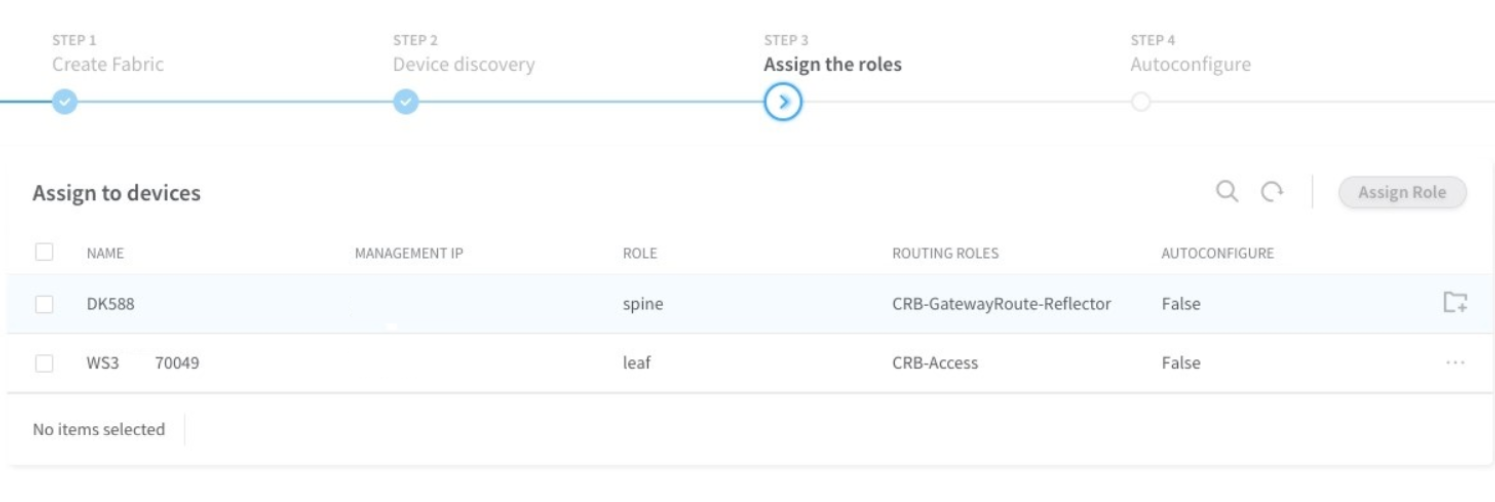
Assign the roles to the fabric devices.
-
DK588 as Spine with CRB-Gateway and Route-Reflector roles.
-
WS3XXXX0049 as Leaf with CRB-Access role.
-
-
Enter the required details.
To configure underlay network via Contrail Command UI:
-
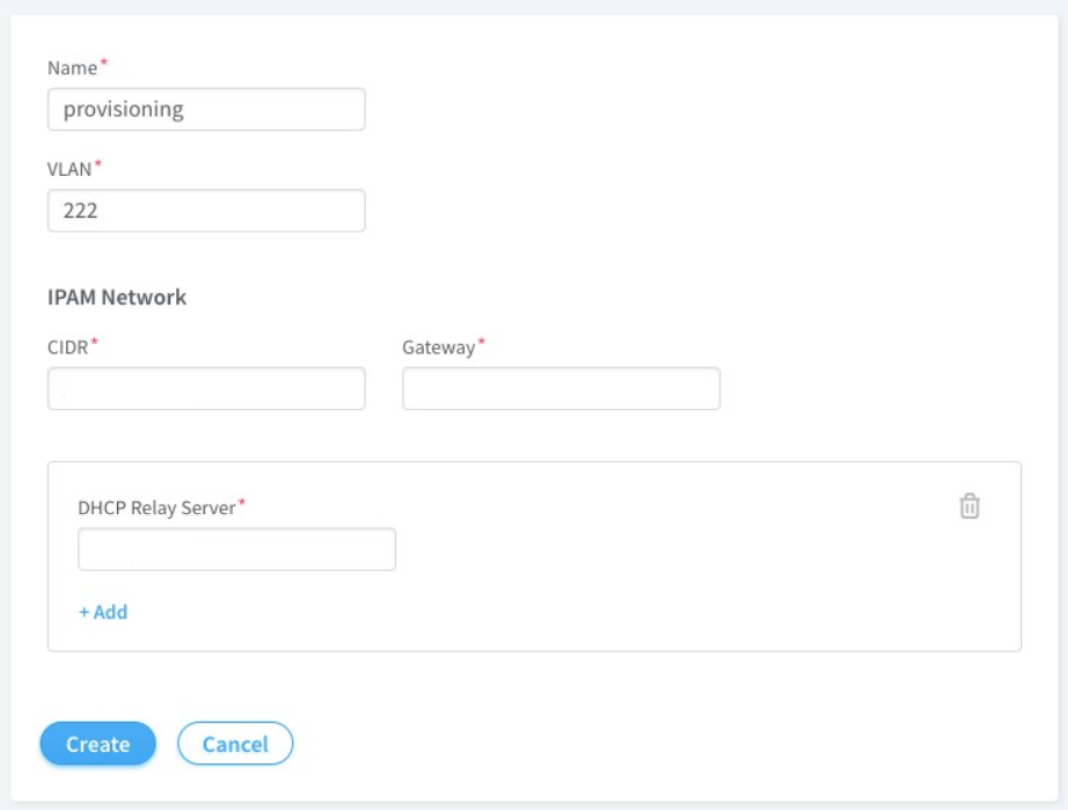
Create provisioning infrastructure network.
-
Click Networks.
-
Create a network by entering the required details.
-
-
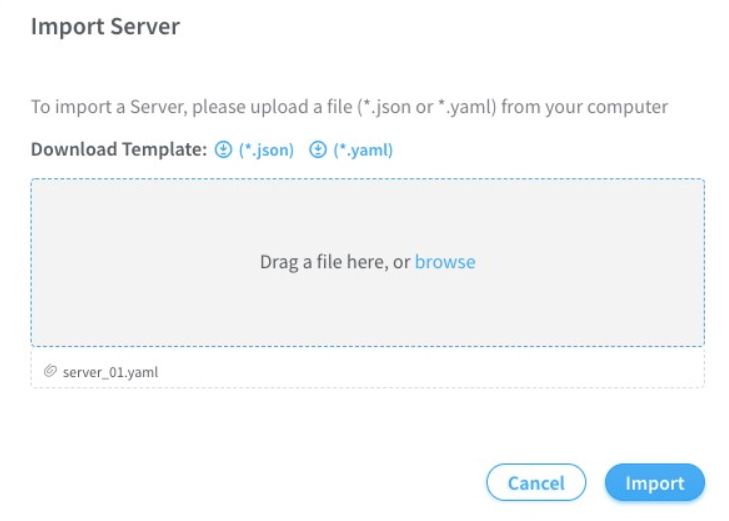
Import server topology.
-
Click Servers.
-
Click Import.
-
Upload the server topology file.
 Sample server topology yaml file:
nodes:
  - name: 5a12s1
    type: baremetal
    ports:
      - name: ens2f1
        mac_address: 90:xx:xx:xx:xx:a1
        switch_name: WS37XXX049
        port_name: xe-0/0/46
        switch_id: 3c:61:04:63:0e:80
Table 2: Required Fields for server topology yaml file Field
Details
name
Name of the infrastructure BMS node
type
Type of the infrastructure BMS node. It must be "baremetal"
ports
List of the ports of BMS node connected to the TOR switch
name
Name of the BMS port
switch_name
TOR switch name
port_name
TOR port name
-
-
Import server node profile.
You must create server node profile for the Contrail Networking Controller server.
-
Click Servers.
-
Click Node Profiles.
-
Click Import.
-
Upload the server node profile file.
Table 3: Required fields for Server Node Profile Field
Details
kind
Resource type
name
Name of a resource
fq_name
Fully Qualified name of a resource
parent_type
Node profile parent resource type. It must be "global-system-config"
node_profile_vendor
Node Profile vendor name
node_profile_type
Node profile type. It must be "end-system" for servers
hardware_refs
List of references to the hardware models supported by the node profile
card_refs
List of references to the interface cards
{
  "resources": [
    {
      "kind": "card",
      "data": {
        "name": "dell-bms-card",
        "fq_name": ["dell-bms","dell-bms-card"],
        "interface_map": {
          "port_info": [{"name": "ens2f1", "labels": ["provisioning"]}]
        }
      }
    },
    {
      "kind": "hardware",
      "data": {
        "name": "dell-bms",
        "fq_name": ["dell-bms"],
        "card_refs": [{"to": ["dell-bms","dell-bms-card"]}]
      }
    },
    {
      "kind": "node_profile",
      "data": {
        "hardware_refs": [{"to": ["dell-bms"]}],
        "parent_type": "global-system-config",
        "name": "Dell_BMS_01",
        "fq_name": ["default-global-system-config", "Dell_BMS_01"],
        "node_profile_vendor": "Dell",
        "node_profile_type": "end-system"
      }
    }
  ]
}
-
-
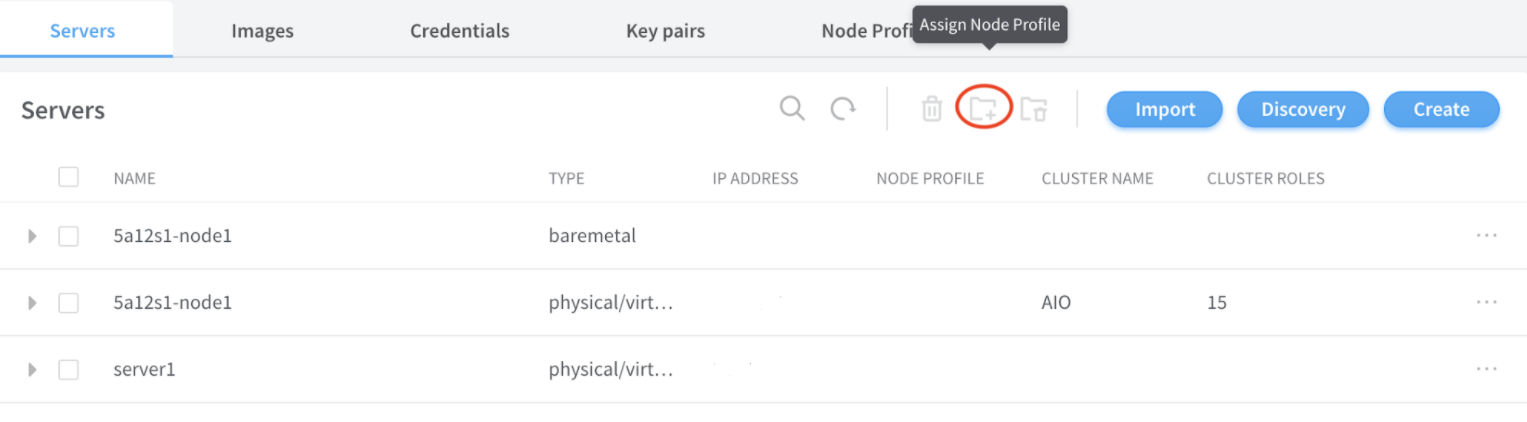
Assign node profile to the server.
-
Click Servers.
-
Select the required server from the list.
-
Click Assign Node Profile.
-
Once the above procedure is completed, change the default route from management port to the access port.
Change History Table
Feature support is determined by the platform and release you are using. Use Feature Explorer to determine if a feature is supported on your platform.