Assign ASNs and IP Addresses (Datacenter)
-
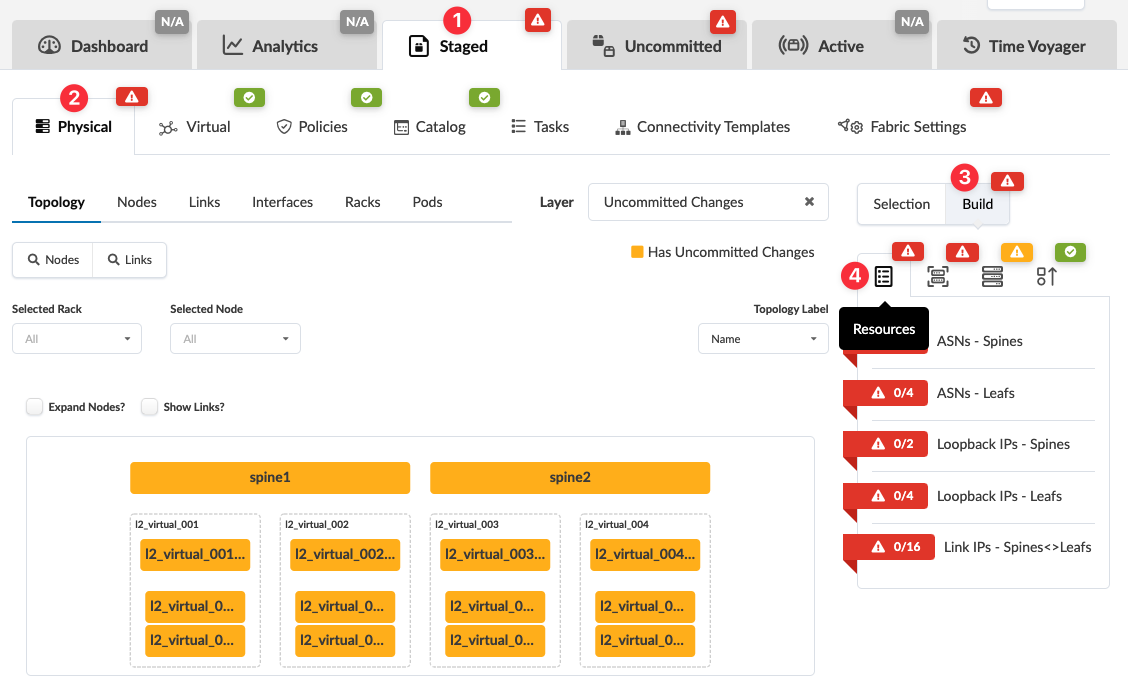
From the blueprint, navigate to Staged > Physical > Build >
Resources. (The Build panel is on the right. Resources is the
leftmost tab.)

-
Red status indicators mean that resources are required. The first number in the
indicator is the number of resources that have been assigned and the second number is the
number of resources that are required. (For example, in the ASNs - Spines resource
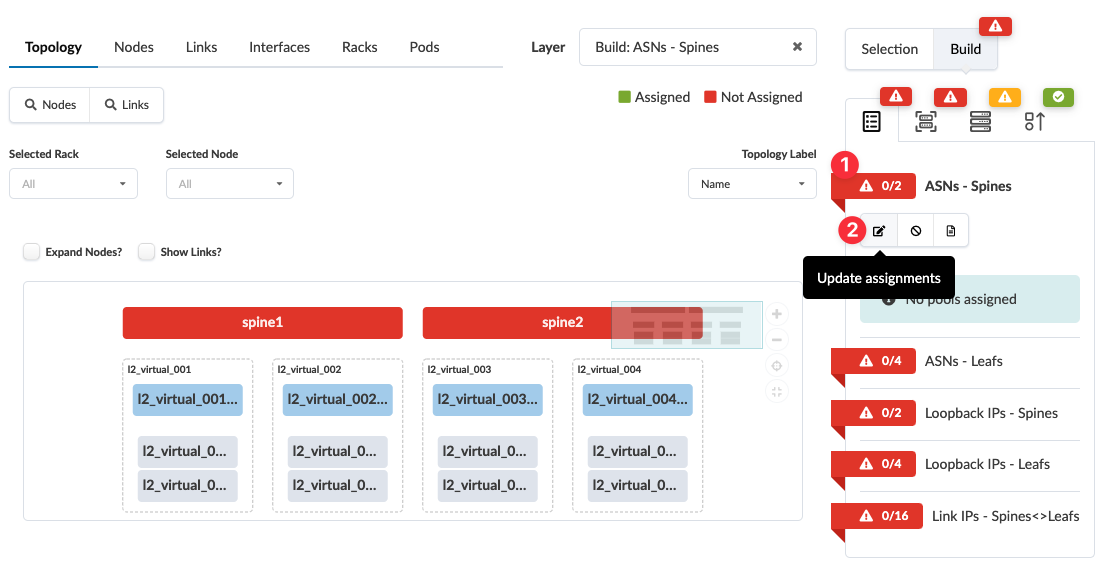
group, zero out of two resources have been assigned.) Click a red status indicator to see
that no pools are assigned, then click the Update assignments
button.
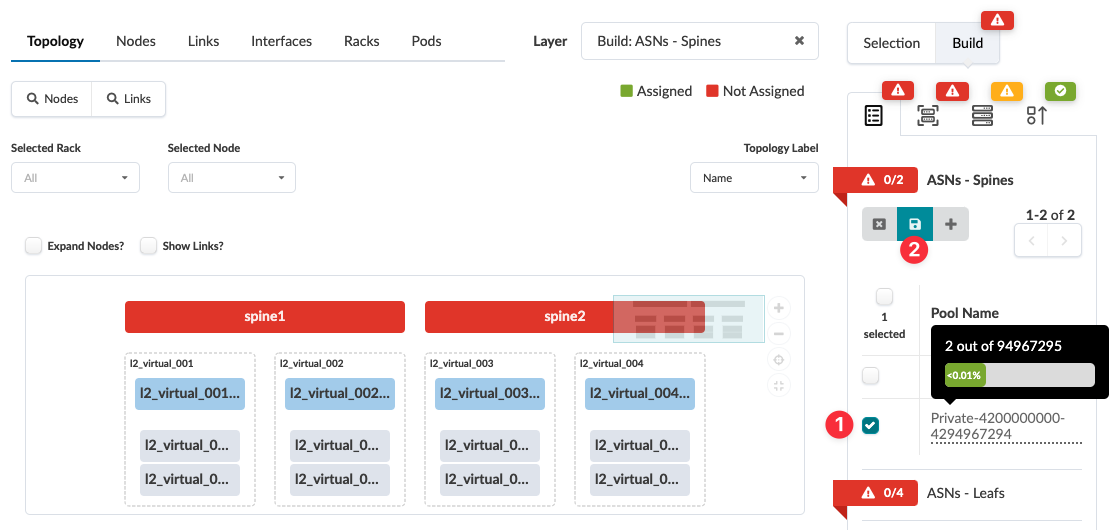
 Available pools are listed. Theses are the same resource pools that you'll find in the global Resources catalog in the left navigation menu. (To see how much of the pool has already been assigned, hover over the resource pool name.)
 -
Select the check box for the pool to use, then click the Save
button.
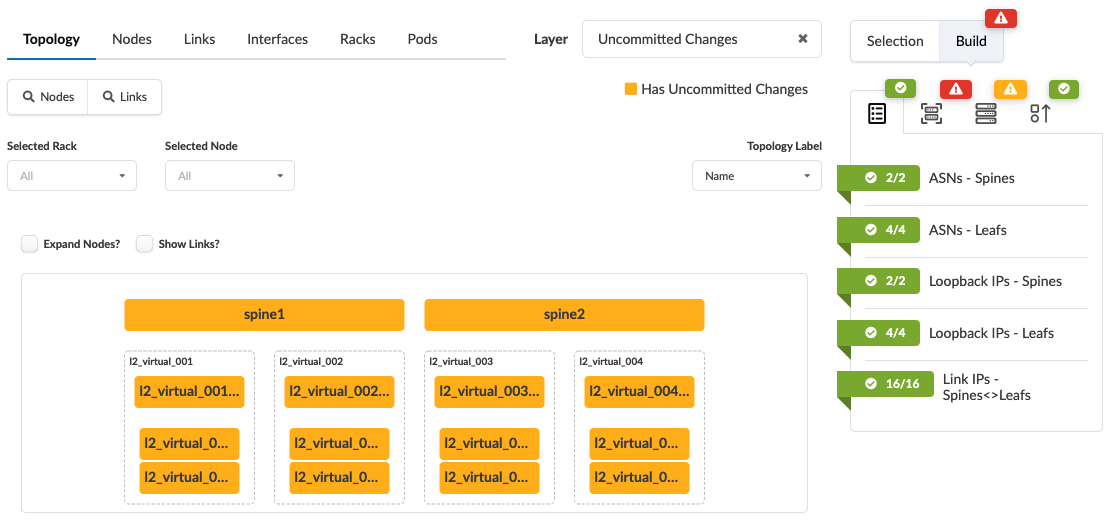
 The required number of resources are automatically assigned to the resource group. When the red status indicator turns green, the resource assignment has been successfully staged.
 -
Continue assigning resources in the same manner until you've assigned all required
resources.
 Note:
Note:If not enough resources are available, you can create a resource pool directly from the blueprint instead of navigating to the Resources catalog (new in Apstra version 5.0.0). After clicking the Update assignments button, click the Create resource pool button (the plus sign), enter the details for the pool, then click Create. You can then select the check box for the new pool to use for assigning resources.

If you want to add, update, or delete resource pools you can go directly to the Resources catalog from the blueprint with one click. Before clicking the Update assignments button, click the Manage resource pools button. You're taken directly to resource pools. When you're ready to return to the blueprint, click the back button.

When you unassign resources (by removing a device or changing a resource), those unused resources remain reserved. Usually, you want to keep them reserved in case you need them again. Some examples are:
-
Time Voyager Rollbacks that involve the use of resources - For example, if you delete a rack then subsequently roll back to a blueprint revision where the rack was not deleted, you'd need to use the same resources.
-
Revert Operations - When you revert staged changes, the originally assigned resources appear in the table view to indicate that they've been retained, but the build section shows that no resources are assigned. Situations like this can (but don't always) result in build errors.
-
Using the Update Stated Cabling Map from LLDP feature.
To prevent potential issues, it's best to keep unused resources reserved. In the rare instances, when you need to release unused but reserved resources, use the Reset resource group overrides button. Those resources will then be available for assigning elsewhere.

-
