Installing the MX2020 Upper Cable Manager
Note:
To accommodate additional clearance, you may order an extended upper cable manager from Juniper Networks.
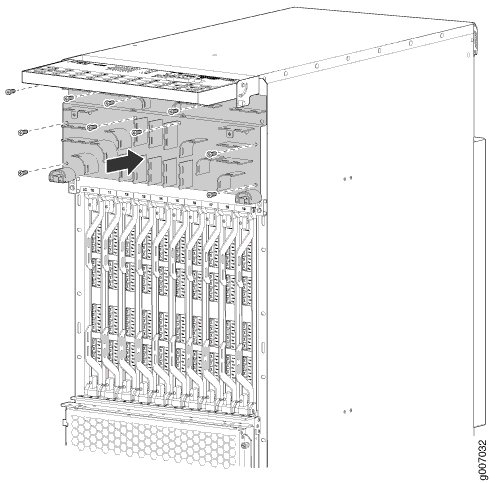
To install the upper cable manager (see Figure 1):
- Position the upper cable manager on the studs on the upper front of the chassis, just below the craft interface.
- Insert the screws into the corners in the upper cable manager onto the studs on the chassis.
- Using a Phillips (+) screwdriver (number 1 or 2), tighten the mounting screws securely.
- Replace the cable manager cover, and secure the two captive screws.
Figure 1: Installing
the Standard Upper Cable Manager