Network Visualization Options
To access the Topology page, select Observability > Network > Topology .
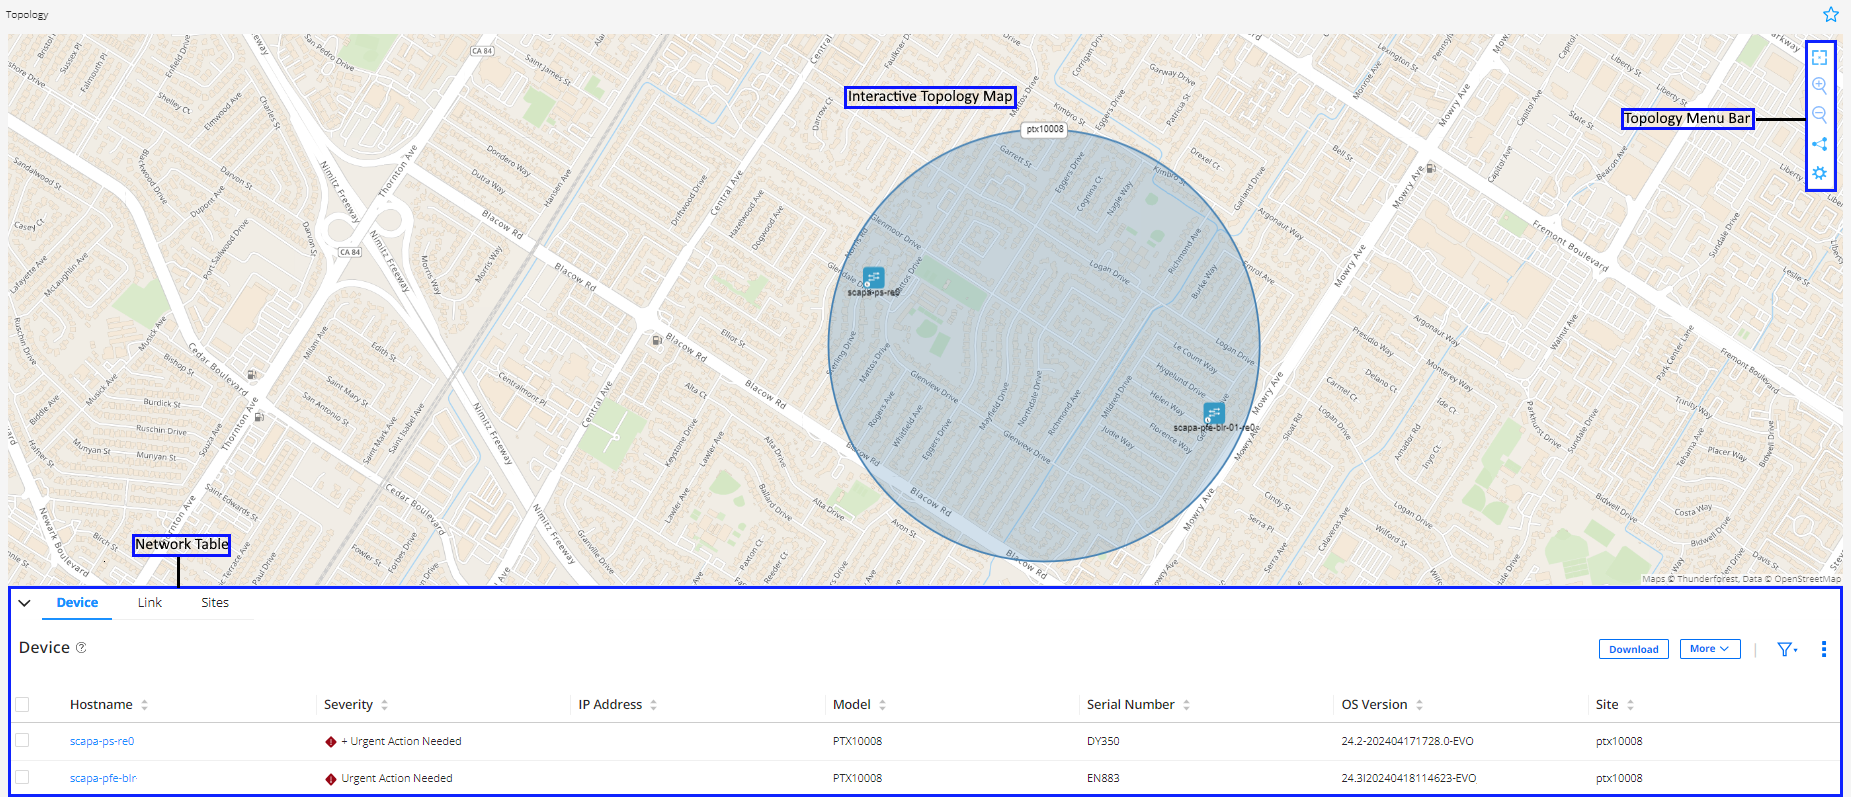
The Topology page displays the devices, links, and sites in your network in graphical and tabular formats. Users with Super User, Network Admin, and Observer roles can monitor the WAN links through the interactive topology map that enables you to customize the view of devices and links across sites. The network table lists the devices, links, and sites in your network topology.
The Topology page can be divided into three main components:
-
Interactive Topology Map—Enables you to view devices and links across sites in your network and customize the map display. Manage the map view, set device positions on the map, customize device and link labels and font size using the right click menu. For more information, see View Network Topology Details.
-
Topology Menu Bar—A vertical bar at the top-right corner of the Topology page, which consists of the following:
-
Reset icon—Center the topology map so that it zooms to fit the screen.
-
Plus icon—Zoom in (enlarge) the topology map.
-
Minus icon—Zoom out (reduce) the topology map.
-
Switch to Cluster View/Node View icon—Switch to Cluster View from the default Node View.
In the Node View, all devices are displayed. When devices and links are in proximity in the map, they may overlap with each other and clutter the map. To reduce clutter, you can switch to the Cluster View to collapse devices and links in the topology map into clusters and bundles, respectively. For more information, see Cluster View.
-
-
Network Table— Displays detailed information about network devices, links, and sites. Click the collapsible arrow icon at the bottom-left of the topology map to display or hide the network table.
For more information, see Network Table Overview.
Figure 1 shows all the components in the Topology page.
Navigation in the Topology Page
Table 1 describes the navigation functions that you can use in the Topology page.
|
Function |
Method |
|---|---|
|
Drag and drop |
Select an element, drag to the required position on the screen, and then release. |
|
Select an element |
Click a link or device to select it. |
|
Select multiple elements |
Do one of the following:
|
|
Zoom in and out 
|
Do one of the following:
|
|
Reset topology view 
|
Click the reset icon in the topology menu bar to resize and center the topology map to fit the visible area of the Devices & Links page. |
|
Right-click to access functions |
Right-click any blank space in the topology map or on a map element to access context-specific menus. |
|
Collapse/expand pane 
|
When a left, right, up, or down slider appears at the margin of a pane, you can click it to collapse or expand the pane. |
|
Pin 
|
Click the pin icon on the top right of the page or widget to fix it at any place on the screen. |
|
Resize panes |
Click and drag any of the pane margins to resize the panes. |