Dynamic Load Balancing in an EVPN-VXLAN Network
When your EVPN-VXLAN network includes a multihomed device that can be reached through multiple VTEPs that share a common Ethernet segment identifier (ESI), dynamic load balancing works as follows:
-
The EVPN control plane (overlay) identifies the common ESI as the next hop for a destination device with a particular MAC address.
-
Based on the parameters in a packet, the forwarding plane in a Juniper Networks switch (hardware) dynamically chooses one of the VTEPs associated with the ESI. The VTEP then forwards the packet along the selected underlay path to the destination device.
By default, Juniper Networks switches have dynamic load balancing enabled. So, you don’t need to configure the feature to get it up and running in an EVPN-VXLAN network.
Instead of statically assigning one virtual tunnel endpoint (VTEP) to forward traffic to a destination device in an EVPN-VXLAN network, Juniper Networks switches now support dynamic load balancing.
Benefits of Dynamic Load Balancing in an EVPN-VXLAN Network
-
More efficient use of aggregated Ethernet links that share a common ESI.
-
Better bandwidth utilization throughout an EVPN-VXLAN network.
How Dynamic Load Balancing Works
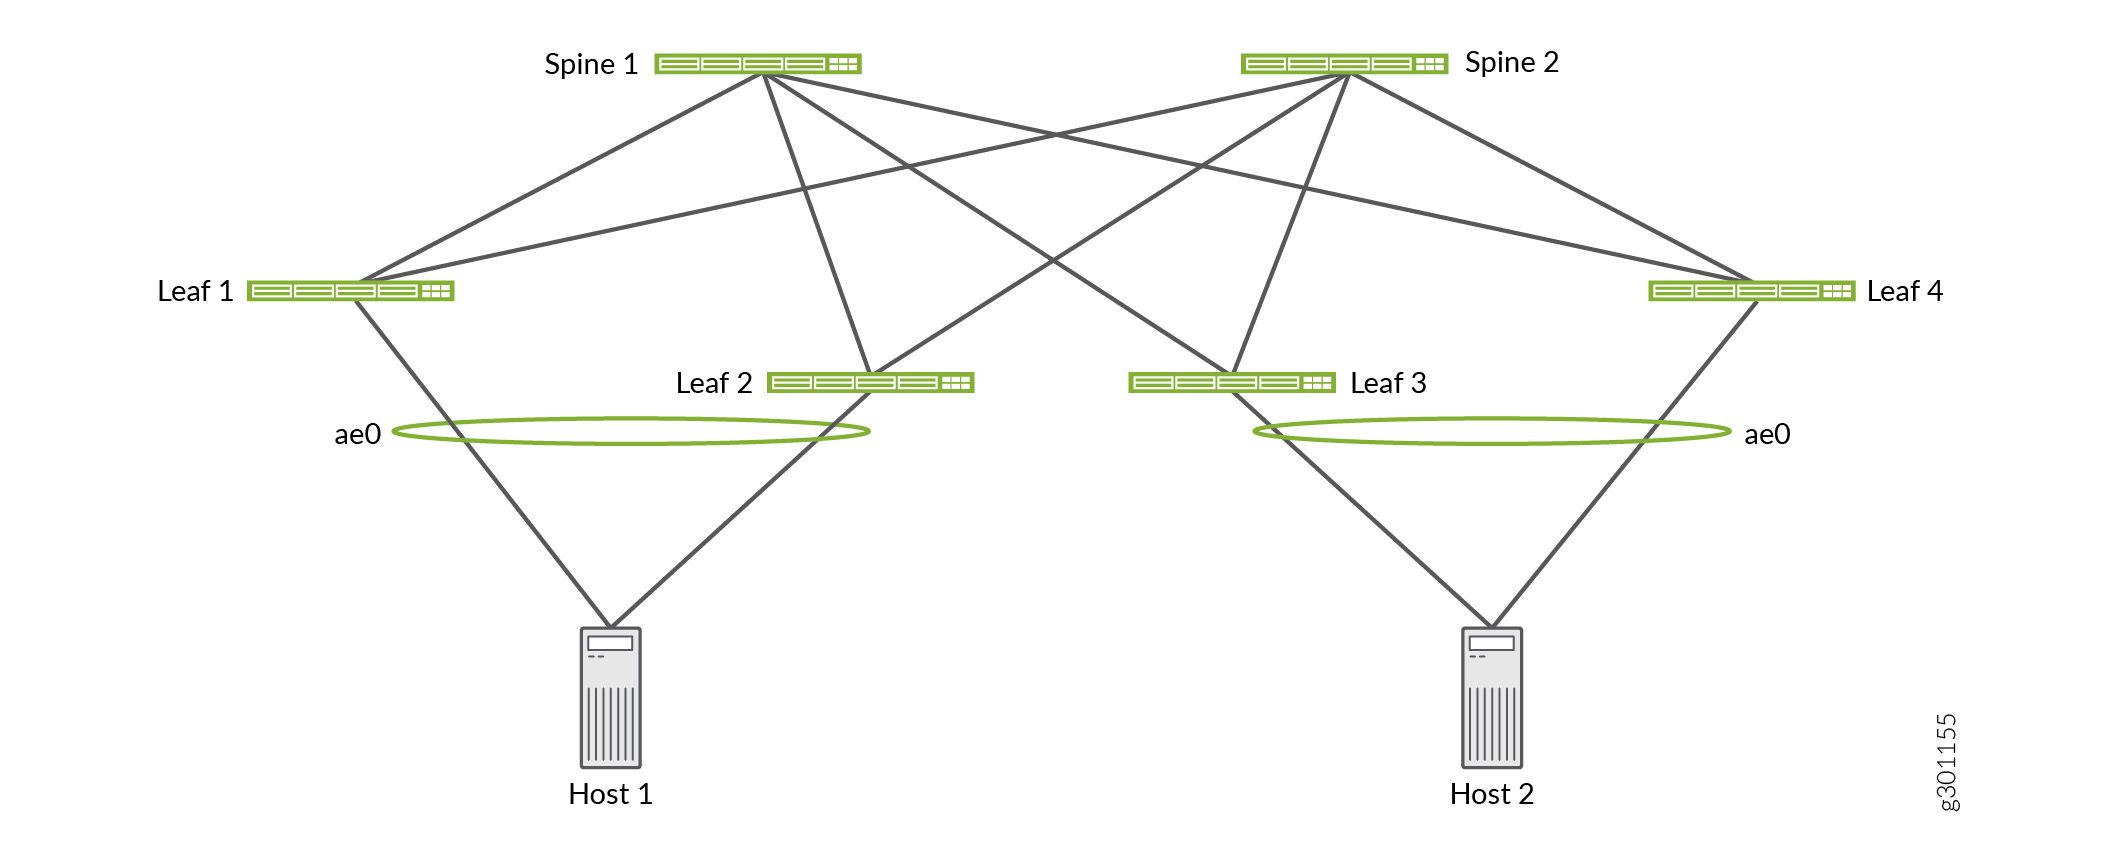
Figure 1 shows a sample EVPN-VXLAN network in which we support dynamic load balancing. This network includes the following elements:
-
Multihomed Hosts 1 and 2. Each of the hosts is connected to two leaf devices through an aggregated Ethernet LAG that is assigned a common ESI.
-
Multihomed Leafs 1 through 4. Each of the leaf devices is connected to Spines 1 and 2.
To keep things simple, the sample EVPN-VXLAN network in Figure 1 shows that the leaf devices are multihomed to two spine devices. However, we support dynamic load balancing among more than two spine devices.

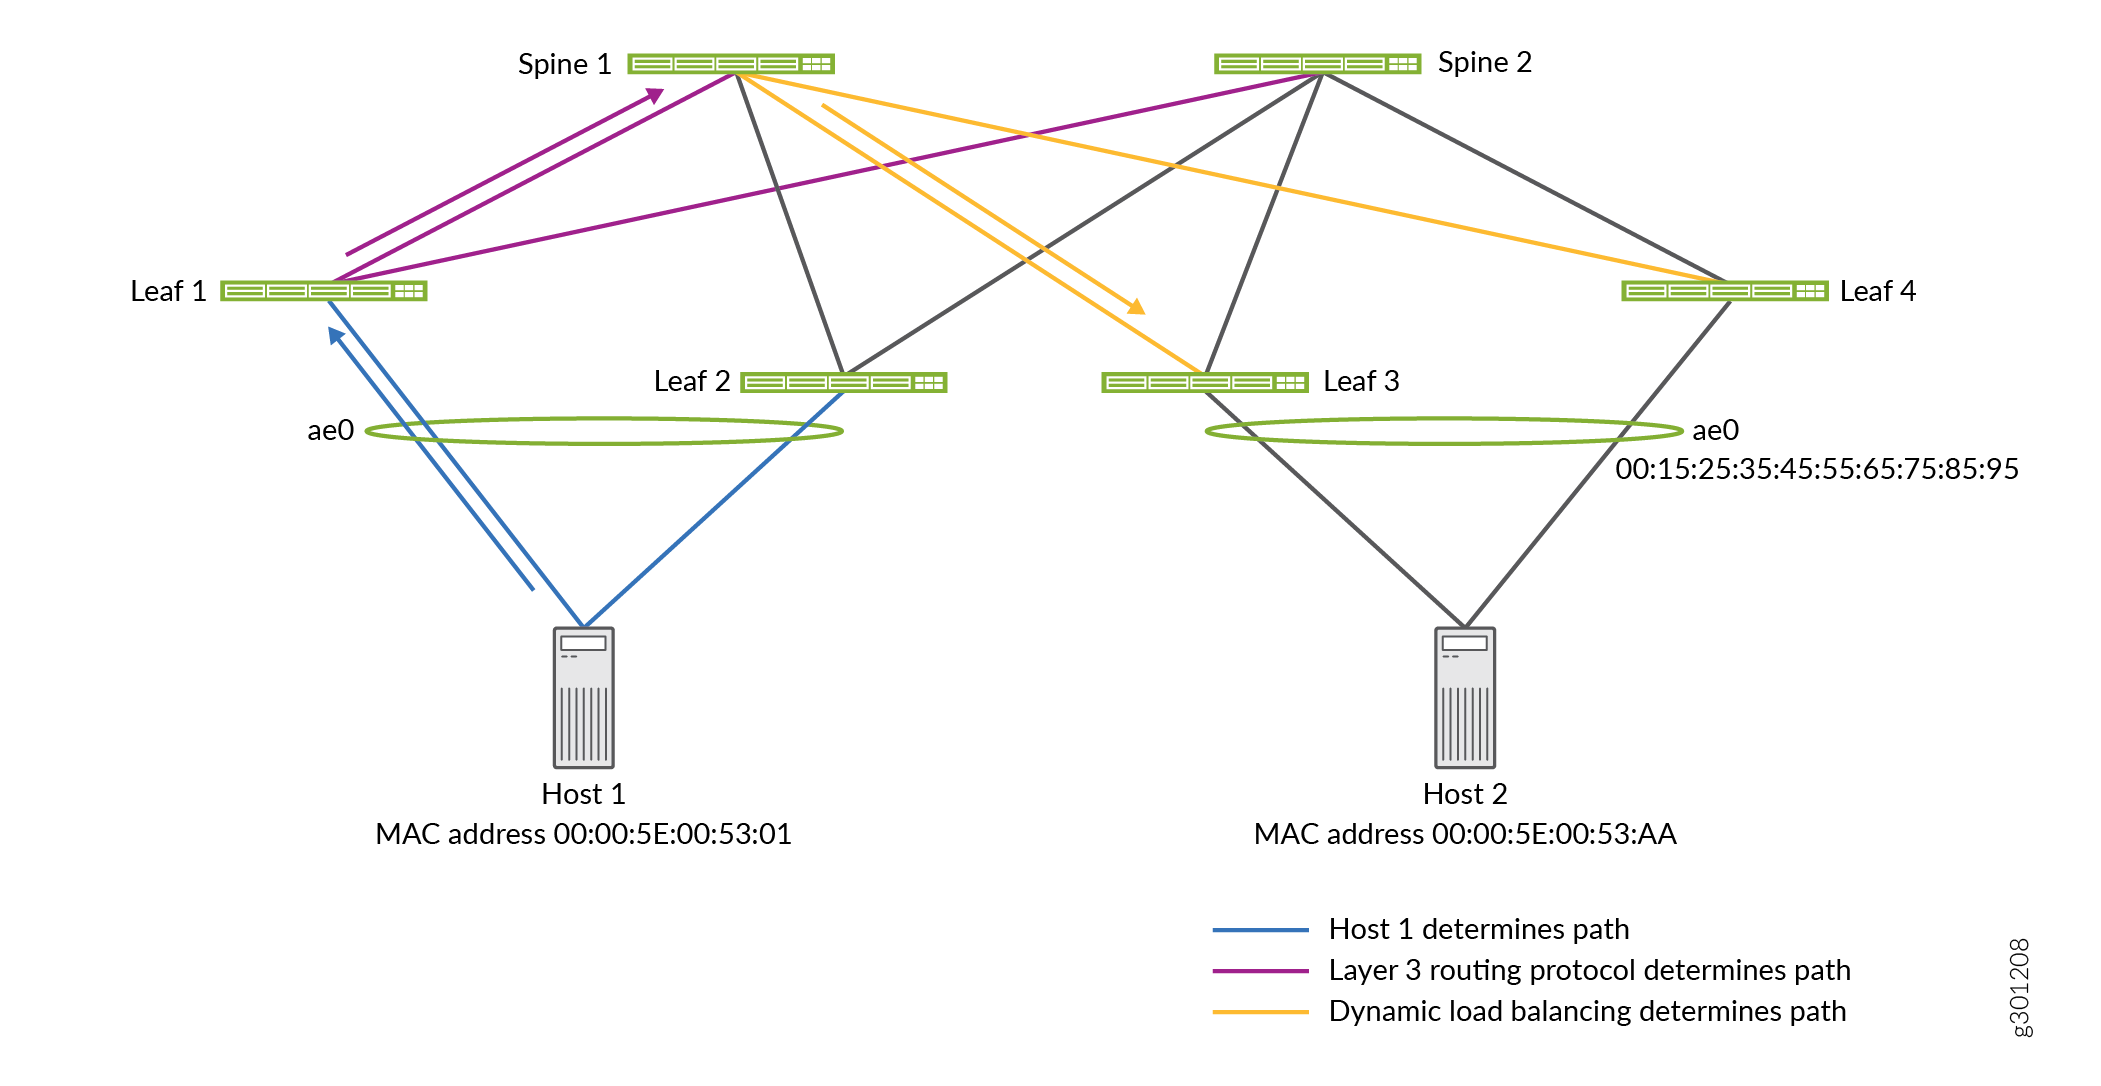
In this EVPN-VXLAN network, the leaf devices perform dynamic load balancing. To understand how dynamic load balancing works, here’s what happens when Host 1 sends a packet to Host 2. In addition to the following dynamic load balancing explanation, Figure 2 provides a graphical summary of the path options and the choices made.
-
Host 1 must choose one of the aggregated Ethernet interfaces through which to forward the packet. In this case, Host 1 chooses the interface to Leaf 1.
-
Upon receipt of the packet, Leaf 1 identifies Host 2’s destination MAC address 00:00:5E:00:53:AA as a member of remote ESI 00:15:25:35:45:55:65:75:85:95. This ESI is assigned to aggregated Ethernet interface ae0, to which Leafs 3 and 4 are connected.
-
Leaf 1 can choose either Leaf 3 or 4 as the intermediate Layer 2 EVPN-VXLAN next hop to which to forward the packet. Using packet parameters established by the dynamic load balancing feature, Leaf 1 dynamically chooses Leaf 3.
-
Leaf 1 can choose either Spine 1 or 2 as the next hop to reach Leaf 3. Using Layer 3 routing tables and routes programmed into the switch hardware, Leaf 1 chooses Spine 1.

How Traffic Is Balanced
Juniper Networks switches use a hash of the following packet parameters to dynamically select the next-hop VTEP:
-
Packets with an IP header:
-
IP header fields:
-
Source IP address
-
Destination IP address
-
Protocol
-
-
VLAN ID
-
Layer 4 (TCP and UDP) source and destination ports
-
-
Packets with an MPLS/IP header:
-
Up to three top labels
-
IP header fields:
-
Source IP address
-
Destination IP address
-
-
Layer 4 (TCP and UDP) source and destination ports
-
-
Packets with a Layer 2 header only:
-
Source MAC address
-
Destination MAC address
-
VLAN ID
-
The hashing takes place before a packet undergoes VXLAN encapsulation.
To refine the hashing input used by dynamic load balancing,
you can include the
               enhanced-hash-key

               hash-parameters ecmp
configuration statements at the [edit forwarding-options] hierarchy level.
How to Verify That Dynamic Load Balancing Is Enabled
You can verify that dynamic load balancing is enabled by entering the following command:
user@switch> show ethernet-switching global-information
Global Configuration:

MAC aging interval    : 300
	...
LE  VLAN aging time   : 1200
RE state              : Master
VXLAN Overlay load bal: Enabled
VXLAN ECMP            : Enabled
In the output that appears, check the VXLAN Overlay load
bal field to make sure that it is set to Enabled.
Change History Table
Feature support is determined by the platform and release you are using. Use Feature Explorer to determine if a feature is supported on your platform.
