Add Identity Providers and Users
Follow these steps to add identity providers (IdPs) to use to authenticate your portal users.
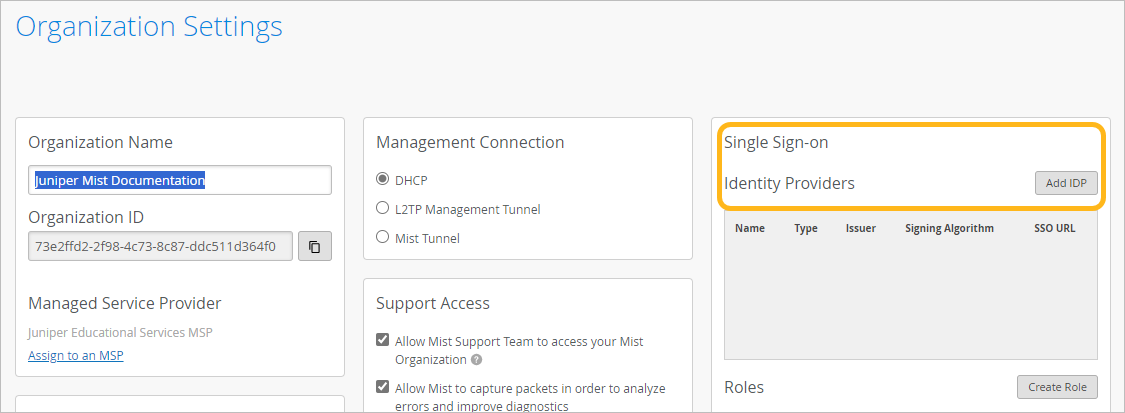
Add your IdPs to your organization and then add your custom roles, delete unneeded local accounts, and provide your users with first-time login instructions.
You need the Super User admin role to configure SSO.
To add identity providers:
-
In the Identity Providers section, click Add
IDP.
-
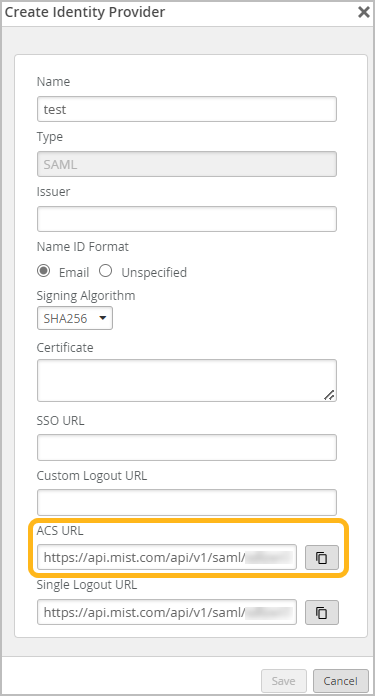
In the Create Identity Provider window:
-
Copy the ACS URL (Assertion Consumer Service URL), which
you'll need to complete the SAML 2.0 integration in your IdP's portal.
-
Copy the ACS URL (Assertion Consumer Service URL), which
you'll need to complete the SAML 2.0 integration in your IdP's portal.
-
Return to the Create Identity Provider in Juniper Mist, and use the information from
the SAML 2.0 SSO integration to complete these fields:
-
Signing Algorithm—Select the same signing algorithm that you selected in your IdP SAML 2.0 integration.
-
Issuer
-
SSO URL
-
Certificate—Open the certificate that you downloaded. Copy the entire text and paste it into this field. Include the BEGIN CERTIFICATE and END CERTIFICATE lines.
Example:
This example shows how you would complete the Juniper Mist fields on the left by entering the values from the Microsoft Azure fields on the right.

-
If errors occur, see Troubleshoot Issues with Identity Provider Setup.