IDP-Based Threat Detection on Session Smart Routers
An Intrusion Detection and Prevention (IDP) policy lets you selectively enforce various attack detection and prevention techniques on network traffic. You can enable IDP on the Juniper® Networks Session Smart™ Router operating as a spoke device in your Juniper Mist™ network by activating it in an application policy.
Intrusion detection is the process of monitoring the events occurring on your network and analyzing them for signs of incidents, violations, or imminent threats to your security policies. Intrusion prevention is the process of performing intrusion detection and then stopping the detected incidents. For details, see Intrusion Detection and Prevention Overview.
You can configure IDP on Session Smart Router only when the devices are operating as spoke devices. To use IDP on Session Smart Router deployed as hub devices, you must leverage additional Juniper Networks SRX Series Firewalls.
Watch the following video for IDP-based threat detection on Session Smart Routers.
Hey everyone, today I want to show you how easy it is to deploy an AI-driven full-stack branch managed by the Mist Cloud. That is a whole branch network with access points, switches, and routers, all being managed by a single pane of glass, with artificial intelligence to alert you to any issues and easily find the root cause of those issues. In this demo, I will show you how Juniper Network's AI-driven full-stack branch simplifies all operational stages. Day zero design, day one deployment, and day two troubleshooting and maintenance. And also, I will show you how quickly this can be done.
All right, let's jump into it. Day zero design. When we talk about day zero operations, we are talking about all the planning and design that you can do prior to deploying any of the systems. These are the tasks that should be performed to make sure that the actual deployment day goes as smoothly as possible. The tasks you want to perform here are designing your network and staging your configuration. Using the Mist Cloud, you have one interface you can log into to configure all of the access points, switches, and routers in your whole network. You can use configuration templates with site-specific variables, so you only have to create a limited number of configurations for large deployments. I have seen deployments with 10,000 sites that only have six or so different designs. So, what do they do? They create six templates and apply the appropriate templates to the correct sites as they are onboarding. I have also dealt with deployments that have a couple variations between sites. Say, for example, they use different IP address schemes at each site. This is not a problem either because all we have to do is input a variable or placeholder like this, and then when we create the site, we say, for this variable, put in this value. With this technology, we can easily deploy 1,000 sites in minutes.
Once you have your network designed and you have staged your configuration, it is time to prepare for deployment day. Day one deployment. Day one stands for the first day of use for our new devices. This is the most exciting day in my opinion. You have a shiny new device and you just can't wait to pull it out of the box and use it. Unfortunately, a lot of times, this day can be ruined by the actual deployment and installation. Well, that does not have to be the case with Juniper Networks. With the AI-driven full-stack branch, you can easily deploy your network using QR codes or claim codes. First, if you didn't do it as part of your day zero tasks, create a site in the Mist cloud and assign the appropriate templates to that site. Then, just look at the back of your device for a QR code and scan it with an app or grab the claim code and add it to your inventory for that site. If you have a white box switcher router, then just copy a few lines of configuration to get that device speaking to the Mist cloud. Once your device connects up to the Mist cloud, it will see what site it is deployed to and grab the appropriate configuration. Another huge benefit of the configuration templates is that if you need to make any changes to your configuration, all you have to do is make the change in the template and the change will get pushed down to all of the appropriate devices. You no longer need to log into each individual device. With these powerful tools at your disposal, you can have a full site up in minutes. This is what we call true zero-touch provisioning.
Day two, maintenance and troubleshooting. Once you have your site deployed, then it just comes down to your normal day-to-day operations. This is what we call our day two operations. In the Mist ecosystem, we like to break our telemetry down to SLEs or service level experiences. These SLEs give you insight into the health of your network, devices, links and applications. They alert you to any issues impacting the user experience and provide insights into the root cause. The SLEs are impressive and very powerful, giving you experience insights across the network. But even more powerful is your AI virtual network assistant, Marvis. Marvis Actions proactively alert you to high priority issues impacting your network. This Marvis actions page is a great page to start your day off with, a cup of coffee view, so you can know where you need to spend your attention and solve issues before your customers even know. You can also chat with Marvis to ask questions about your network. Say, for example, you're getting complaints about an application not working. You can ask Marvis if the problem is something on your network, with your ISP or on the application itself. This saves hours of investigating to prove where the problem is and reduces your MTTI or mean time to innocence. Security is also managed by Mist and Marvis. Using the IDP and enhanced web filtering features in your SessionSmart routers, you leverage the Juniper IDP signature database, providing state-of-the-art protection against the most up-to-date vulnerabilities. The database contains definitions of attack objects and application signatures defined in the form of an IDP policy rule set that is updated regularly.By automatically downloading the latest definitions and application signatures, the SSR is able to provide cutting-edge security solutions for your network. When discovered, you can either have your router alert you to the vulnerability or block the traffic, giving you the network protection that you need without the need to purchase additional hardware.
Lastly, with all of this data and all of these cool tools, how can you share this information with interested parties and extend Mist into your business intelligence? This can be done with Premium Analytics. Premium Analytics is another tool that you can use to share with any decision maker, help them get the relevant information they need. Whether it's a CIO looking at further network investment, a branch manager looking at user experience, or a facilities management executive looking at real estate optimization and occupancy management. Premium Analytics provides long-term insights into your network with intuitive graphs and charts. So that was a very brief dive into what the Juniper Network AI-driven full-stack SD branch has to offer. To summarize, the AI-driven full-stack SD branch simplifies every stage of operations, design, deployment, maintenance, and troubleshooting, allowing for the best user experience for your network architects, engineers, operations folks, and end users. There is a lot more that you can do with the Mist Cloud and Mist AI than we have time to show you here. If you'd like to try this out for yourself, sign up for a demo or POC. Thank you for watching.
Juniper Mist cloud supports the following IDP profiles:
-
Standard—The Standard profile is the default profile and represents the set of IDP signatures and rules that Juniper Networks recommends. Each attack type and severity has a Juniper-defined, non-configurable action that the IDP engine enforces when it detects an attack. The possible actions are as follows:
-
Close the client and server TCP connection.
-
Drop the current packet and all subsequent packets
-
Send an alert only (no additional action).
-
-
Alert—Alert profiles are suitable only for low-severity attacks. When the IDP engine detects malicious traffic on the network, the system generates an alert, but it does not take additional measures to prevent the attack. The IDP signature and rules are the same as in the standard profile.
-
Strict—The Strict profile contains a similar set of IDP signatures and rules as the standard profile. However, when the system detects an attack, this profile actively blocks any malicious traffic or other attacks detected on the network.
You can apply an IDP profile to an application policy. Each profile has an associated traffic action, and these actions define how to apply a rule set to a service or an application policy. Actions in the IDP profile are preconfigured and are not available for users to configure.
To configure IDP-based threat detection:
-
In the Juniper Mist cloud portal, click Organization > WAN Edge Templates and select a template for your spoke device.
-
On the WAN Edge Templates page, scroll down to the Applications Policies pane. The pane displays the list of existing application policies.
-
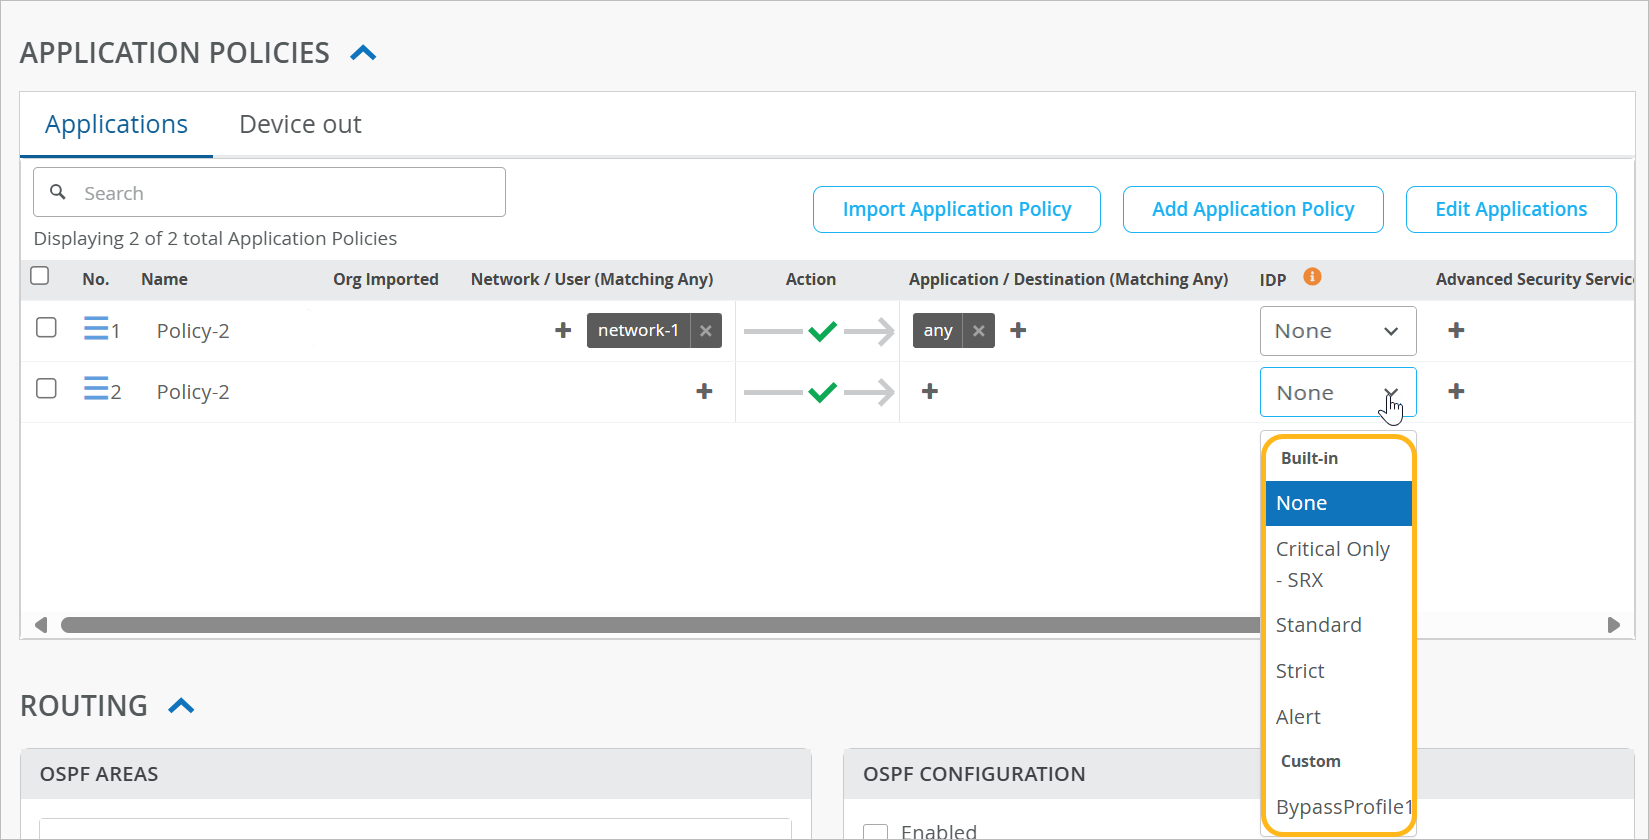
Under IDP column, select an IDP profile. For example, for the Internet-via-Hub-CBO policy, select the IDP profile Alert.
Figure 1: Configure an IDP Profile (Alert) - Click Save.
The selected IDP profile is applied on all spoke devices.
Ensure that you set the policy action to PERMIT; otherwise, the IDP settings might override the DENY statement.
On all spoke devices, where the traffic is not steered to a local LAN or WAN interface (for LBO), you must add the IDP service on the hub device. In this example, you steer the traffic to an overlay VPN, so you must also let the remote site (the hub) know about the change.
In the following snippet, you can see the change of the forwarding path on the spoke device after activating IDP. On the LAN-interface side, there is no change, on the WAN-side, a new automatic service called: ANY-idp* and Tenant called: SPOKE-LAN1-idp* are created. Also, you can see two sessions inside the system. Other side, that is, the hub device expects a matching tenant name “SPOKE-LAN1-idp*” and no longer uses “SPOKE-LAN1” that was used earlier in application policies.
The following sample is from an Session Smart Router Programmable Command Line Interface (PCLI) accessible locally on the device.
show service ============================================== ==================== ====================================================== ================= =========================== ======= ========== ============== ============== Service Prefixes Transport Tenant Allowed Service-Policy State Sessions Tx Bandwidth Rx Bandwidth ============================================== ==================== ====================================================== ================= =========================== ======= ========== ============== ============== ANY 0.0.0.0/0 - SPOKE-LAN1 ANY-sp . . ANY-idp* 0.0.0.0/0 - SPOKE-LAN1-idp* ANY-sp Up 0 0 bps 0 bps . . show sessions ====================================== ===== =============================== ================= ======================= ======================= ====== ======= ================= ========== ================= =========== =============== ========== =================== ========= ================= Session Id Dir Service Tenant Dev Name Intf Name VLAN Proto Src IP Src Port Dest IP Dest Port NAT IP NAT Port Payload Encrypted Timeout Uptime ====================================== ===== =============================== ================= ======================= ======================= ====== ======= ================= ========== ================= =========== =============== ========== =================== ========= ================= 3e3bc1d9-3e6f-455b-87f8-902d459eec5e fwd ANY SPOKE-LAN1 ge-0-3 ge-0-3_1099 1099 ICMP 10.99.99.99 10 9.9.9.9 10 0.0.0.0 0 True 4 0 days 0:59:25 3e3bc1d9-3e6f-455b-87f8-902d459eec5e rev ANY SPOKE-LAN1 idp-in idp-in 0 ICMP 9.9.9.9 10 10.99.99.99 10 0.0.0.0 0 True 0 0 days 0:59:25 2d1251ac-1e3a-42b7-8d5b-83403be09677 fwd ANY-idp* SPOKE-LAN1-idp* idp-out idp-out 0 ICMP 10.99.99.99 10 9.9.9.9 10 0.0.0.0 0 True 4 0 days 0:59:25 2d1251ac-1e3a-42b7-8d5b-83403be09677 rev ANY-idp* SPOKE-LAN1-idp* ge-0-0 ge-0-0 0 UDP 192.168.129.191 16405 192.168.173.114 16414 0.0.0.0 0 True 0 0 days 0:59:25
To setup a matching tenant name on the hub-device side for this example, use the following steps:
-
In Juniper Mist cloud portal, click Organization > Hub Profiles and select a profile. For example, select a profile named hub1.
-
Scroll down to the Application Policies section and set IDP profile as Standard for Spokes-to-Hub-LAN and Spokes-Traffic-CBO-on-Hub.
Figure 2: Setting IDP Profile on Hub Device Side -
Save the changes.
This procedure synchronizes the tenant-names on both sides enabling the communication between hub and spoke.
When you activate the IDP feature for the first time on a spoke-device, we recommend you to plan it in a maintenance window. The start of the IDP engine and inclusion into the path from LAN to WAN (that is, service-chaining) might take a few minutes and might also interrupt ongoing communications.
You can test the effects of the IDP-based security scanner by launching sample attacks. You can use tools such as Nikto in Kali Linux, which has a variety of options available for security-penetration testing.
Use a virtual machine (VM) desktop (desktop1) in a sandbox or lab environment, and install a simple security scanner for web servers, such as Nikto. Nikto is an open-source web server and web application scanner. For example, you can run Nikto against an unhardened Apache Tomcat web server (or its equivalent) that is local to your lab. In this test, you can send plain or unencrypted HTTP requests for IDP inspection.
The following sample shows a process where you install the tool, check the presence of the HTTP server, and then launch the attacks.
virsh console desktop1 apt-get update apt-get install -y nikto # Using your individual Lab-Access-IP we test if the labinternal # Apache Tomcat Server of the Apache guacamole container is avail wget http://172.16.77.155:8080 –2022-09-16 15:47:32– http://172.16.77.155:8080/ Connecting to 172.16.77.155:8080… connected. HTTP request sent, awaiting response… 200 Length: unspecified [text/html] Saving to: ‘index.html’ index.html [ <=> ] 10.92K –.-KB/s in 0s 2022-09-16 15:47:32 (85.3 MB/s) – ‘index.html’ saved [11184] # Now start our security scanner for the first time nikto -h http://172.16.77.155:8080 – Nikto v2.1.5 ————————————————————————— + Target IP: 172.16.77.155 + Target Hostname: 172.16.77.155 + Target Port: 8080 + Start Time: 2022-09-16 15:48:22 (GMT0) ————————————————————————— + Server: No banner retrieved + The anti-clickjacking X-Frame-Options header is not present. + No CGI Directories found (use ‘-C all’ to force check all possible dirs) + Server leaks inodes via ETags, header found with file /favicon.ico, fields: 0xW/21630 0x1556961512000 + OSVDB-39272: favicon.ico file identifies this server as: Apache Tomcat + Allowed HTTP Methods: GET, HEAD, POST, PUT, DELETE, OPTIONS + OSVDB-397: HTTP method (‘Allow’ Header): ‘PUT’ method could allow clients to save files on the web server. + OSVDB-5646: HTTP method (‘Allow’ Header): ‘DELETE’ may allow clients to remove files on the web server. + /examples/servlets/index.html: Apache Tomcat default JSP pages present. + Cookie JSESSIONID created without the httponly flag + OSVDB-3720: /examples/jsp/snp/snoop.jsp: Displays information about page retrievals, including other users. + OSVDB-3233: /manager/manager-howto.html: Tomcat documentation found. + /manager/html: Default Tomcat Manager interface found + 6544 items checked: 1 error(s) and 10 item(s) reported on remote host + End Time: 2022-09-16 15:50:03 (GMT0) (101 seconds) ————————————————————————— + 1 host(s) tested
You can view the generated events by navigating to Site > Secure WAN Edge IDP/URL Events.
Figure 4 shows IDP events generated for the Session Smart Router.
In the previous example, you used passive logging for the events by using IDP profile type Alerts. Next, use IDP profile type Strict to stop or mitigate the events. When you use the Strict profile, the IDP engine closes TCP connections against the detected attacks.
You can follow the same process as shown in the sample. However, this time you change the spoke device template and change the IDP profile from Alert to Strict, as shown in Figure 5.
Run the security scanner. You'll notice that the scanner takes longer to run because it detects more errors and less events.
nikto -h http://172.16.77.155:8080 – Nikto v2.1.5 ————————————————————————— + Target IP: 172.16.77.155 + Target Hostname: 172.16.77.155 + Target Port: 8080 + Start Time: 2022-09-16 16:01:51 (GMT0) ————————————————————————— + Server: No banner retrieved + The anti-clickjacking X-Frame-Options header is not present. + No CGI Directories found (use ‘-C all’ to force check all possible dirs) + Server leaks inodes via ETags, header found with file /favicon.ico, fields: 0xW/21630 0x1556961512000 + OSVDB-39272: favicon.ico file identifies this server as: Apache Tomcat + Allowed HTTP Methods: GET, HEAD, POST, PUT, DELETE, OPTIONS + OSVDB-397: HTTP method (‘Allow’ Header): ‘PUT’ method could allow clients to save files on the web server. + OSVDB-5646: HTTP method (‘Allow’ Header): ‘DELETE’ may allow clients to remove files on the web server. + /examples/servlets/index.html: Apache Tomcat default JSP pages present. + 6544 items checked: 5657 error(s) and 6 item(s) reported on remote host + End Time: 2022-09-16 16:05:27 (GMT0) (216 seconds) ————————————————————————— + 1 host(s) tested
Figure 6 shows that for some events, the action is to close the session to mitigate the threats (under the Action field).
Intrusion Detection and Prevention (IDP) Bypass Profiles
The IDP Bypass works in conjunction with the intrusion prevention system (IPS) rules to prevent unnecessary alarms from being generated. You configure IDP profile when you want to exclude a specific destination, or attack type from matching an IDP rule. This prevents IDP from generating unnecessary alarms.
An IDP profile can have multiple bypass profiles, each with multiple bypass rules.
To create IDP bypass profile:
In the Juniper Mist cloud portal, select Organization > WAN > Application Policy > IDP bypass profiles.
The page displays a list of IDP bypass profiles (if available)
- Click Add Bypass Profile to create a profile.
- In the Create Bypass Profile window:
- Add Name. Use alphanumerics, underscores, or dashes, and cannot exceed 63 characters.
- Select base profile. The supported base profiles are:
- Standard
- Strict
- Critical only– SRX
You need a base IDP profile to create an IDP bypass profile.
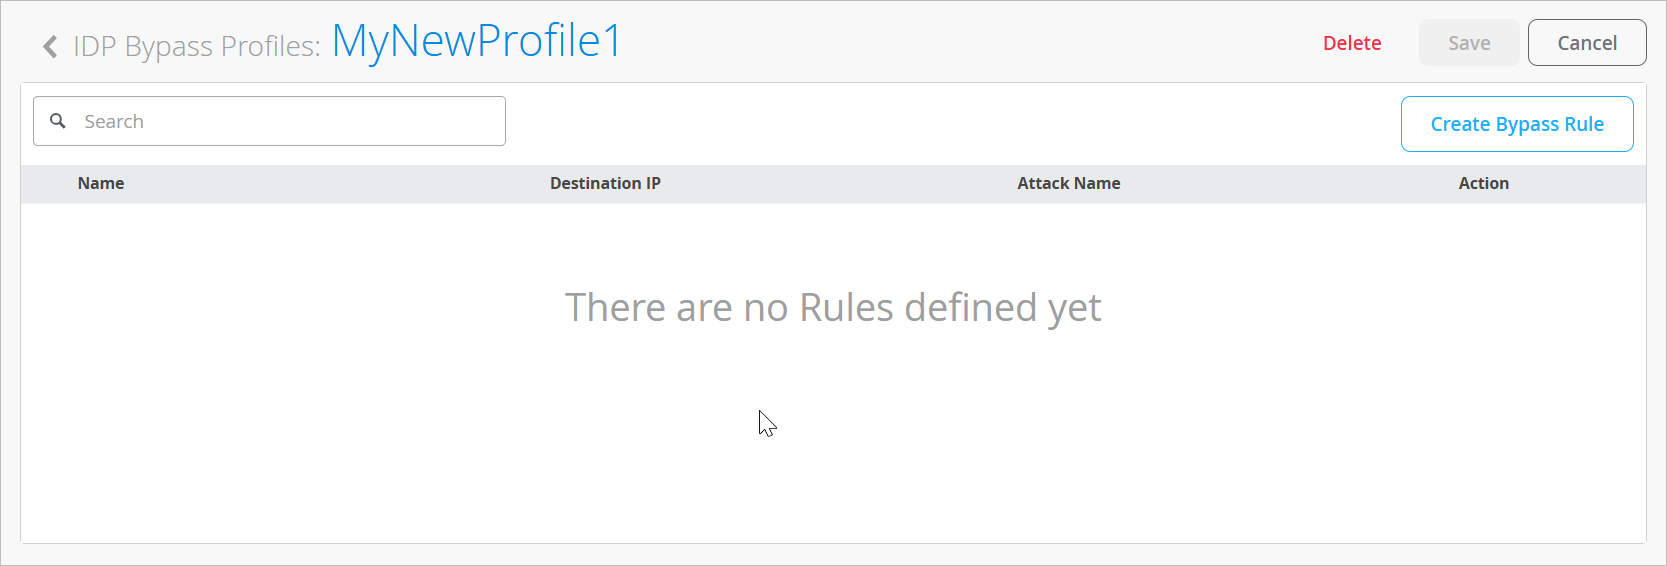
- Click Next. The portal opens a rules page where you can
define the rule for the IDP bypass profile.Figure 7: IDP Bypass Profile Rule
- Action – Select the associated traffic action. Available options are — Alter, Drop, or Close.
- Destination IP – IP address of the destination for traffic you want to exempt. You can select one or more destination IP address from the populated list or you can enter the destination IP address by clicking Add Destination IP.
- Attack Name – Select the attacks you want IDP to exempt for the specified destination addresses from the displayed list. Alternatively you can enter the attack by clicking Add Attack Name. The attack you enter must be of type supported by Juniper Networks IPS Signature.
- Click Save.
The rule you created appears under IDP Bypass Profile pane. Next, you need to apply the IDP bypass profile in an application policy similar applying any IDP profile by using the following steps:
- In the Juniper Mist cloud portal, click Organization > WAN Edge Templates and select a template for your spoke device.
- Under the IDP column, select the IDP profile. For example, select the IDP bypass
profile that you created in the previous step. Figure 8: Apply IDP Bypass Profile in Application Policy
- Click Save once you configure other options in application policy. See Configure Application Policies on Session Smart Routers.
You can view the generated events by navigating to Site > Secure WAN Edge IDP/URL Events.