Help us improve your experience.

Let us know what you think.

Do you have time for a two-minute survey?

header-navigation
keyboard_arrow_up
close
keyboard_arrow_left
Juniper Apstra 5.0.1 / 5.0.0 User Guide
Table of Contents Expand all
list Table of Contents
file_download PDF
{ "lLangCode": "en", "lName": "English", "lCountryCode": "us", "transcode": "en_US" }
English
keyboard_arrow_right

Log in to Apstra GUI

Release: Juniper Apstra 5.0
{}
Change Release
date_range 04-Nov-24

Access the Apstra GUI to design, build, deploy, operate and validate your network.

  1. From the latest web browser version of Google Chrome or Mozilla FireFox, enter the URL https://<apstra_server_ip> where <apstra_server_ip> is the IP address of the Apstra server (or a DNS name that resolves to the IP address of the Apstra server).
  2. If a security warning appears, click Advanced and Proceed to the site. The warning occurs because the SSL certificate that was generated during installation is self-signed, and you didn't replace it with a signed one when you installed the software. We recommend, for security reasons, that you replace the SSL certificate. (See the Juniper Apstra Installation and Upgrade Guide for details.)
  3. From the login page, enter username admin and the secure password that you set when you configured the Apstra server. (Entering the password incorrectly too many times locks you out for a few minutes depending on how password requirements have been configured. You can update password complexity requirements. )

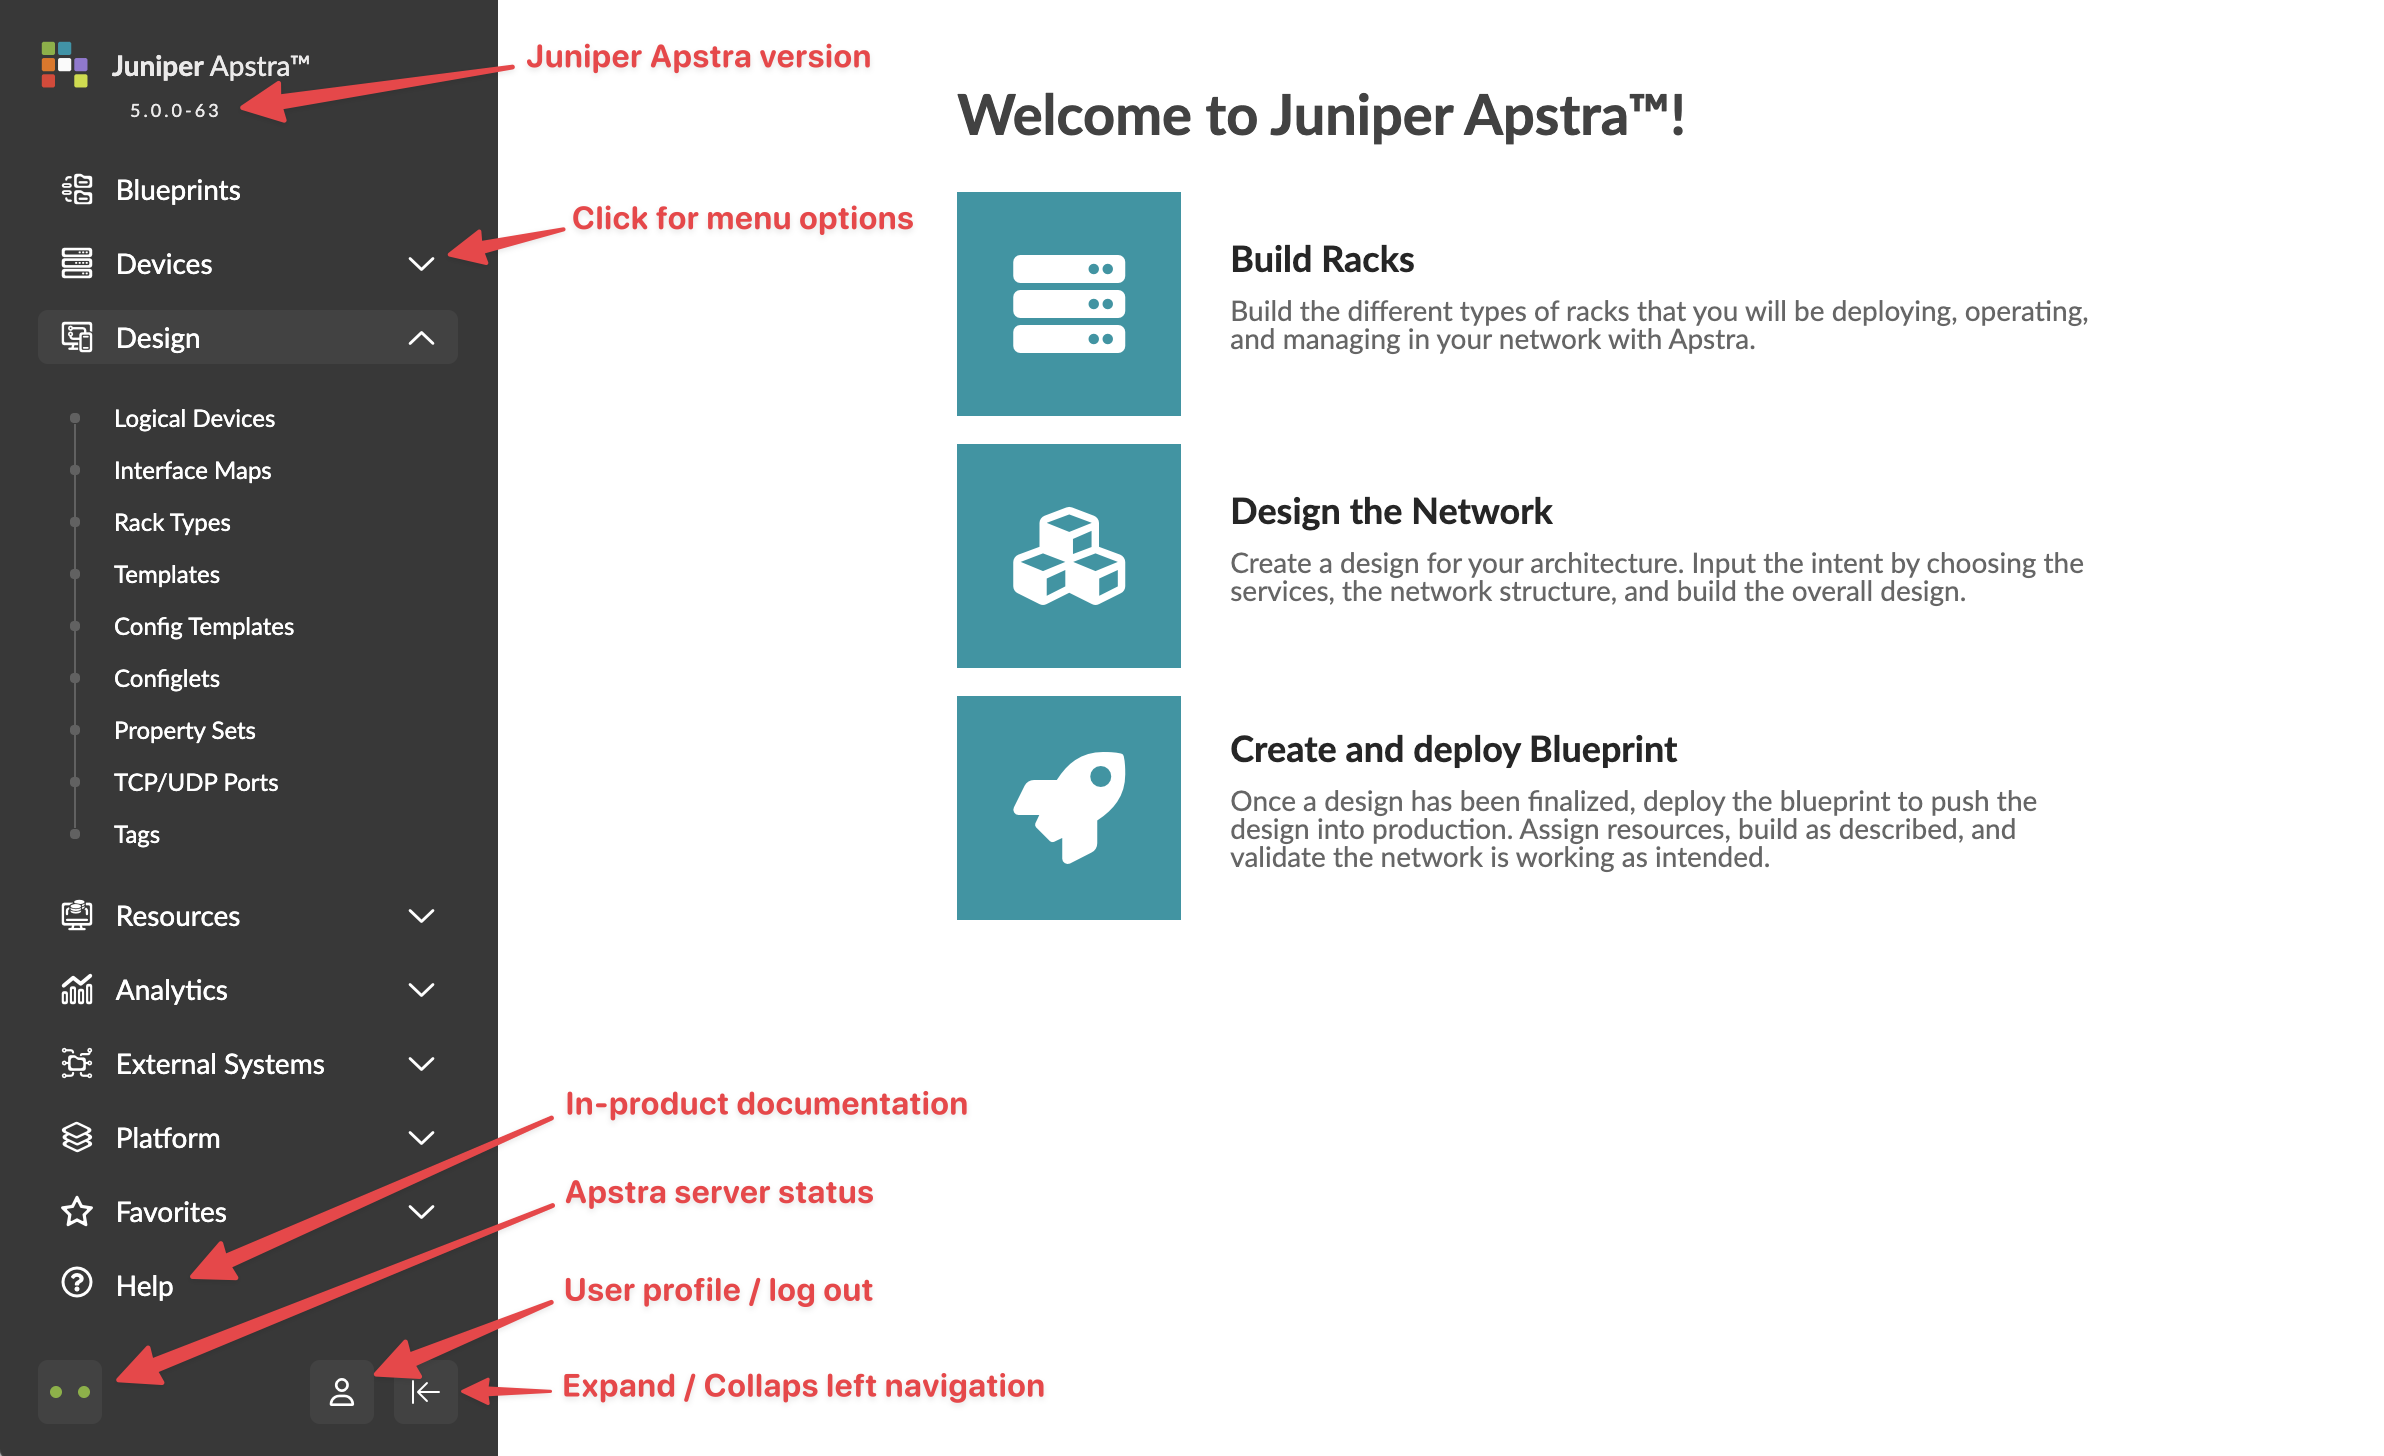
    The main screen appears.

Next Steps: See the Get Started section of this guide for the general workflow for building your network, with links to more information.
footer-navigation