Change Assigned Device Admin States
You can change the admin state assigned to one or more devices from the Managed Devices table, or you can change it for a single device from the Device selection page.
Change Admin State from Managed Devices Table
-
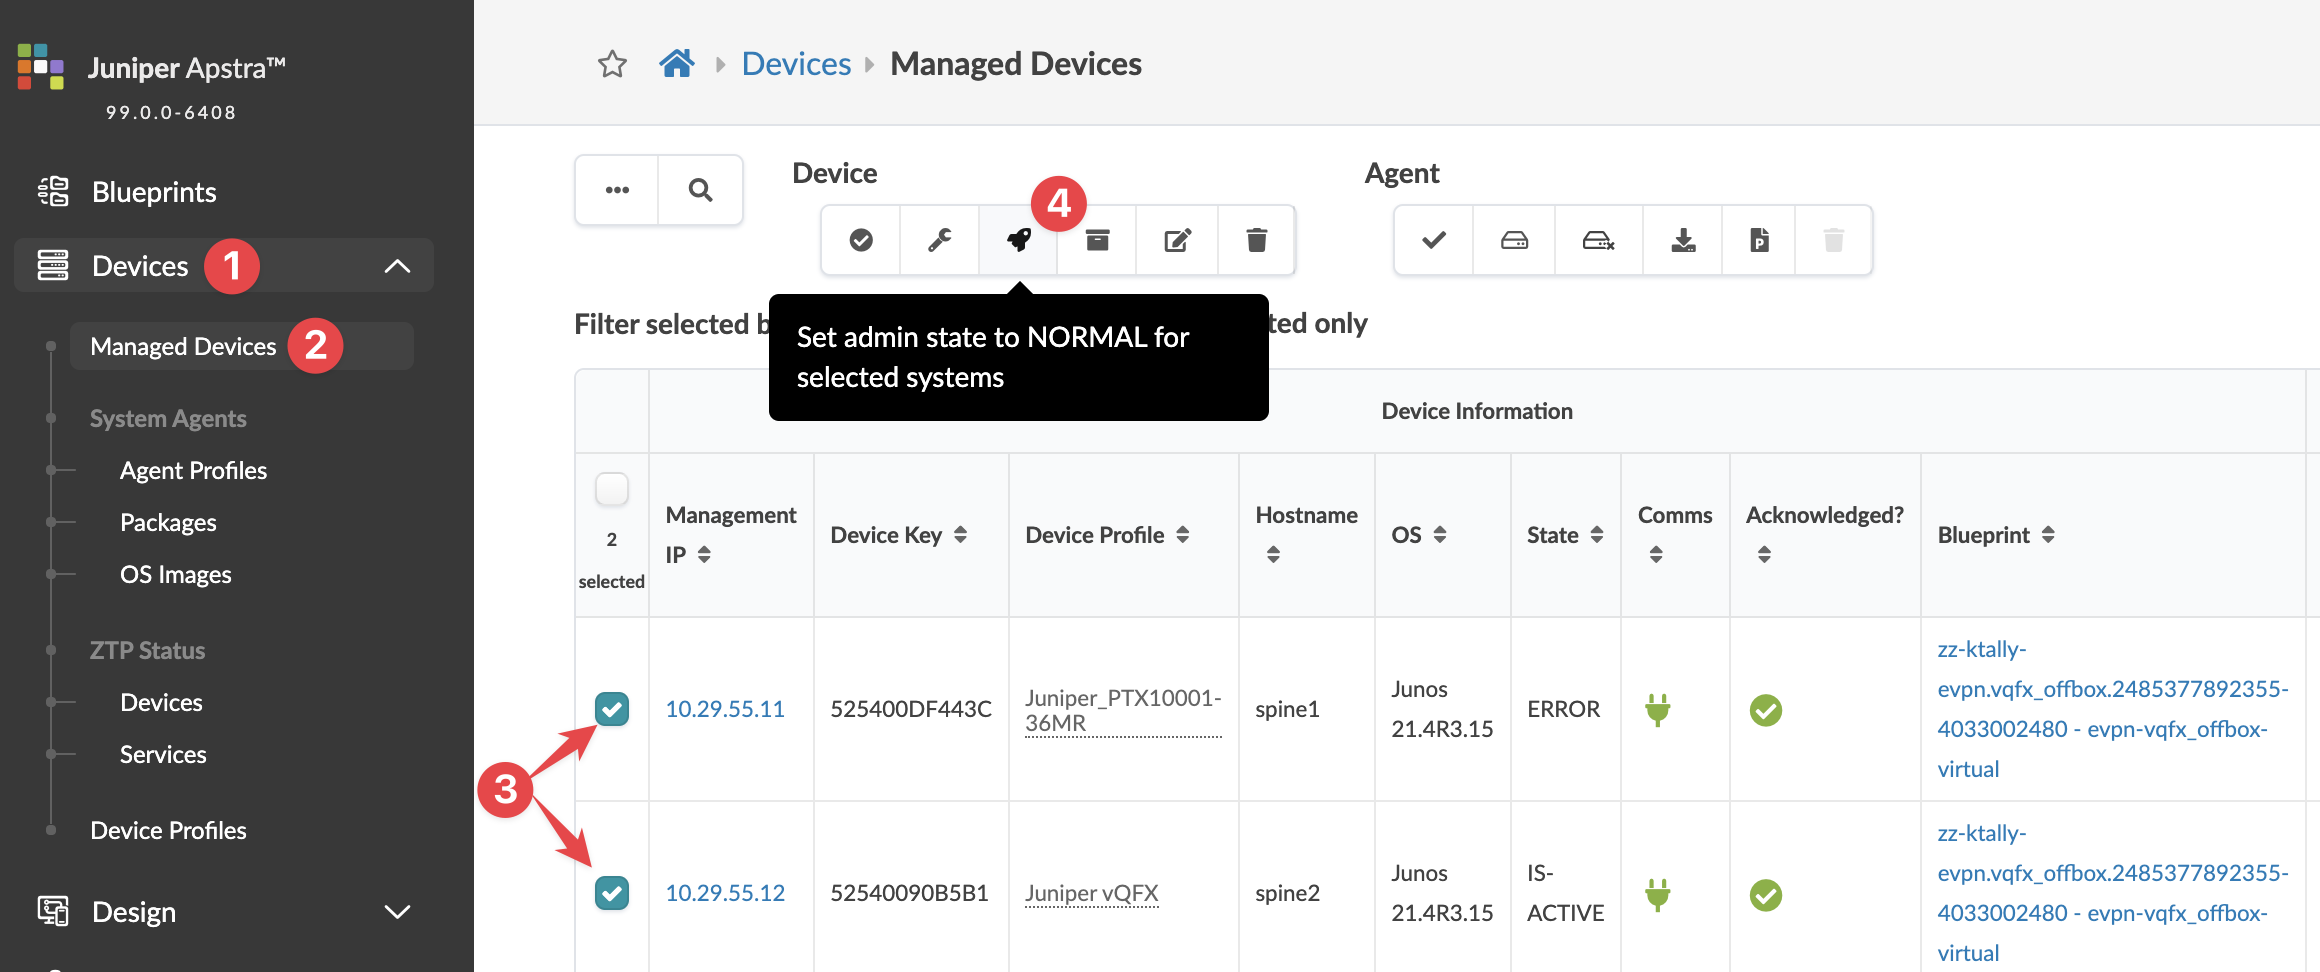
From the left navigation menu in the Apstra GUI, navigate to
Devices > Managed Devices and select the check
box(es) for the device(s) with the admin state(s) to change.

-
In the Device menu that appears above the table,
click the button for the applicable admin state.
-
Set admin state to NORMAL for selected systems - If you're upgrading a device network operating system, make sure the admin state is set to NORMAL before beginning the process.
-
Set admin state to DECOMM for selected systems - If you're decommissioning a device, setting the admin state to DECOMM is part of a larger process. See Remove Device from Managed Devices for the workflow and more details.
-
Set admin state to MAINT for selected items - this state is no longer used.
-
- Click Confirm to change the admin state and return to the Managed Devices table.
Change Admin State from Device Selection
-
From the left navigation menu in the Apstra GUI, navigate to
Devices > Managed Devices and click the
management IP for the device with the admin state to change.

-
On the Device detail page that opens, click the
Edit button (upper-right).

-
In the dialog that opens, select the Admin
State.
-
Set admin state to NORMAL for selected systems - If you're upgrading a device network operating system, make sure the admin state is set to NORMAL before beginning the process.
-
Set admin state to DECOMM for selected systems - If you are decommissioning a device, setting the admin state to DECOMM is part of a larger process. See Remove Device from Managed Devices for the workflow and more details.
-
Set admin state to MAINT for selected items - this state is no longer used.
-
- Click Update to change the admin state and return to the Device detail page.
