Create User Profile
Creating a user profile enables a user to access the Apstra
platform via its GUI. (To enable a user to access the Apstra platform via SSH, create a local
Linux system user.)
-
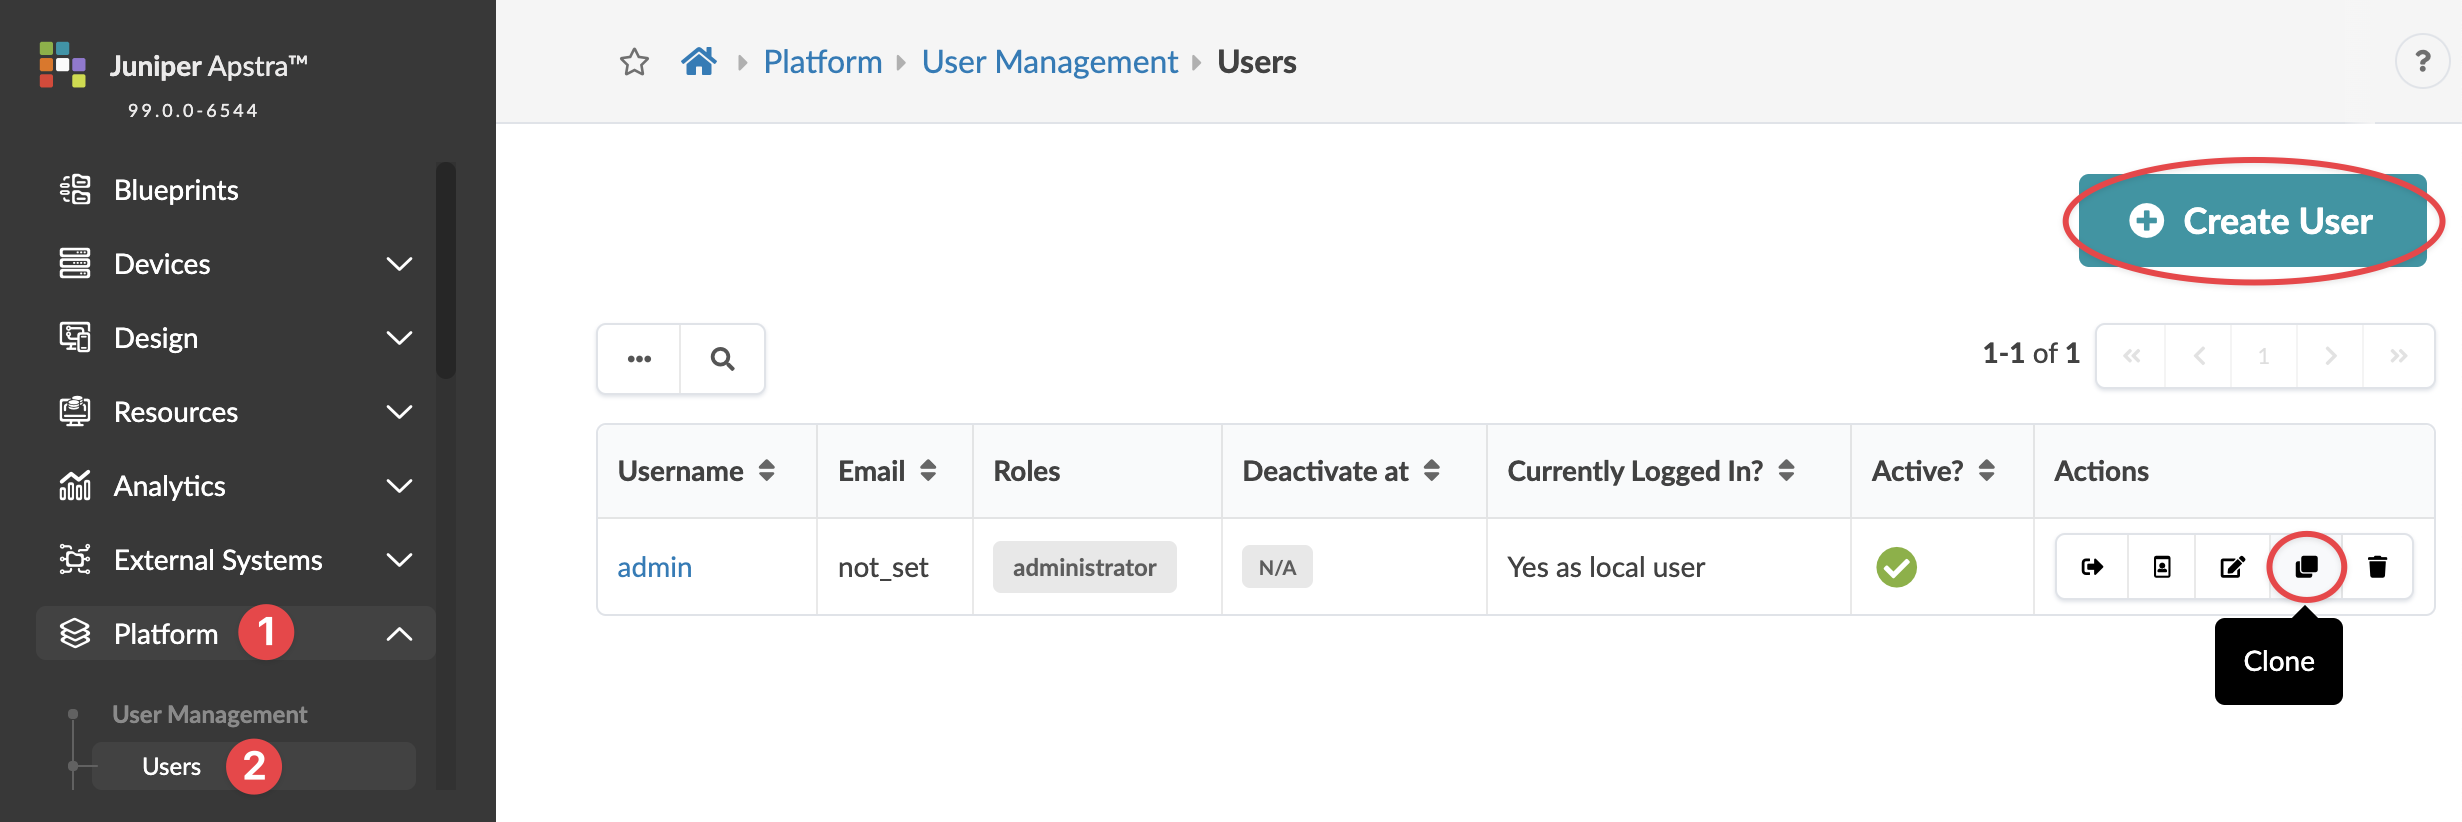
From the left navigation menu, navigate to Platform > User Management
> Users and click Create User (or to copy an
existing user profile and customize it, click the Clone button for
the user profile to copy).
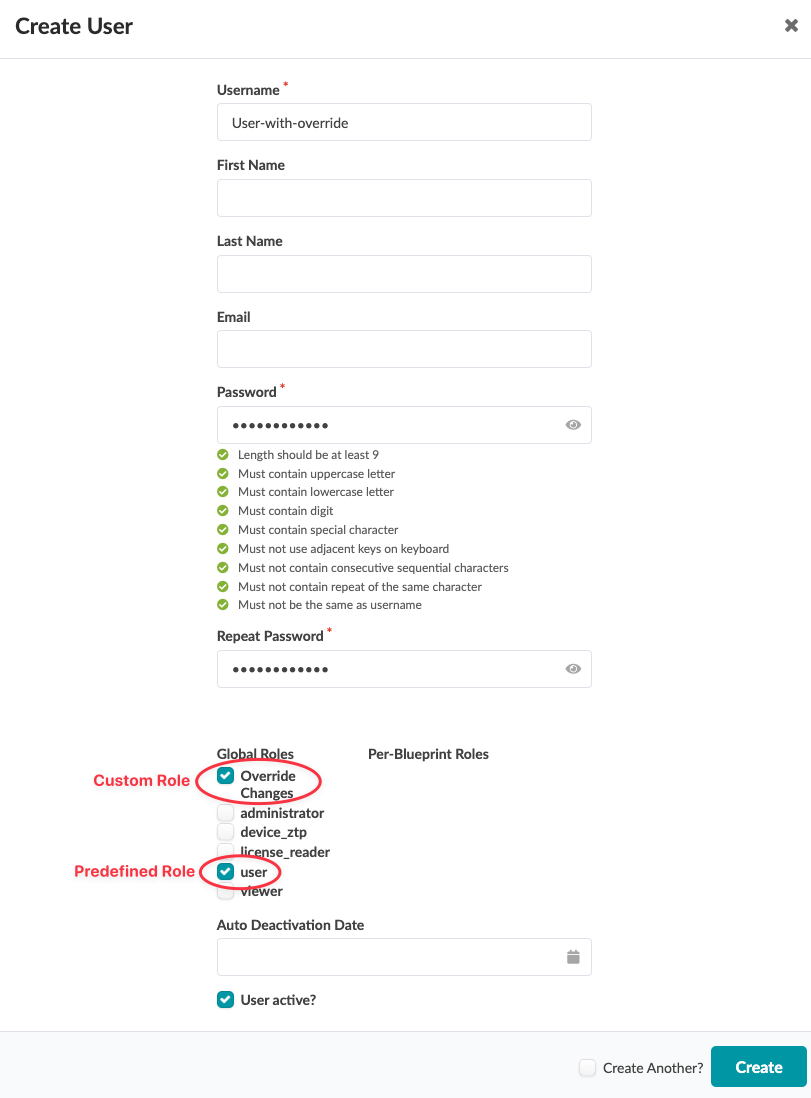
 The Create User dialog opens (or the Clone User dialog opens, as applicable).
 -
Enter a username, enter a password that meets password complexity requirements, then
re-enter the password. (You can change requirements from
Platform > Security > Password Complexity Parameters.)

-
Select the check boxes for one or more roles for the new user. (To see permissions for
each of the global roles, navigate to Platform > User Management > Roles.) If custom roles
have been created, they appear as options along with the predefined roles.
For example, you may want a user to have the default roles for user, and also be able to see who has staged any blueprint changes and be able to override those changes. First, create a custom role with the override permission. Then, create a user with two roles: the user role and this custom role.
- To deactivate the user automatically on a specific data and time, select the date and time from the Auto Deactivation Date calendar. You can also immediately deactivate and activate the user by deselecting or selecting the User active? check box. (This feature is new in Apstra version 5.0.0.)
- Click Create to create the user profile and return to the table view.
