If none of the predefined logical devices meet the capability requirements of your
qualified device, you can create a custom one.
-
From the left navigation menu, navigate to Design > Logical
Devices and click Create Logical Device.
-
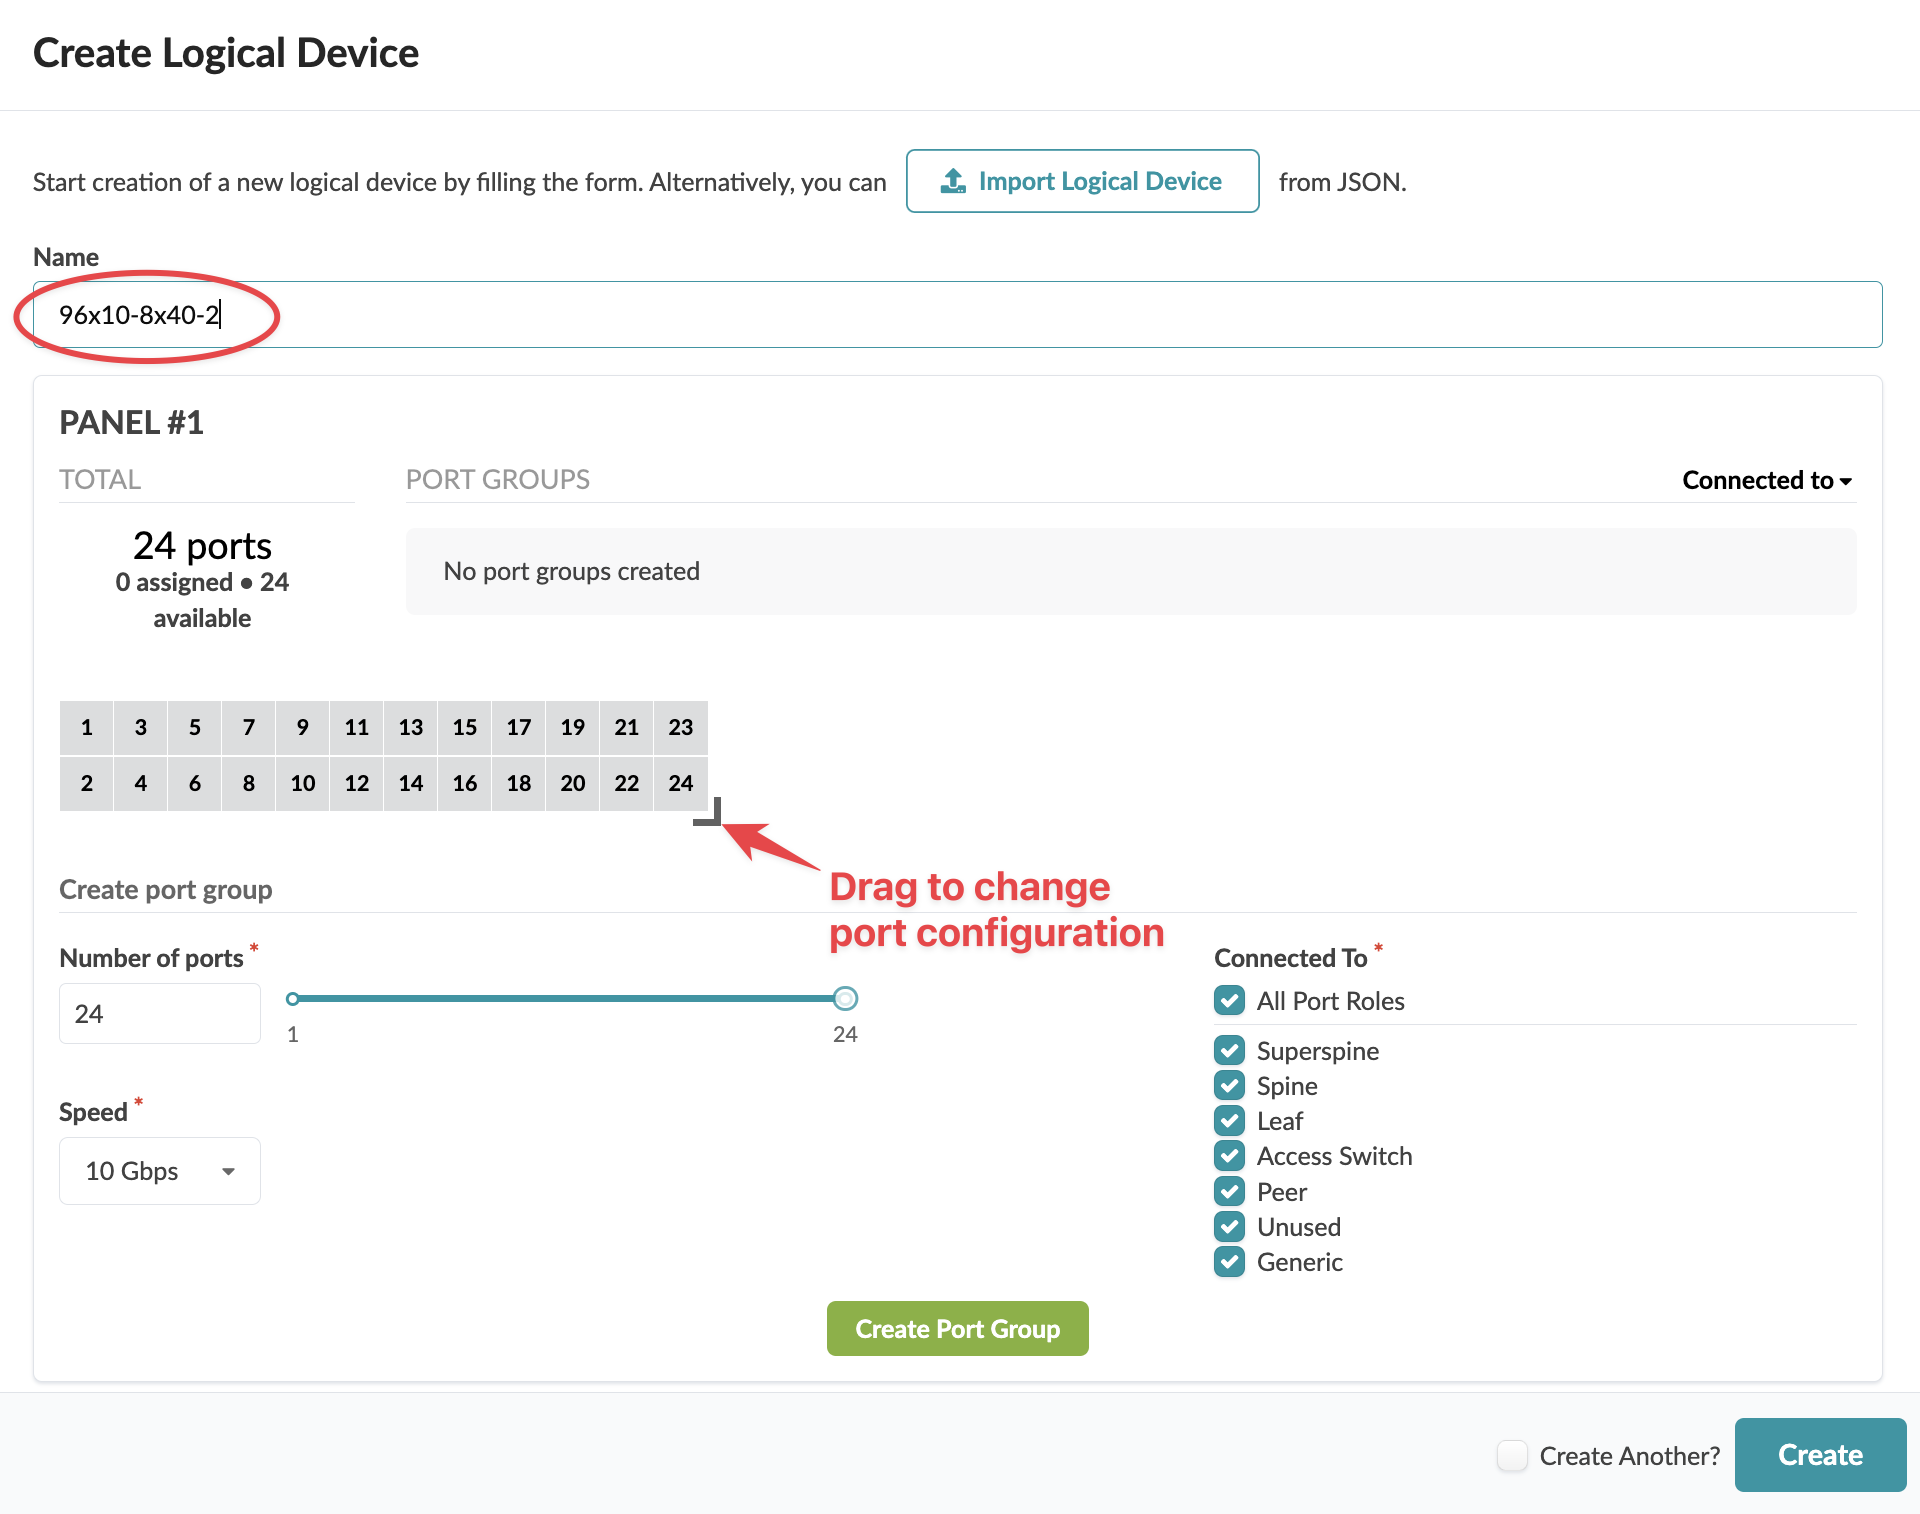
In the dialog that opens, enter a unique name for the logical device (64 characters or
fewer).
Using descriptive names makes it easier for you to find later. In our example, we're
naming the logical device 96x10-8x40-2, which represents the following
configuration:
-
96x10 - a panel with one port group consisting of 96 ports at 10 Gbps
-
8x40 - a panel with one port group consisting of 8 ports at 40 Gbps
-
2 - number of panels (rack units)
-
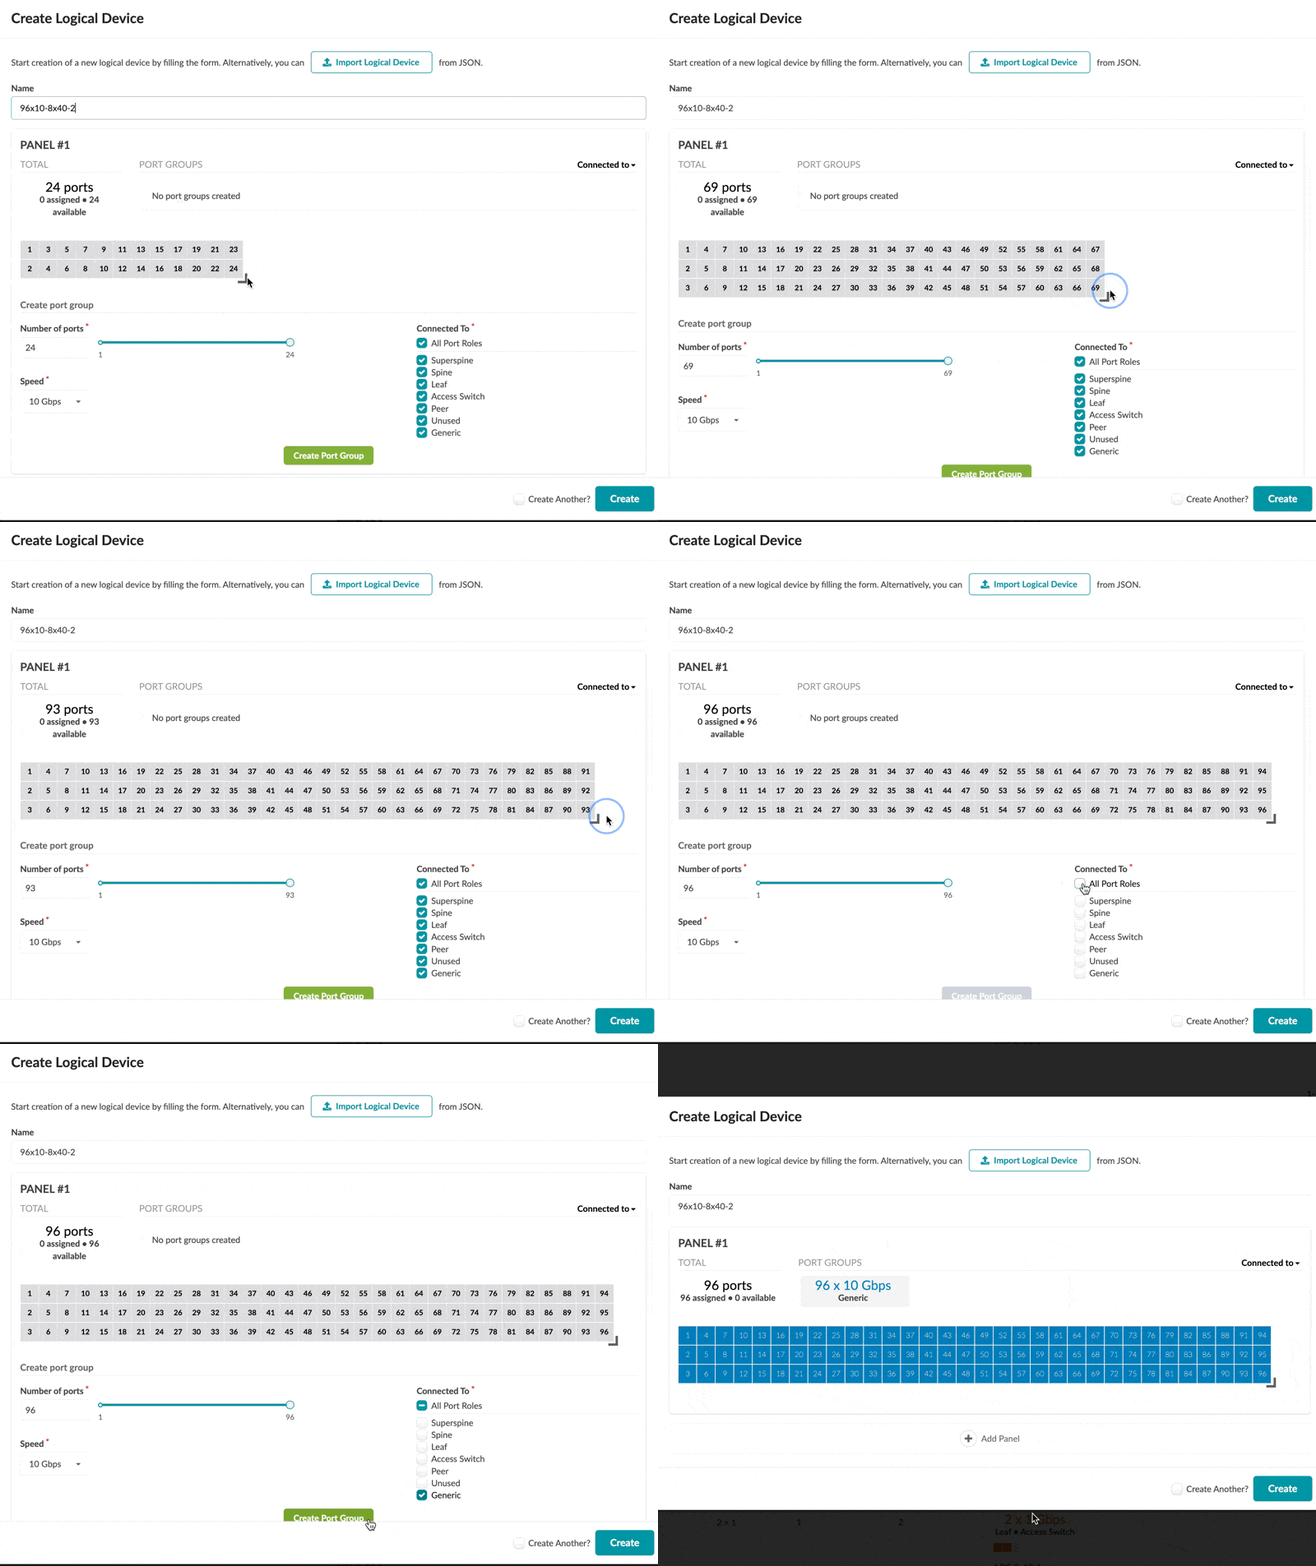
Specify the number and arrangement of ports by dragging from the bottom-right corner of
the port layout.
The default panel layout consists of 24 ports, 2 rows of 12 ports each. In our example,
the first panel has 96 ports, 3 rows of 32 ports each.
-
To create a port group, specify the Number of ports and their
Speed; select the role(s) for these ports and click
Create Port Group.
-
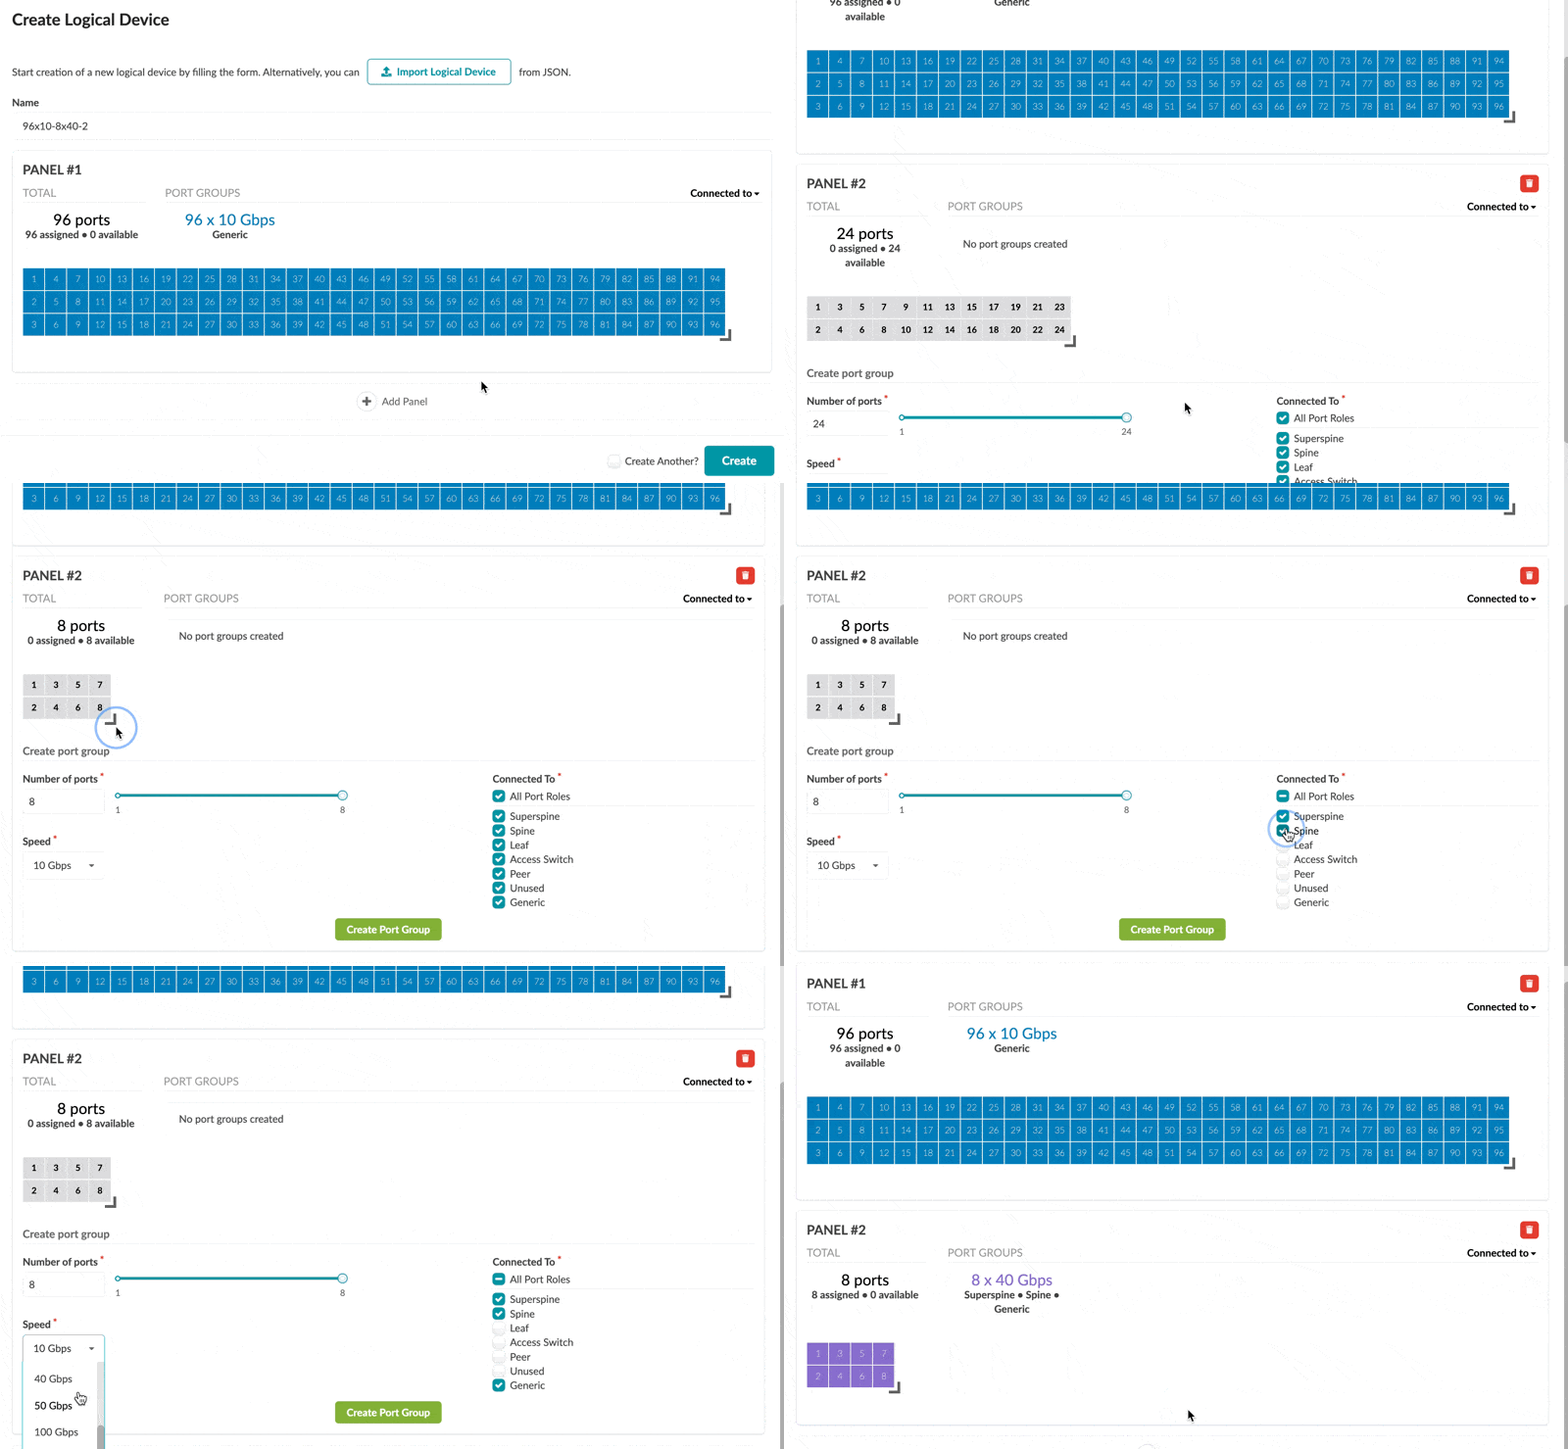
If your panel design has multiple port speeds and roles, create additional port groups
for them in the same manner. All ports must be assigned to a port group. For any ports
that won't be used, create a port group and assign it the Unused role.
In our example, the first panel has 96 ports, all with the same speed and role, so
we're using all the ports in one port group.
-
To add a panel, click Add Panel (bottom-middle) and repeat the
steps as for the first panel.
Our example has a second panel with 8 ports at 40 Gbps with superspine, spine, and
generic roles.
-
Click Create (bottom-right) to create the logical device and
return to the table view.
Logical devices are used in interface maps, rack types and templates in Day 0 operations.
They are also used in Day 2 operations.


