Update Virtual Network Assignments
You can assign (and unassign) multiple VXLAN virtual networks at the same time from the Apstra GUI.
Assign / Unassign One Virtual Network
When you create a virtual network, you assign it to
one or more nodes. You can edit the VN to assign it to additional nodes and/or to
unassign it from nodes that it's already assigned to.
-
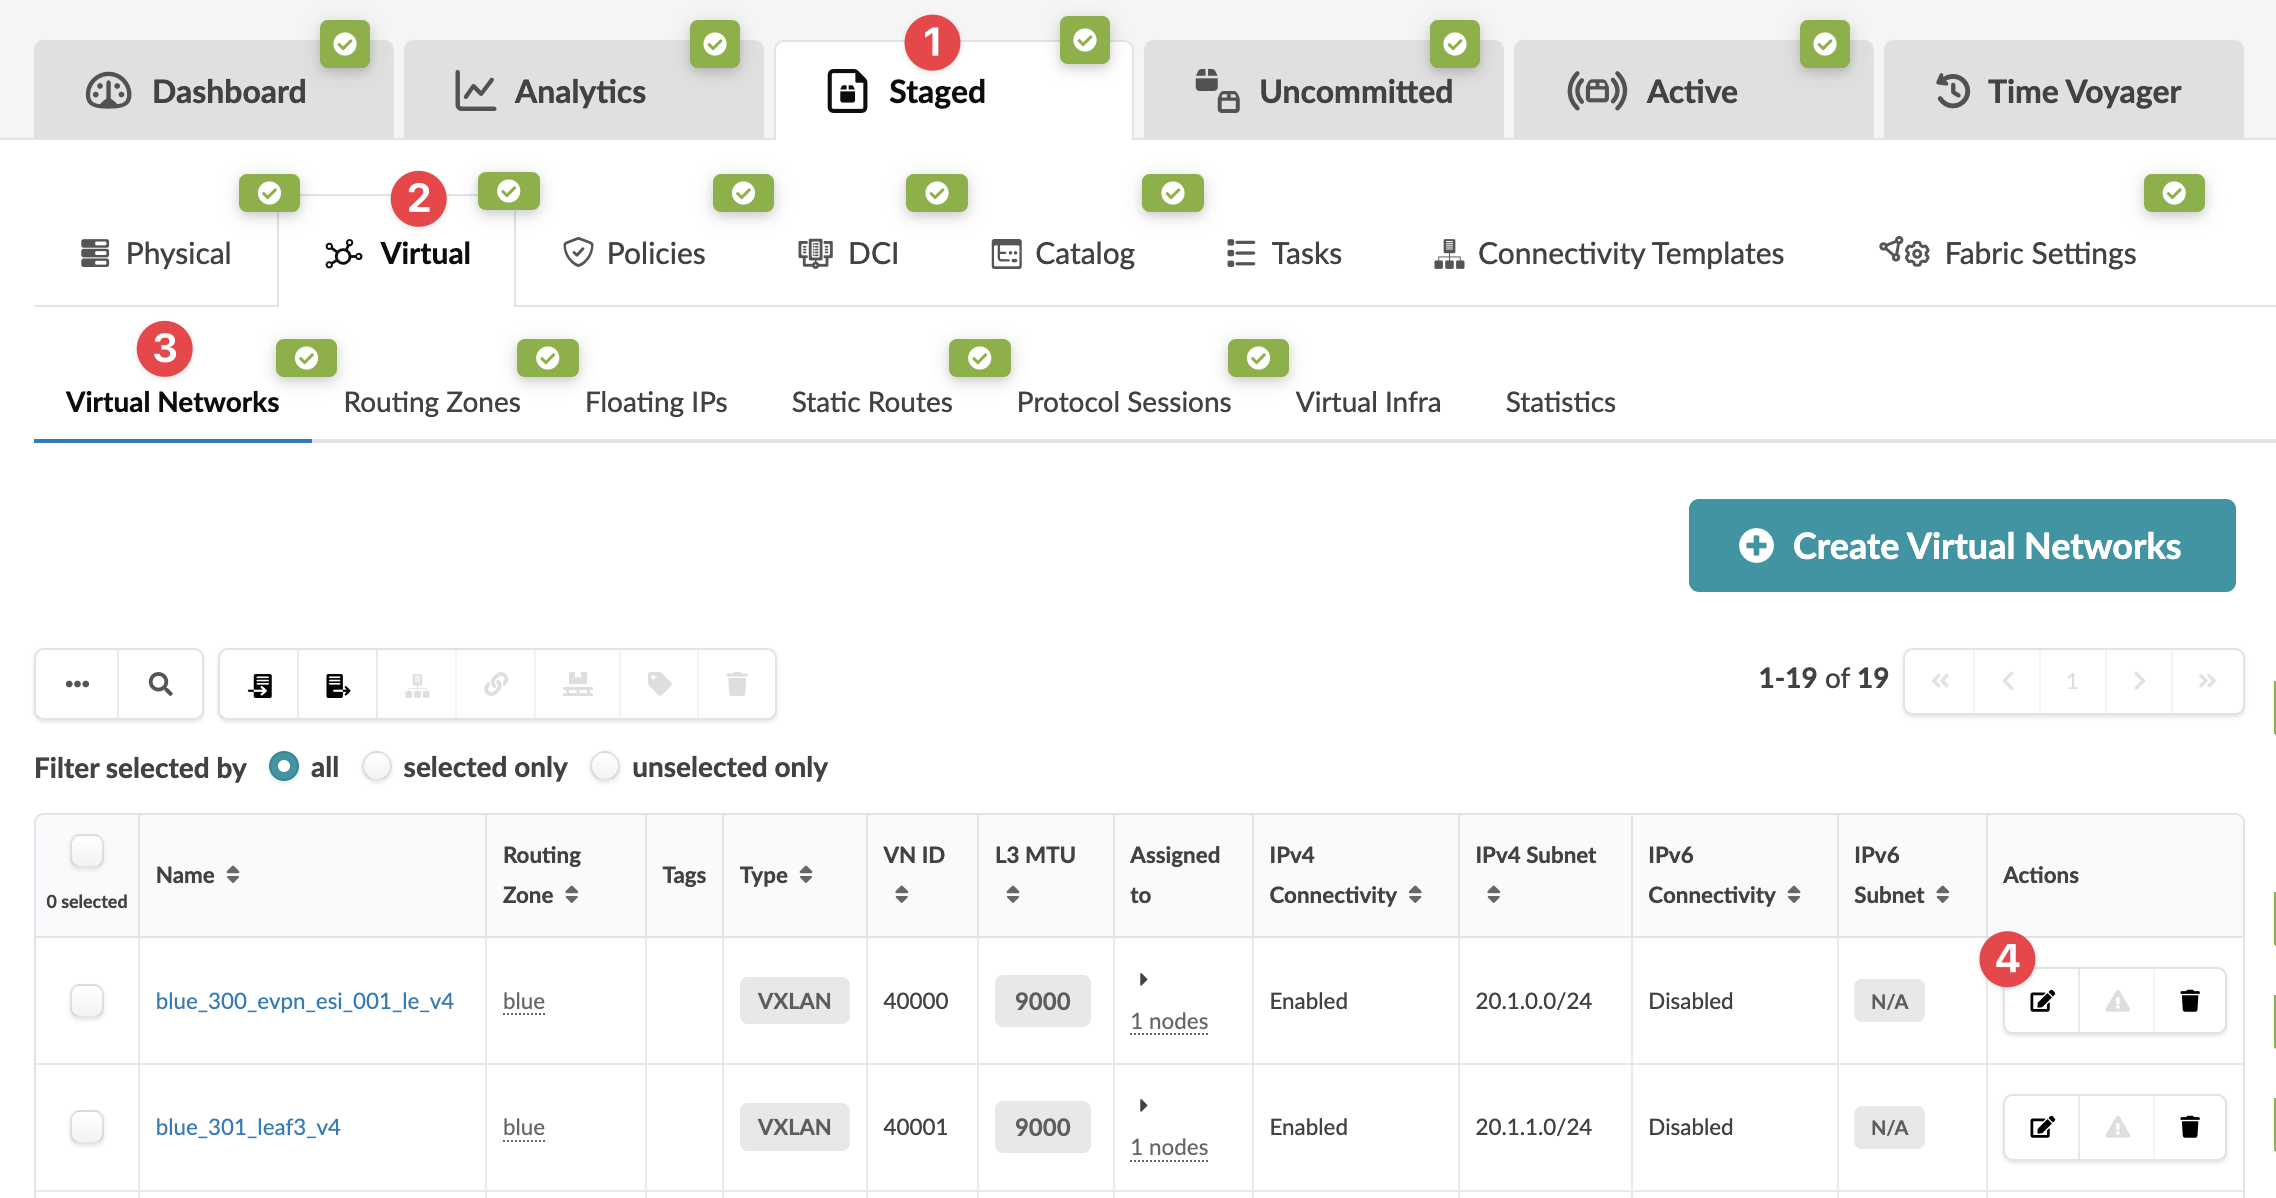
From the blueprint, navigate to Staged > Virtual > Virtual
Networks and click the Edit button
for the virtual network to update.
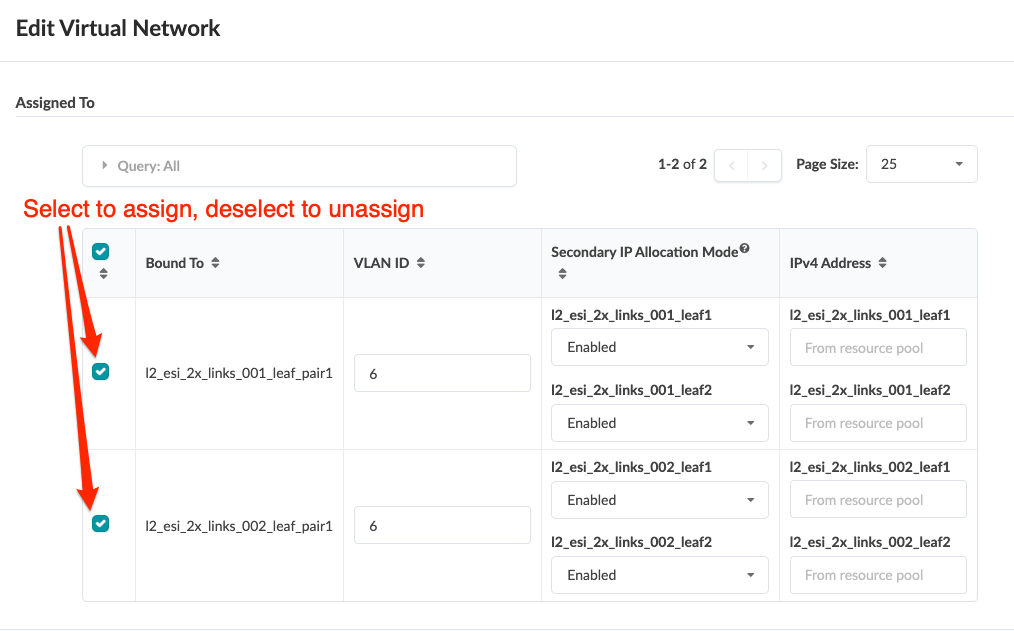
 The Edit Virtual Network dialog opens
 -
Scroll past the Virtual Network Parameters section
to the Assigned To section:
-
Assign the VN to one or more nodes by selecting the applicable node check box(es).
-
Unassign the VN from one or more nodes by deselecting the applicable node check box(es).
-
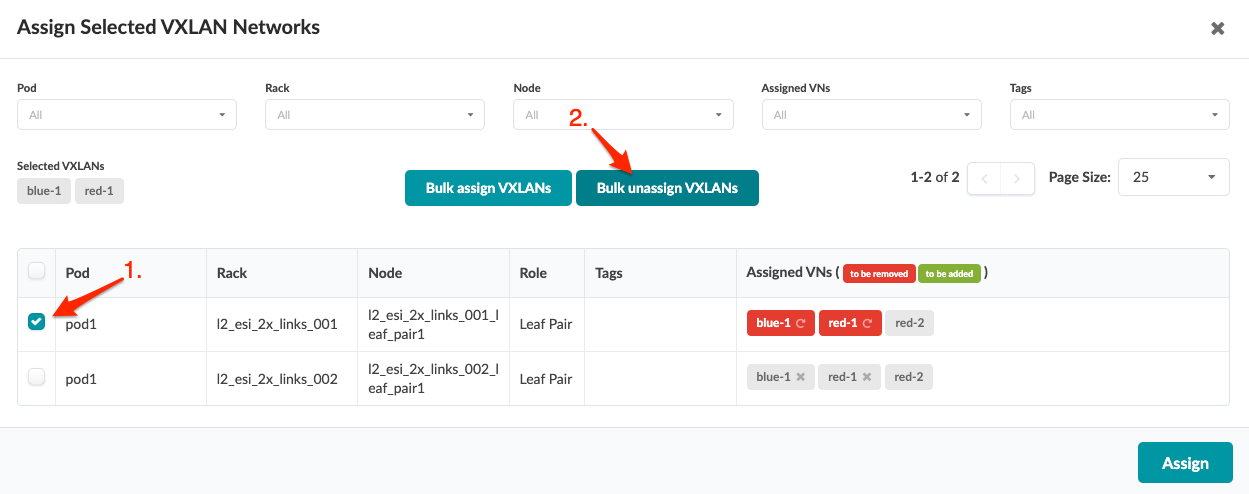
Assign / Unassign Multiple Virtual Networks
You can assign/unassign many virtual networks at the
same time. This is especially useful when you've added a rack as a Day 2 operation
and you need to assign a lot of virtual networks to it.
-
Click the Assign selected VXLAN networks button that
becomes available above the table (fourth of five buttons).
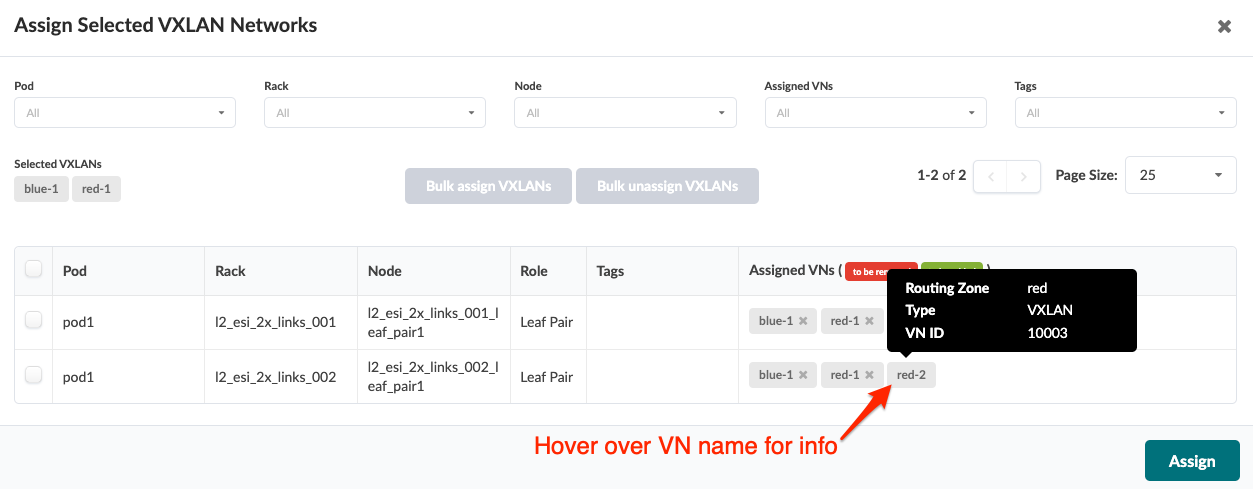
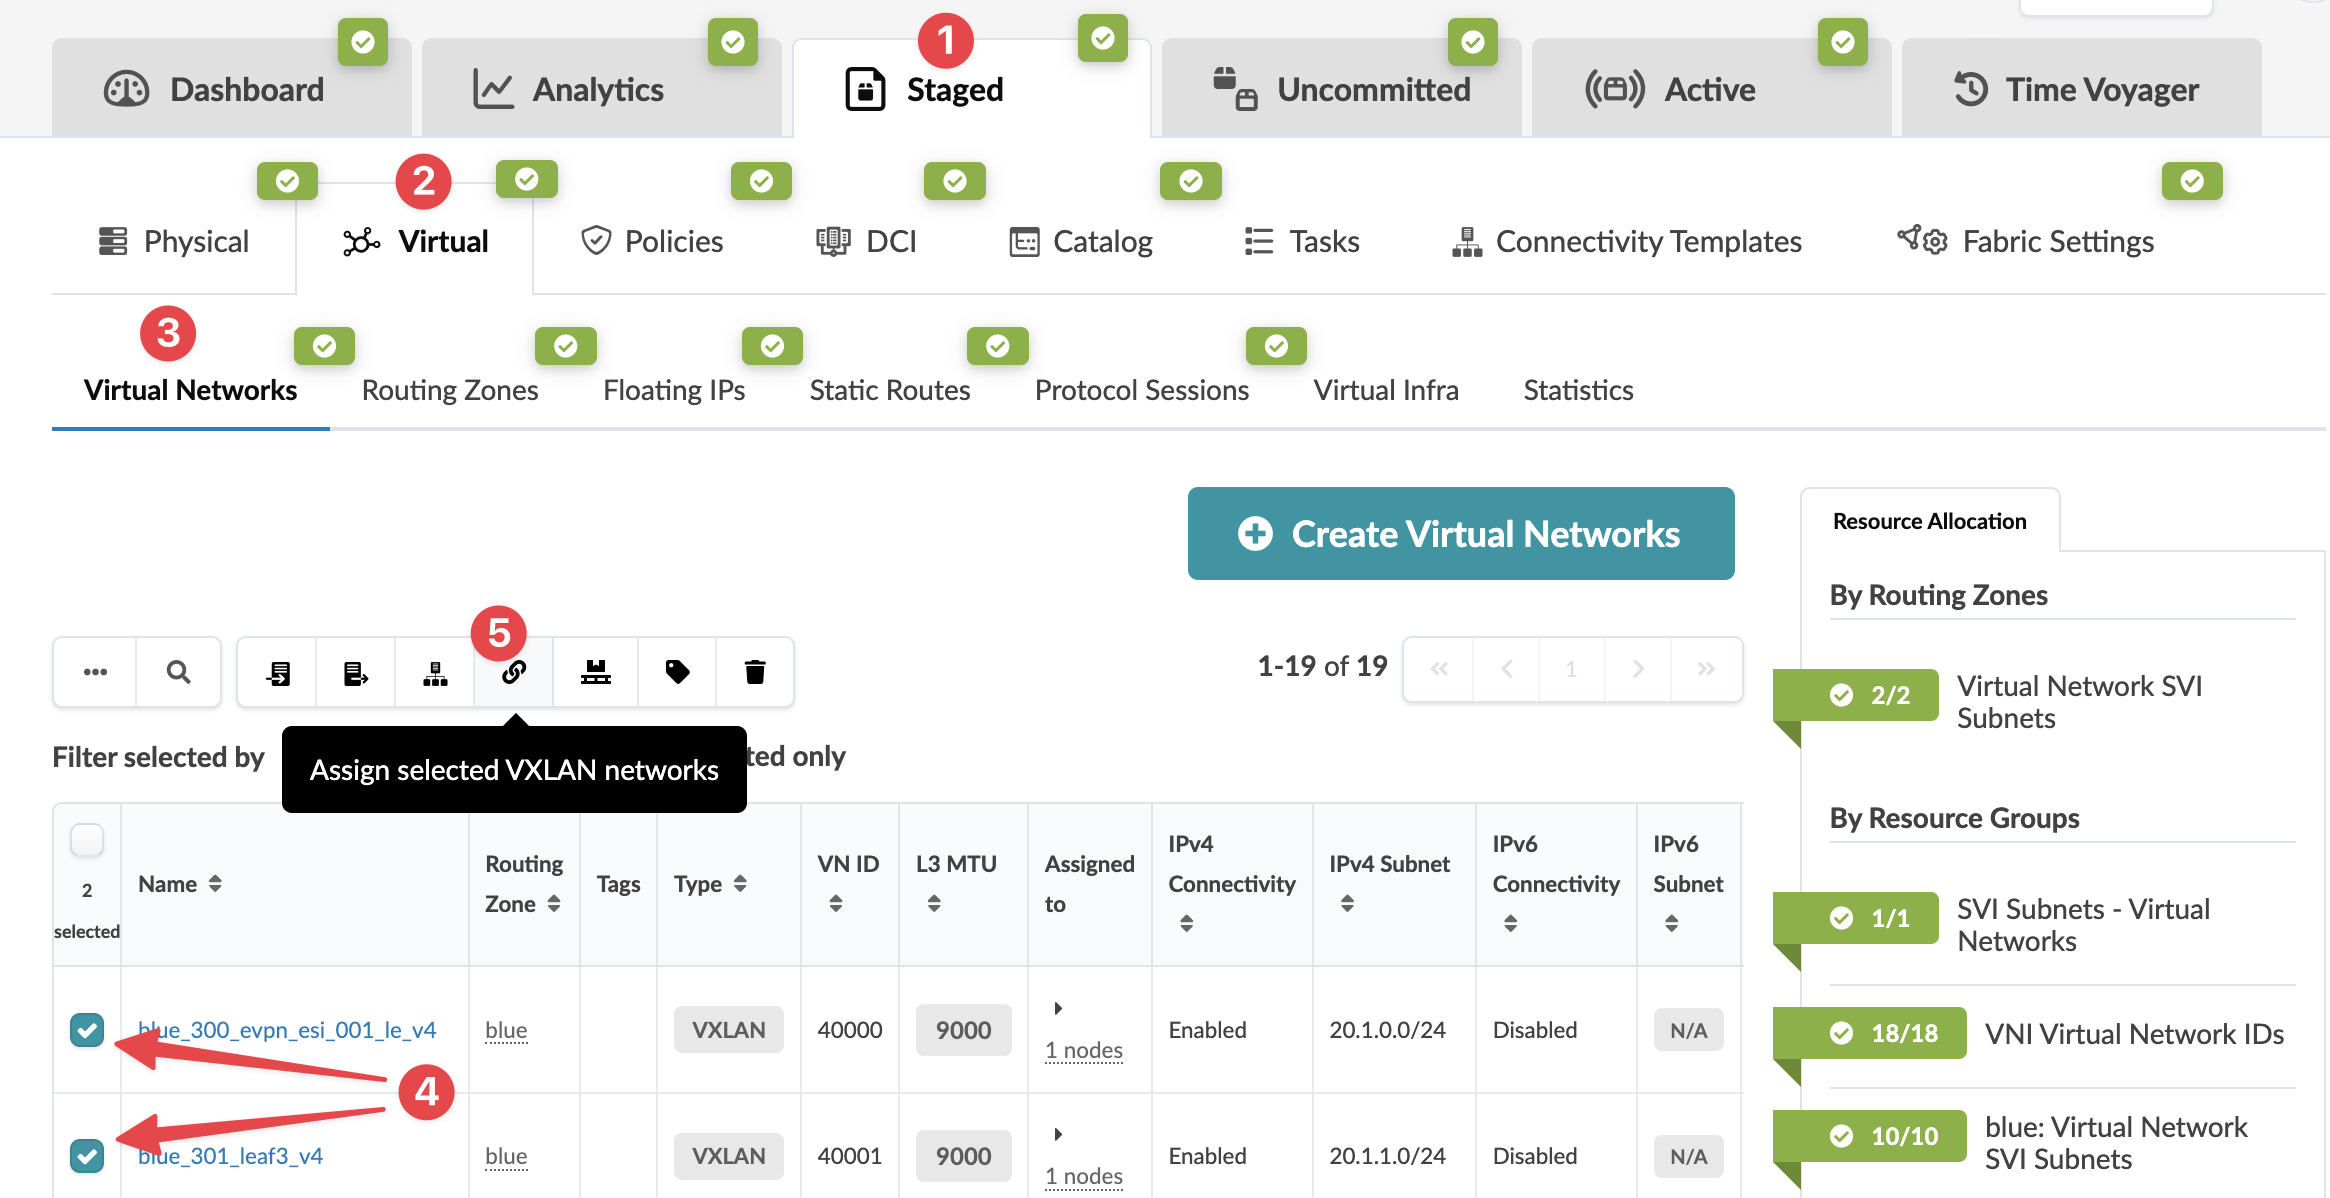 The Assign selected VXLAN networks dialog opens.
 -
In the dialog that opens, you can see the associated routing zone, VN type
and VN ID by hovering over the VNs that are already assigned.
-
Your selected VXLANs appear above the table on the left. The table shows
the VNs that are already assigned to nodes in the network. Select the check
boxes for one or more nodes. The Bulk assign VXLANs
and Bulk unassign VXLANs buttons become
available.