Configure an AP for Survey Mode
To plan where to deploy your access points (APs), onboard one AP and enable site survey mode so that you can use this AP to test wireless coverage throughout your site.
During a site survey, you place an AP at different locations at the site to measure signal strength, throughput, signal interference, packet loss, and other key parameters. Site surveys help you to determine the number of APs required for your site and the placement of APs to provide optimal wireless coverage.
To configure your AP for use in survey mode:
- Claim your AP and assign it to a site.See Claim a Juniper AP and Assign APs to Sites.
- Power on your AP. Ensure that the AP has connectivity to the Juniper Mist cloud so that the configurations can be pushed to the AP.
-
Ensure that AP configuration persistence is enabled and AP uplink monitoring is
disabled:
-
Scroll down to the AP Config Persistence section of the page and ensure that you've
selected the AP Config Persistence check box. Additionally,
ensure that you cleared the AP Uplink Monitoring check box in
the AP Uplink Monitoring section.
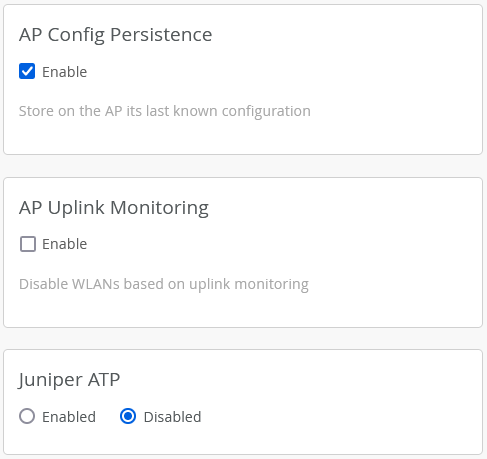
The AP stores the complete configuration if AP configuration persistence is enabled for your site. When the AP is unable to connect to the Juniper Mist cloud, the AP can reboot from this stored configuration and continue to transmit beacons.
When AP uplink monitoring is enabled, the AP broadcasts the service set identifier (SSID) only if an Ethernet link is present. When you operate the AP in survey mode, you connect the AP only to a portable power source such as a Power over Ethernet (PoE) injector or a battery pack. Without a connection to a switch, the AP lacks an Ethernet link. You must disable AP uplink monitoring to ensure that in survey mode, the AP can broadcast the SSID.
-
Scroll down to the AP Config Persistence section of the page and ensure that you've
selected the AP Config Persistence check box. Additionally,
ensure that you cleared the AP Uplink Monitoring check box in
the AP Uplink Monitoring section.
-
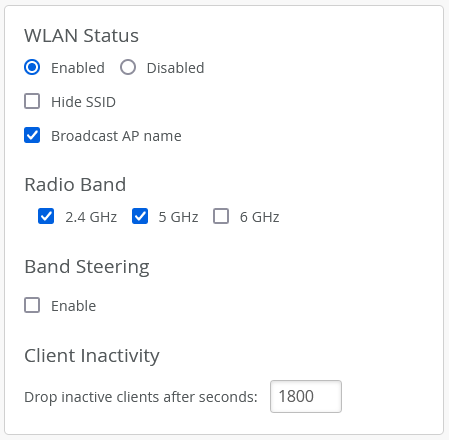
Create a WLAN.
-
(Optional) Navigate to the WLAN Status section and enable Broadcast AP
name. This setting enables you to view the name of the AP in third-party
Wi-Fi tools.
-
(Optional) Navigate to the WLAN Status section and enable Broadcast AP
name. This setting enables you to view the name of the AP in third-party
Wi-Fi tools.
-
Configure the power and channel settings for your AP:
Now, your AP will start beaconing a WLAN at your desired channel and power. As AP Config Persistence is enabled, you can remove cloud connectivity on the AP. The AP continues to beacon even after it reboots. You can use this AP to perform site surveys. You can move the AP around the site and measure its received signal strength indicator (RSSI) by using third-party site survey tools such as Ekahau AI Pro, NetAlly AirMagnet, iBWave, and Hamina Onsite.