Help us improve your experience.

Let us know what you think.

Do you have time for a two-minute survey?

Announcement: Try the Ask AI chatbot for answers to your technical questions about Juniper products and solutions.

close
header-navigation
keyboard_arrow_up
close
keyboard_arrow_left
list Table of Contents

Use Microsoft® Azure for Guest Portal Single Sign-On

date_range 19-Mar-25

Use this information if you want to integrate with Microsoft® Azure to authenticate guest users.

When you configure a WLAN in the Juniper Mist™ portal, you can set up a guest portal that allows users to sign on by using an Identity Provider (IdP). This topic provides tips for using Microsoft® Azure. You'd follow similar steps for other IdPs.

Set up your application in Microsoft Entra ID (previously Azure Active Directory):

  • Set up an application in Microsoft Entra ID (Azure AD) with single sign-on enabled.

  • Choose SAML (Security Assertion Markup Language) as the single sign-on method.

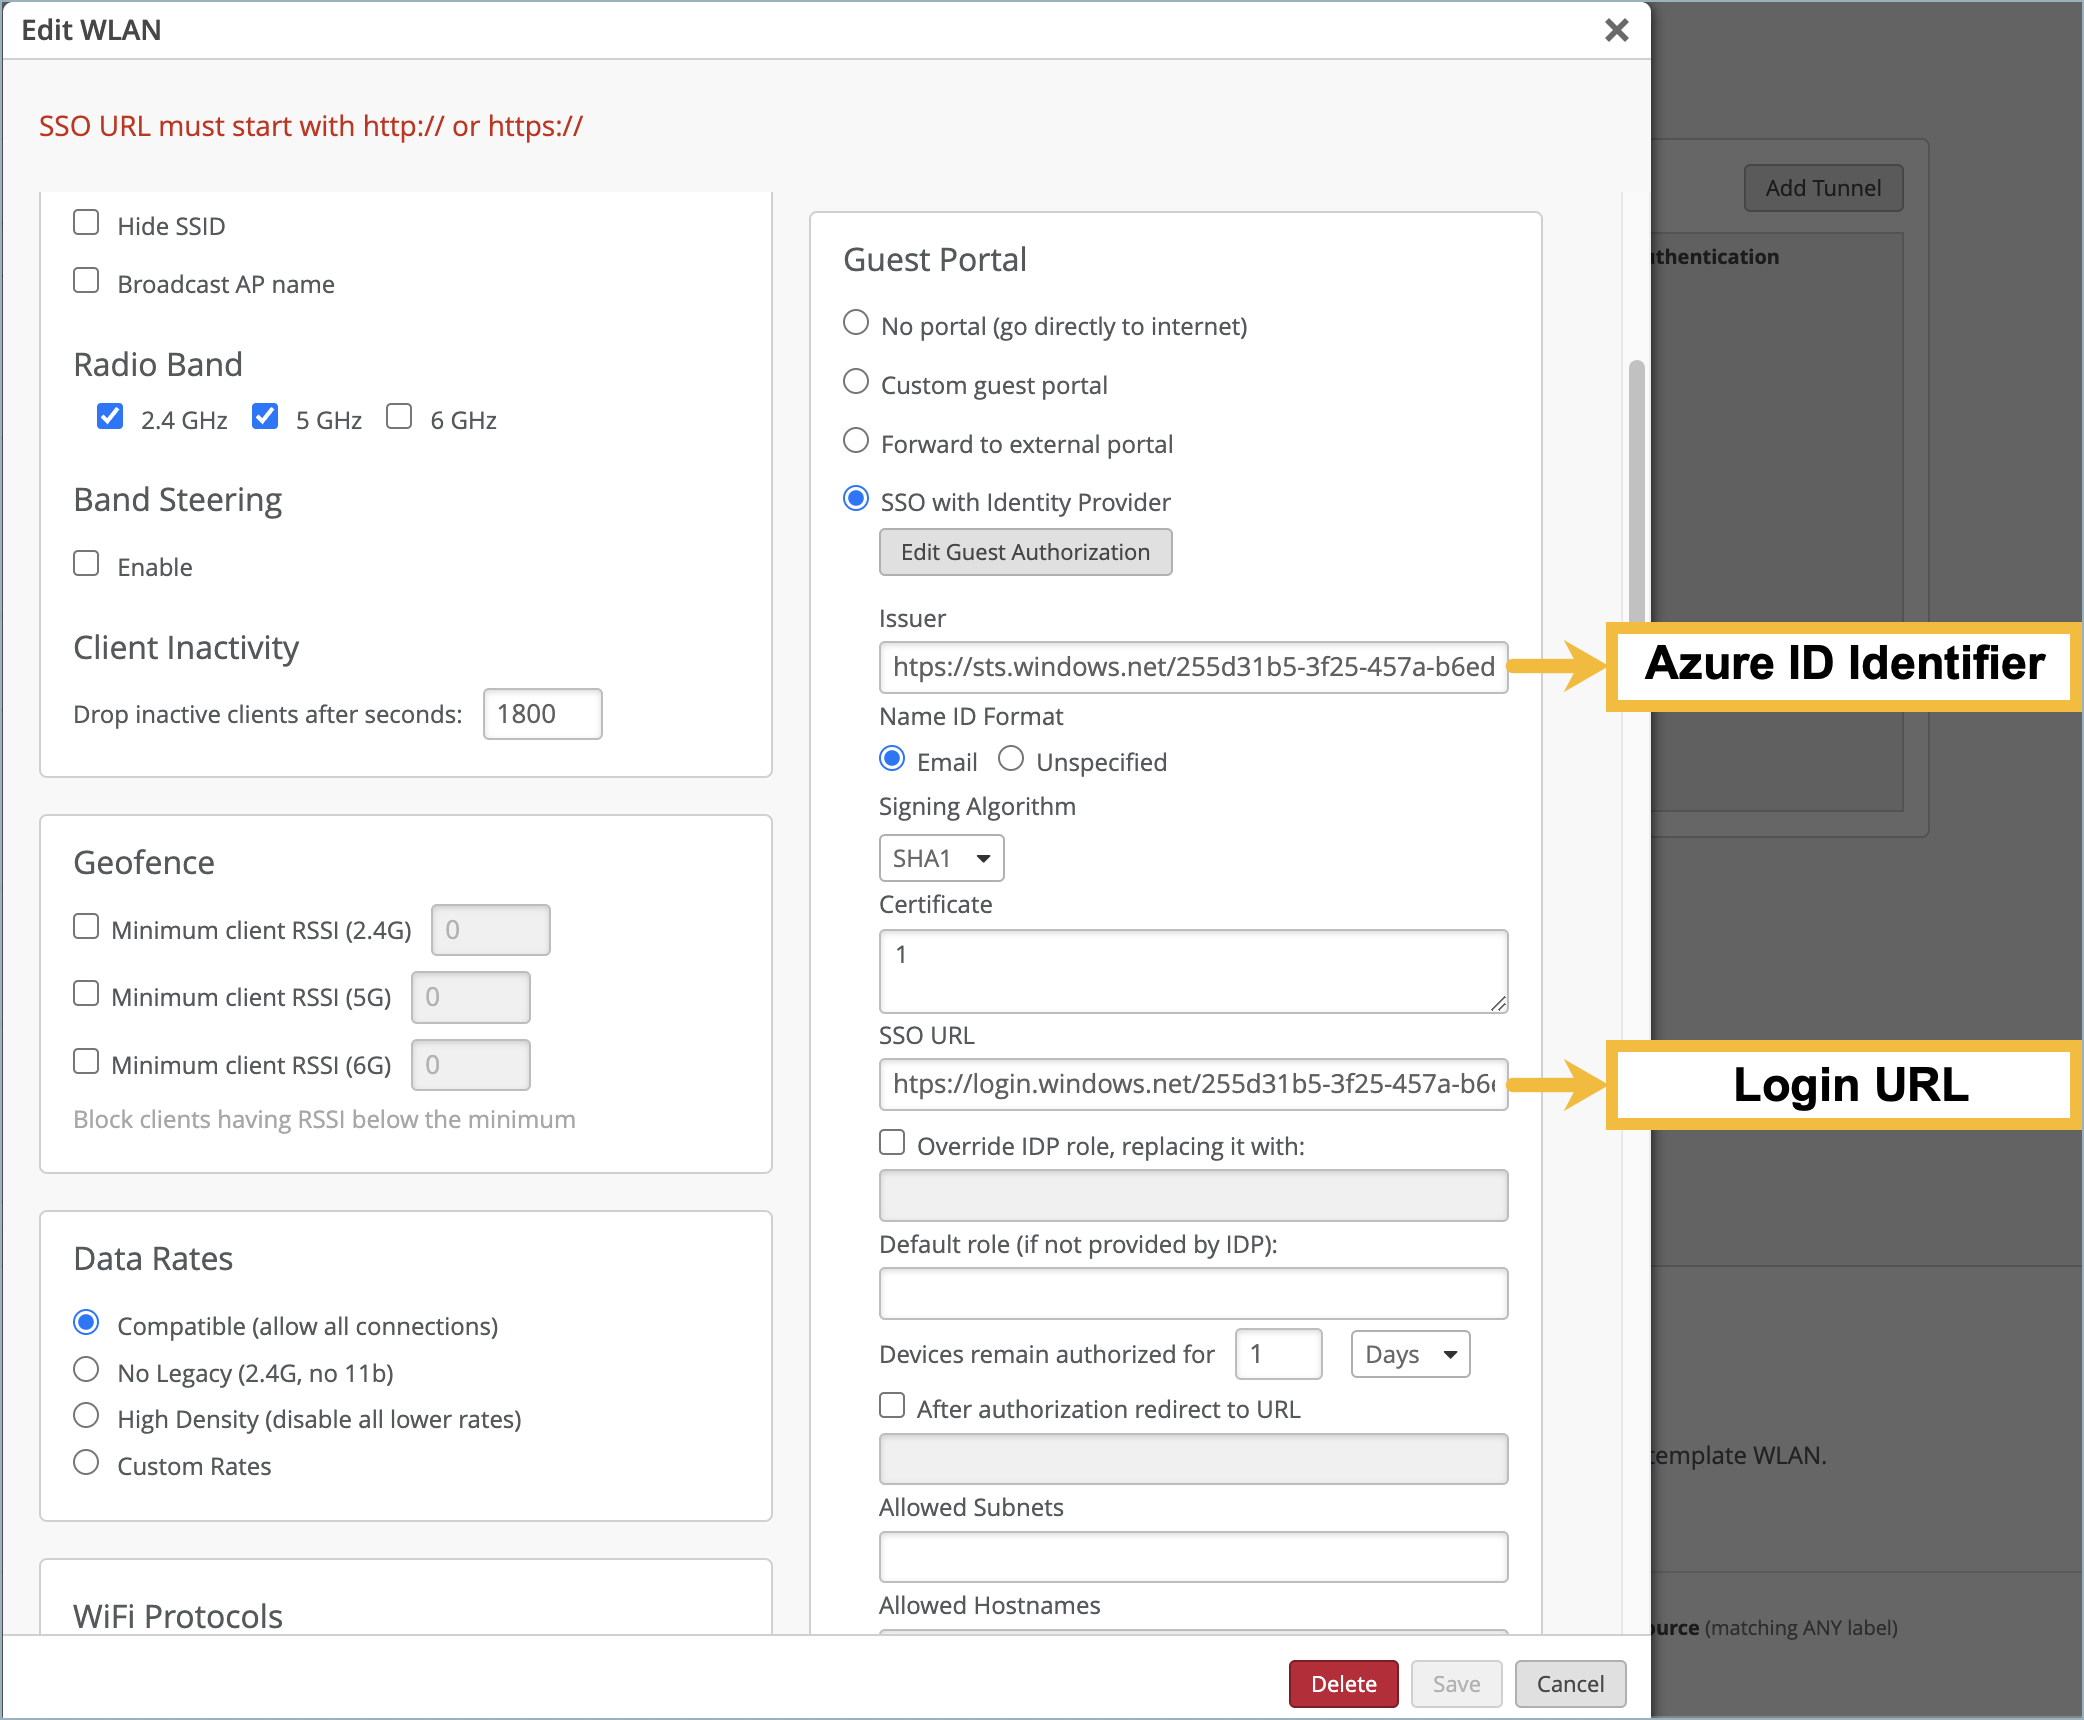
  • Copy and save the Microsoft Entra Identifier (Azure ID Identifier) and the Login URL.

  • Add Users or Groups and assign them to the application so that they will be able to authenticate via the SSO application.

Note:

If you need help adding a SAML application in Entra, consult your Microsoft support information. For example, consider this topic on the Microsoft site: How to Enable single sign-on for an enterprise application.

To set up your guest portal SSO with Azure:

  1. In your WLAN configuration, select SSO with Identity Provider, as described in Use an Identity Provider for Guest Access.
  2. Enter the information you obtained from Microsoft Entra in the Issuer and SSO URL fields.
  3. Fill in the Certificate field (you can fill this in with random information for now).
  4. Click Save.
    The Portal SSO URL is generated.
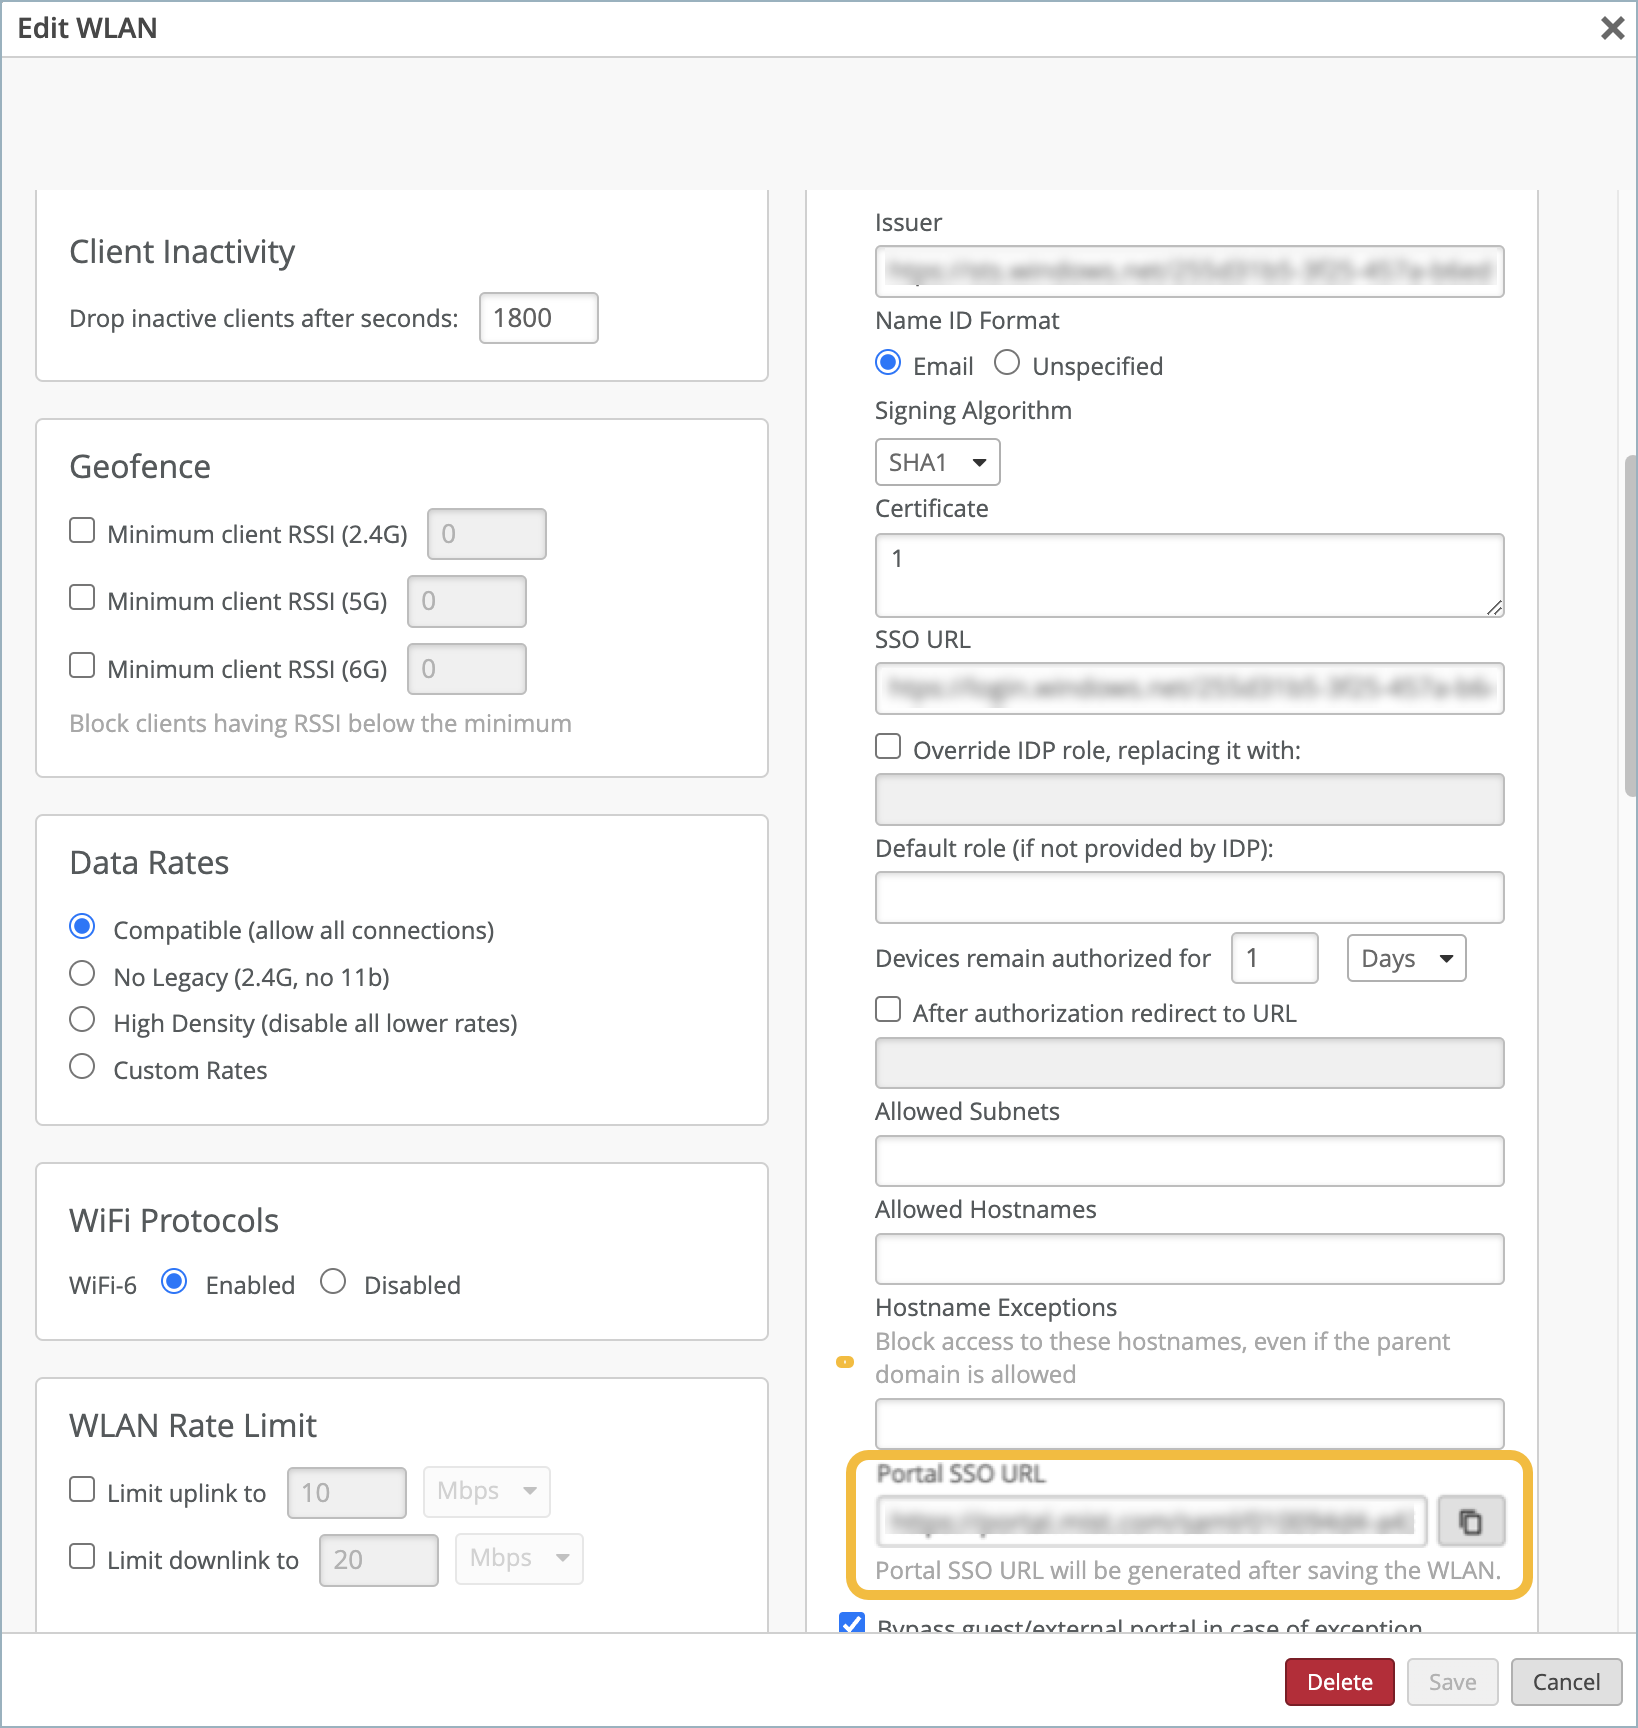
  5. Copy and save the Portal SSO URL.
  6. Go to the Microsoft Entra portal and complete these tasks:
    • Edit the Basic SAML Configuration you created for Juniper Mist and paste the Portal SSO URL into the Identifier, Reply URL, and Sign on URL fields. Click Save.

    • Edit the User Attributes & Claims section.

      • Delete the claims ending in "/emailaddress" and "/name".

      • Edit the “givenname” claim. Clear the contents of the Namespace field, then change the Name field to “FirstName”.

      • Edit the “surname” claim. Clear the contents of the Namespace field, then change the Name field to “LastName”.

    • Navigate back to the SAML configuration page and edit the SAML Signing Certificate.
      • In the Signing Option field, select Sign SAML response and assertion.

      • Click Save.

      • Download the Base 64 Certificate.

      • Open the certificate as a text file and copy its contents.

  7. In the Juniper Mist portal, navigate to the WLAN.
    Note:
    • If the WLAN is in a WLAN template, select Organization > Wireless | WLAN Templates, click the template, and then click the WLAN.

    • For a site-level WLAN, select Site > Wireless | WLANs, and then click the WLAN.

  8. Select SHA256 for the Signing Algorithm and paste the contents of the certificate into the Certificate field.
  9. You can optionally configure the Default role field with Guest for guest authorization.
  10. Add the Microsoft FQDNs into the Allowed Hostnames field to allow the guest clients to authenticate.

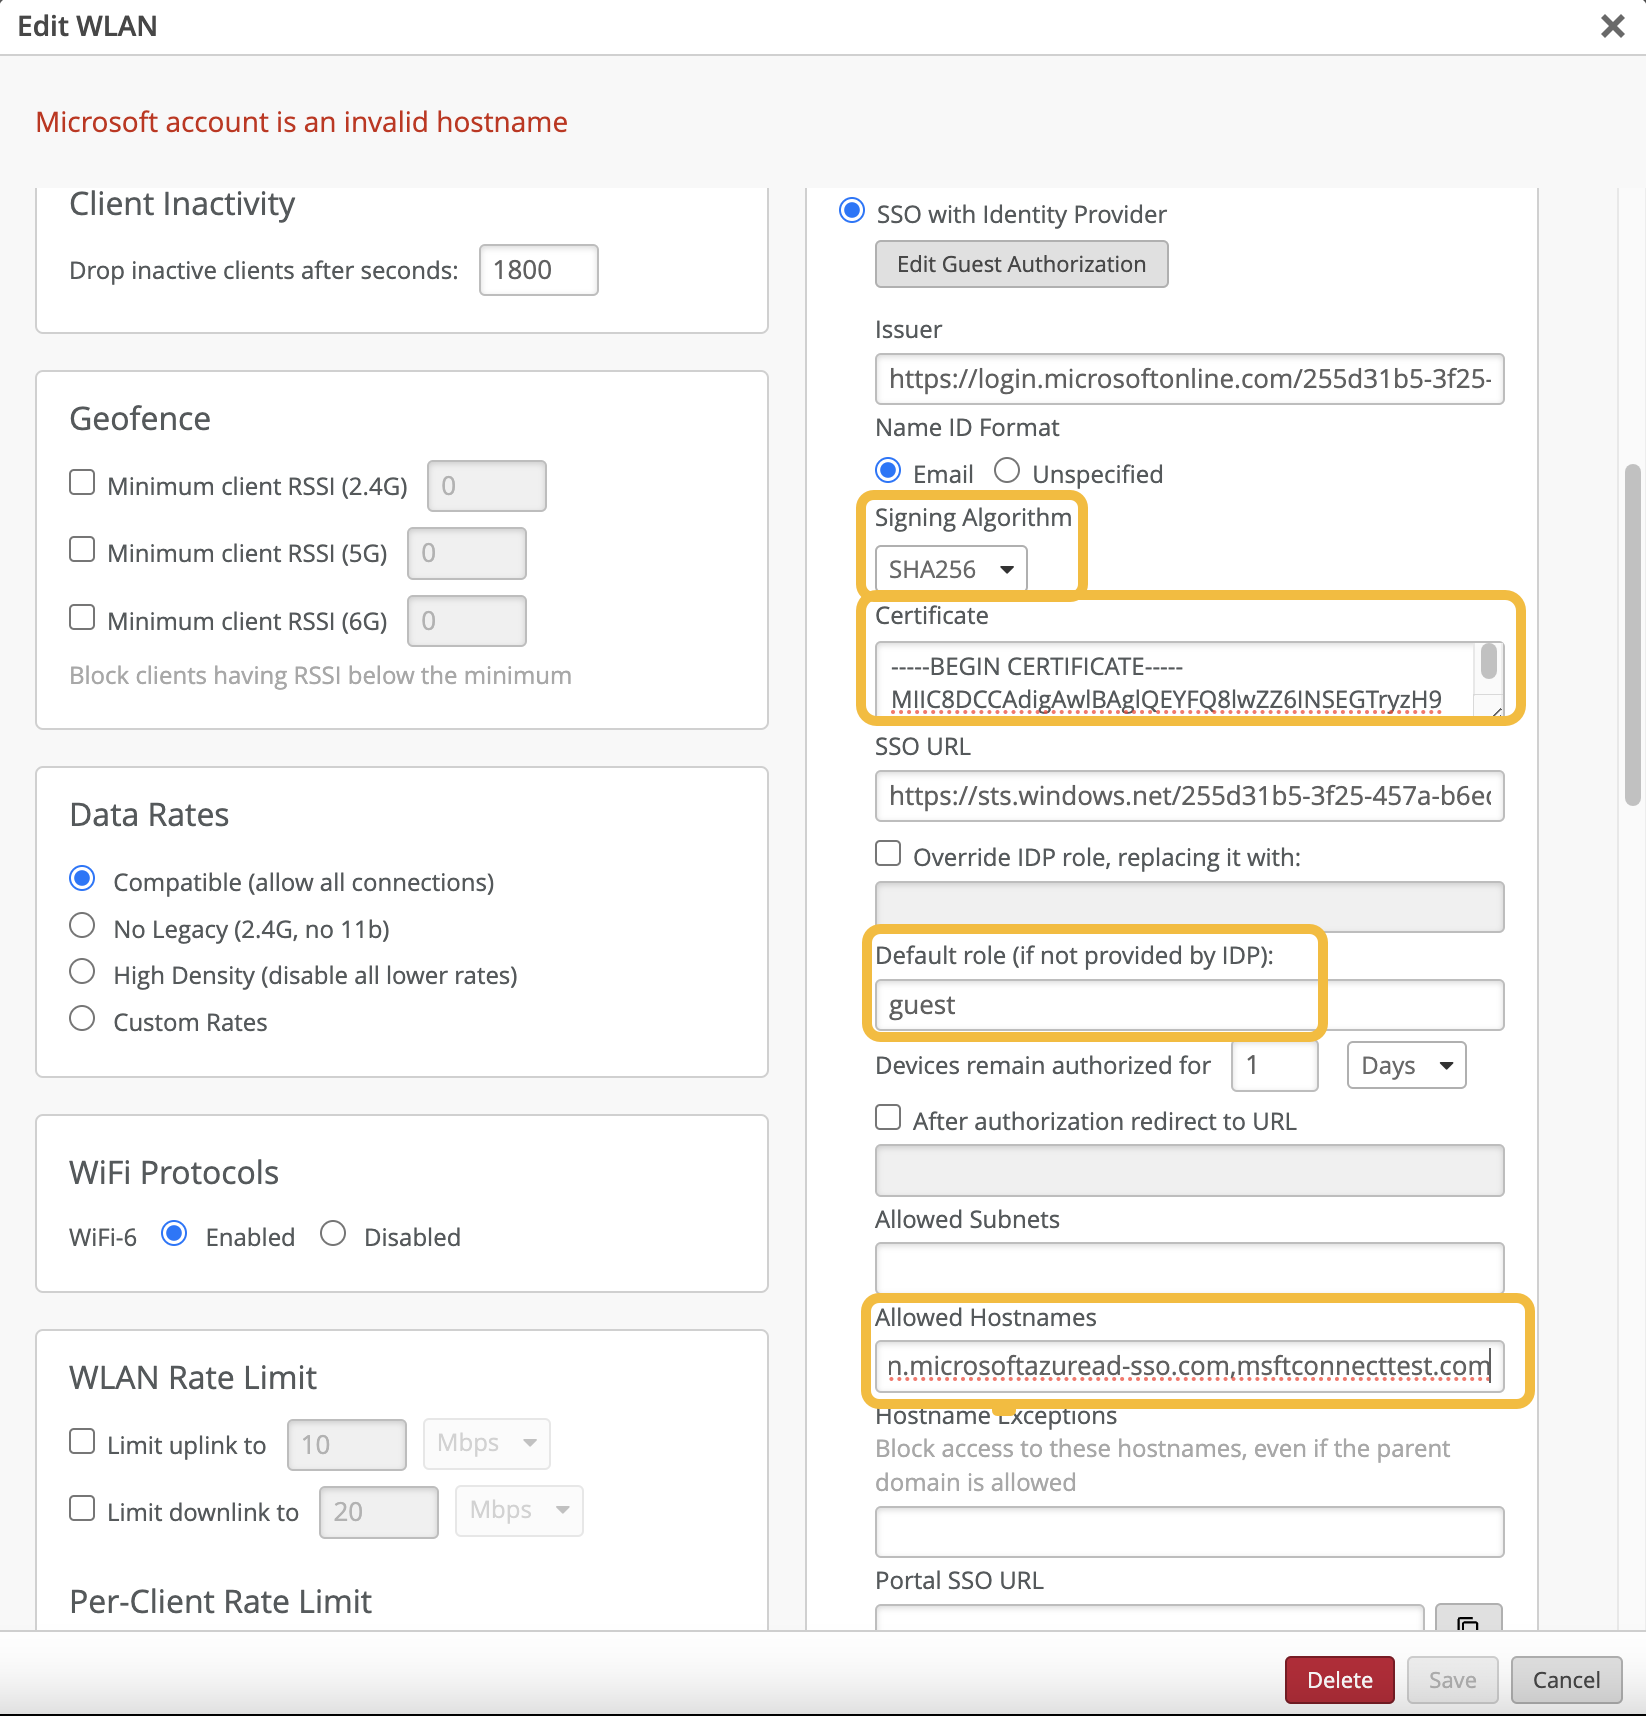
    For a complete list of the necessary Microsoft FQDNs, refer to your Microsoft documentation. Suggested Microsoft FQDNs include:

    • login.microsoftonline.com
    • *.aadcdn.msftauth.net
    • *.aadcdn.msftauthimages.net
    • *.aadcdn.msauthimages.net
    • *.logincdn.msftauth.net
    • login.live.com
    • *.msauth.net
    • *.aadcdn.microsoftonline-p.com

    • *.microsoftonline-p.com

    • Note: You may need to allow additional authentication URLs depending on your environment. See sections 56, 59, and 97 of Microsoft 365 URLs and IP address ranges.
file_download PDF
{ "lLangCode": "en", "lName": "English", "lCountryCode": "us", "transcode": "en_US" }
English
keyboard_arrow_right
footer-navigation
keyboard_arrow_down
file_download
{ "lLangCode": "en", "lName": "English", "lCountryCode": "us", "transcode": "en_US" }
language