ON THIS PAGE
Automatic Client VLAN Assignments
You can set up the WLAN so that users are automatically connected to a given VLAN according to the username/password they enter. You do this by configuring dynamic VLANs in the Mist portal, in conjunction with a RADIUS server. For unknown clients, you can send them to the Guest Network. The RADIUS server should already be connected to you switch. Likewise, your access points (APs) should be connected to the switch, with the correct VLANs configured.
The following VLAN types are supported for dynamic VLANs: Airespace-Interface-Name and Tunnel-Private-Group-ID.
RADIUS Setup
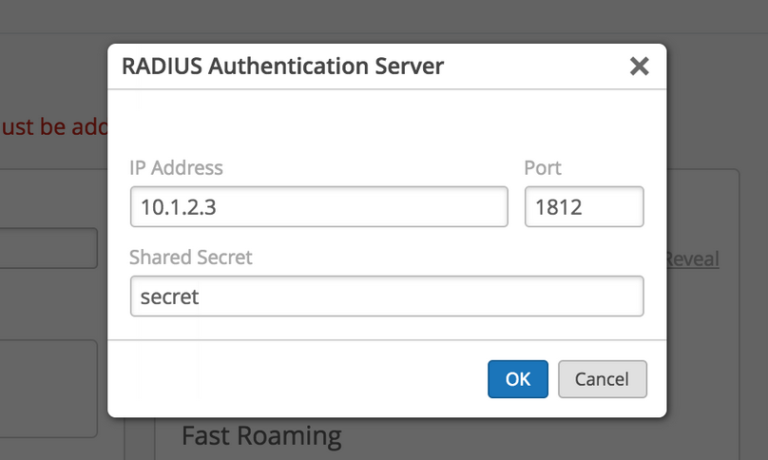
Although the specific RADIUS-side configuration will vary by provider, in general the idea is to configure a shared secret for encrypting and signing client traffic, to allow inbound traffic from the clients IP addresses, and to have a users list that identifies the WLAN clients you want to segment, and their associated VLAN IDs.
Using FreeRADIUS server as an example, you would edit the following files: clients.conf and users.
Configure the network and a secret for client requests in clients.conf, like so:
#client WLAN-1
{
# ipaddr= 192.0.2.0/24
# secret= testing123-1
#}
Configure the /etc/freeradius/user file with a list of WLAN users (including their user name, password, and VLAN association) like so:
user1
Cleartext-Password := "password1"
User-Name = user1,
Tunnel-Type = VLAN,
Tunnel-Medium-Type = IEEE-802,
Tunnel-Private-Group-ID = 10

user2
Cleartext-Password := "password2"
User-Name = user2,
Tunnel-Type = VLAN,
Tunnel-Medium-Type = IEEE-802,
Tunnel-Private-Group-ID = 20

user3
Cleartext-Password := "password3"
User-Name = user3,
Tunnel-Type = VLAN,
Tunnel-Medium-Type = IEEE-802,
Tunnel-Private-Group-ID = 30
If you are using FreeRADIUS server and it is not returning tunnel attributes in the
Access-Accept request, and/or if the user is not being assigned correct IP address
(from the VLAN), then you may need to add a line to the
/etc/freeradius/mods-available/eap.conf file:
use_tunneled_reply = yes
WLAN Setup

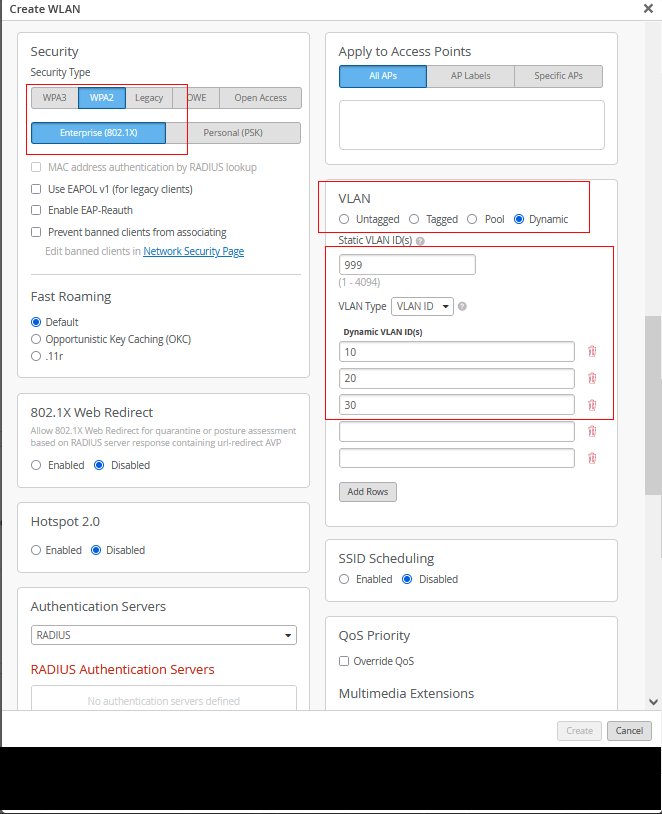
As noted, you can set up your WLAN so when users log on to it, they are automatically connected to a selected VLAN. In the Mist portal, this is called Dynamic VLANs, and you can enable the feature as follows:

