Enable Passpoint on Your WLAN
Follow this procedure to integrate Juniper Mist™ with Passpoint for secure user authentication.
You can integrate Juniper Mist™ with Passpoint® (formerly called Hotspot 2.0), which allows automatic secured connections for mobile devices to support various use-cases, such as public guest networks, carrier Wi-Fi offload, Eduroam services and many more.
For more information about Passpoint, see information on the Wi-Fi Alliance site.
Juniper Mist provides templates for each operator and service provider, removing the complexity that was historically associated with Passpoint configuration. You need only to enable Passpoint on the WLAN and configure your RADIUS or RadSec authentication server according to the guidance from your Passpoint service provider.
-
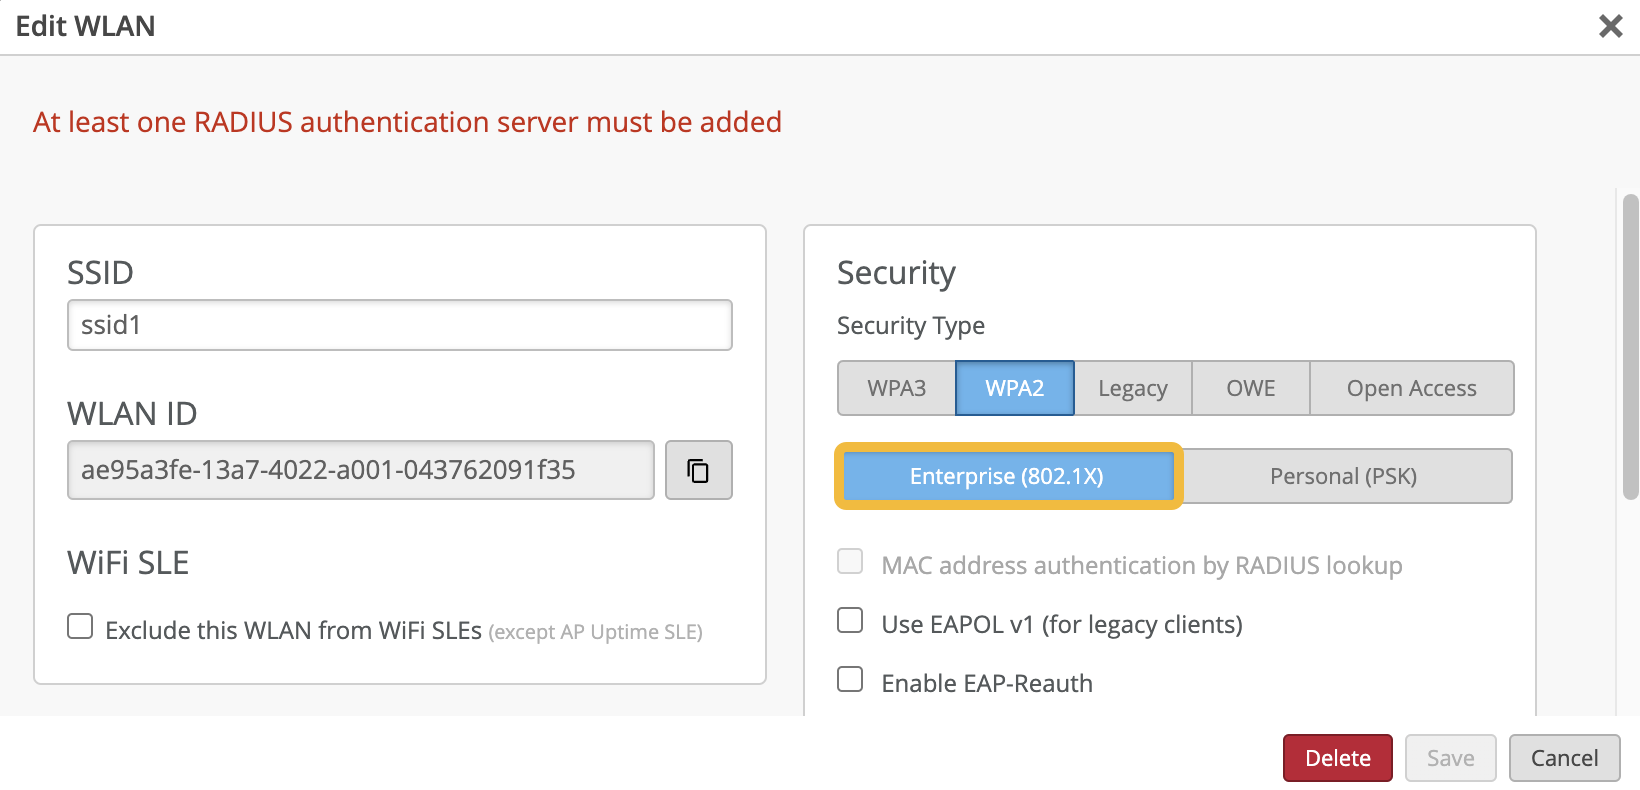
Select Enterprise (802.1X).
-
In the Passpoint section, select Enabled
and then click + to select your Operators
(service providers).
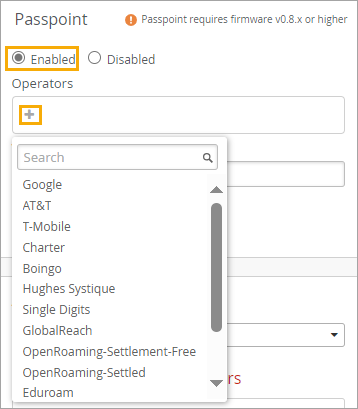 Selecting an operator loads the 802.11u settings that are required by the service provider.
 -
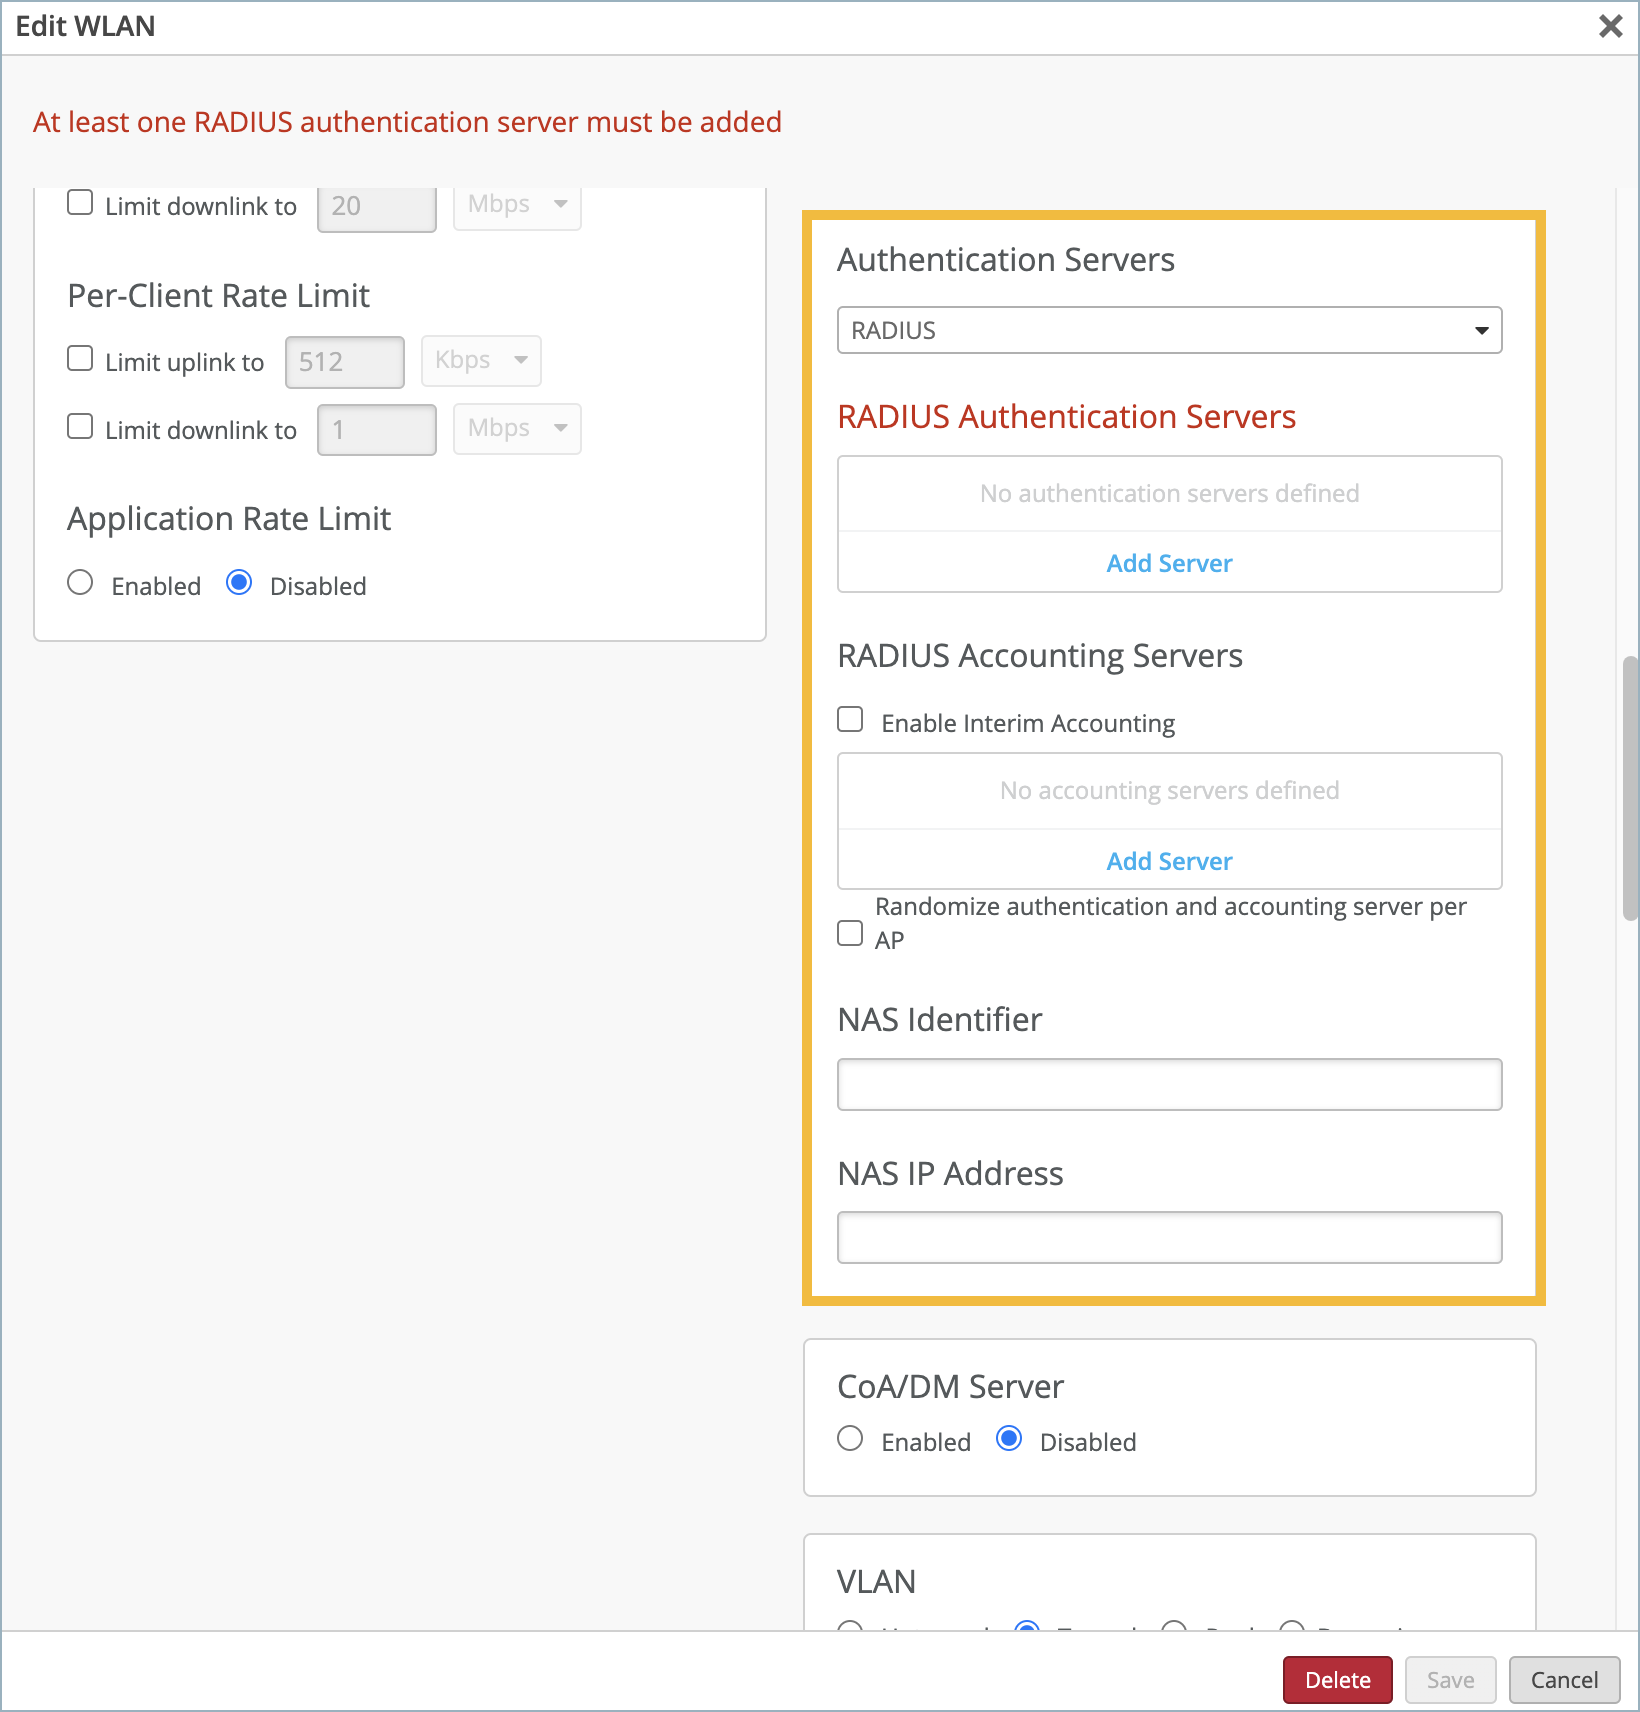
In the Authentication Servers section, click Add
Server, select the server type (RADIUS or RadSec), then enter the
information, and click the checkmark to save the settings.
Consult with your Passpoint service provider to ensure that you configure the correct RADIUS or RadSec settings.
-
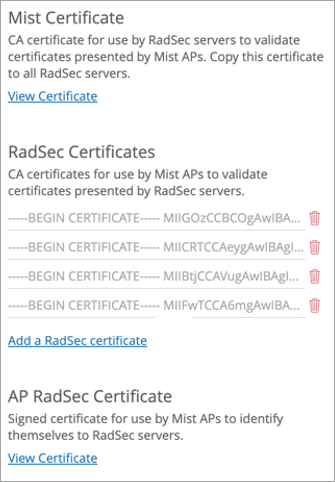
If you are using RadSec, manage your certificates as follows:
To obtain your Mist certificate, go to Organization > Admin > Settings. You'll find the certificate under Mist Certificate.
Obtain the RadSec certificate from your RadSec server provider.
Obtain the AP certificate from your Passpoint Provider or Authentication Broker.
To add your certificates to Mist, again go to Organization > Admin > Settings. You'll add your certificates under RadSec Certificates and AP RadSec Certificate.