Create Access Switch
-
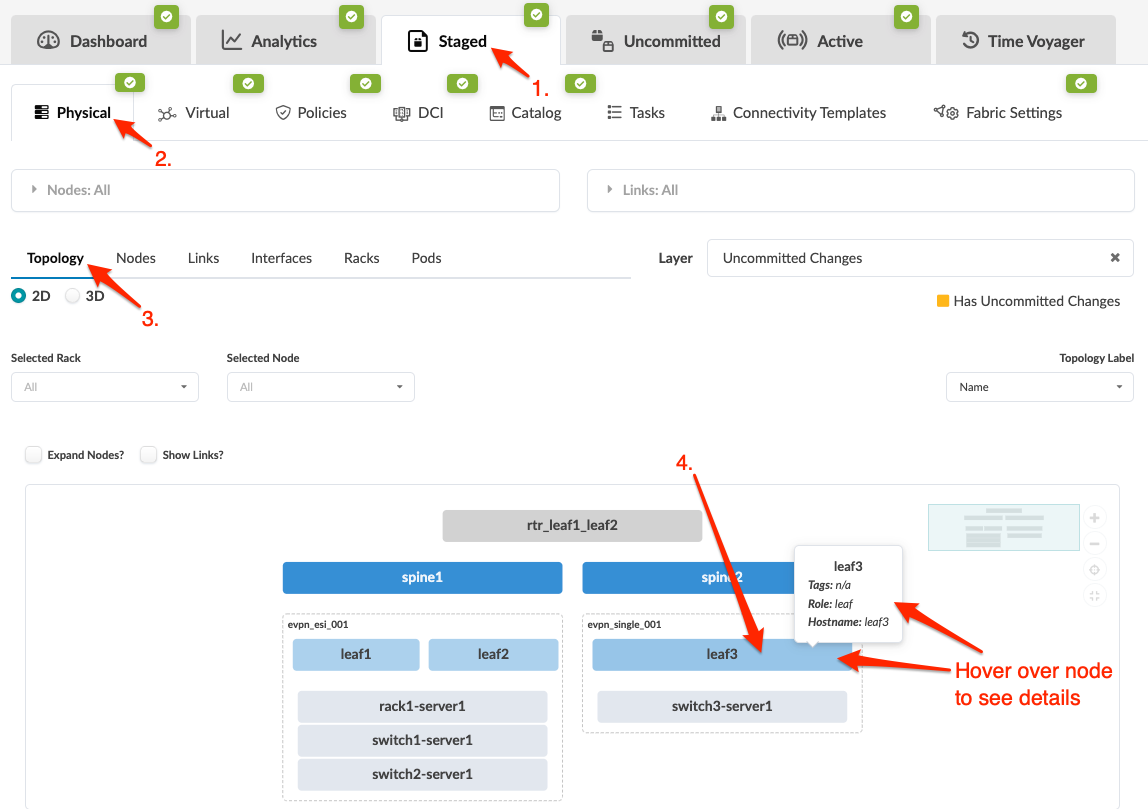
From the blueprint, navigate to Staged > Physical >
Topology and select the leaf to connect to the new access switch.
-
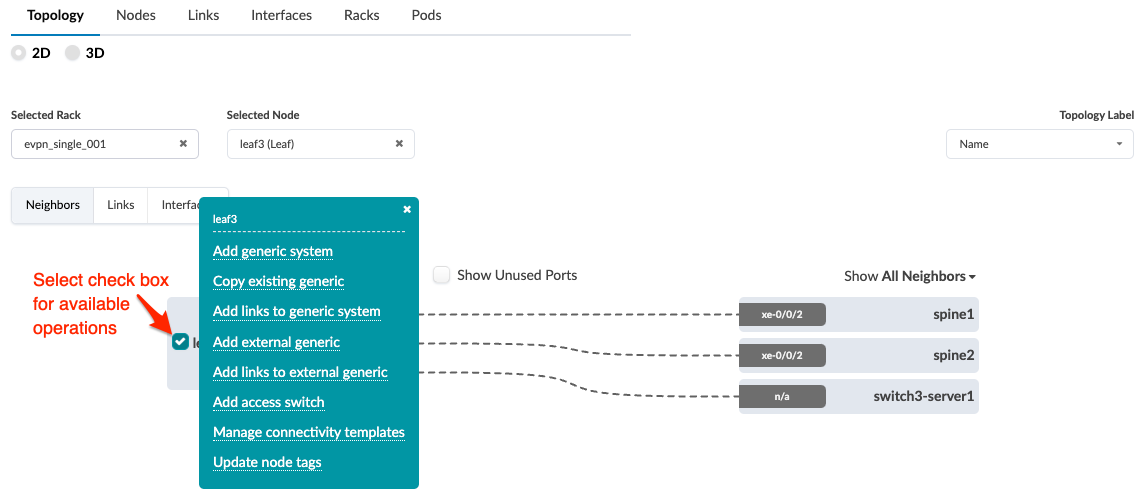
Select the leaf check box to see the operations available for that leaf (and that you
have permissions for).
 Note:
Note:You can also get to the selection page from the Nodes view. From the blueprint, navigate to Staged > Physical > Nodes, click the leaf name in the table, then click the leaf name that appears at the top of the Selection panel (on the right side of the page).
-
Click Add access switch and enter a unique label and
hostname.
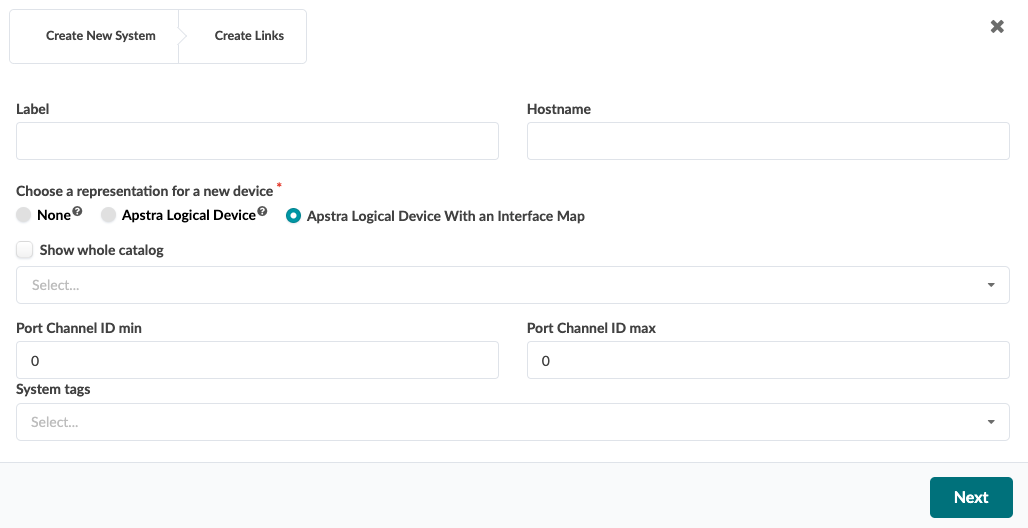
- Select the appropriate interface map from the drop-down list.
- Enter the port channel ID min and max. (Prior to Apstra version 4.2.0, all non-default port channel numbers had to be unique per blueprint. Port channel ranges could not overlap. This requirement has been relaxed, and now they need only be unique per system.)
-
Enter tags (optional) to identify the role(s) of the new access switch, then click
Next.
-
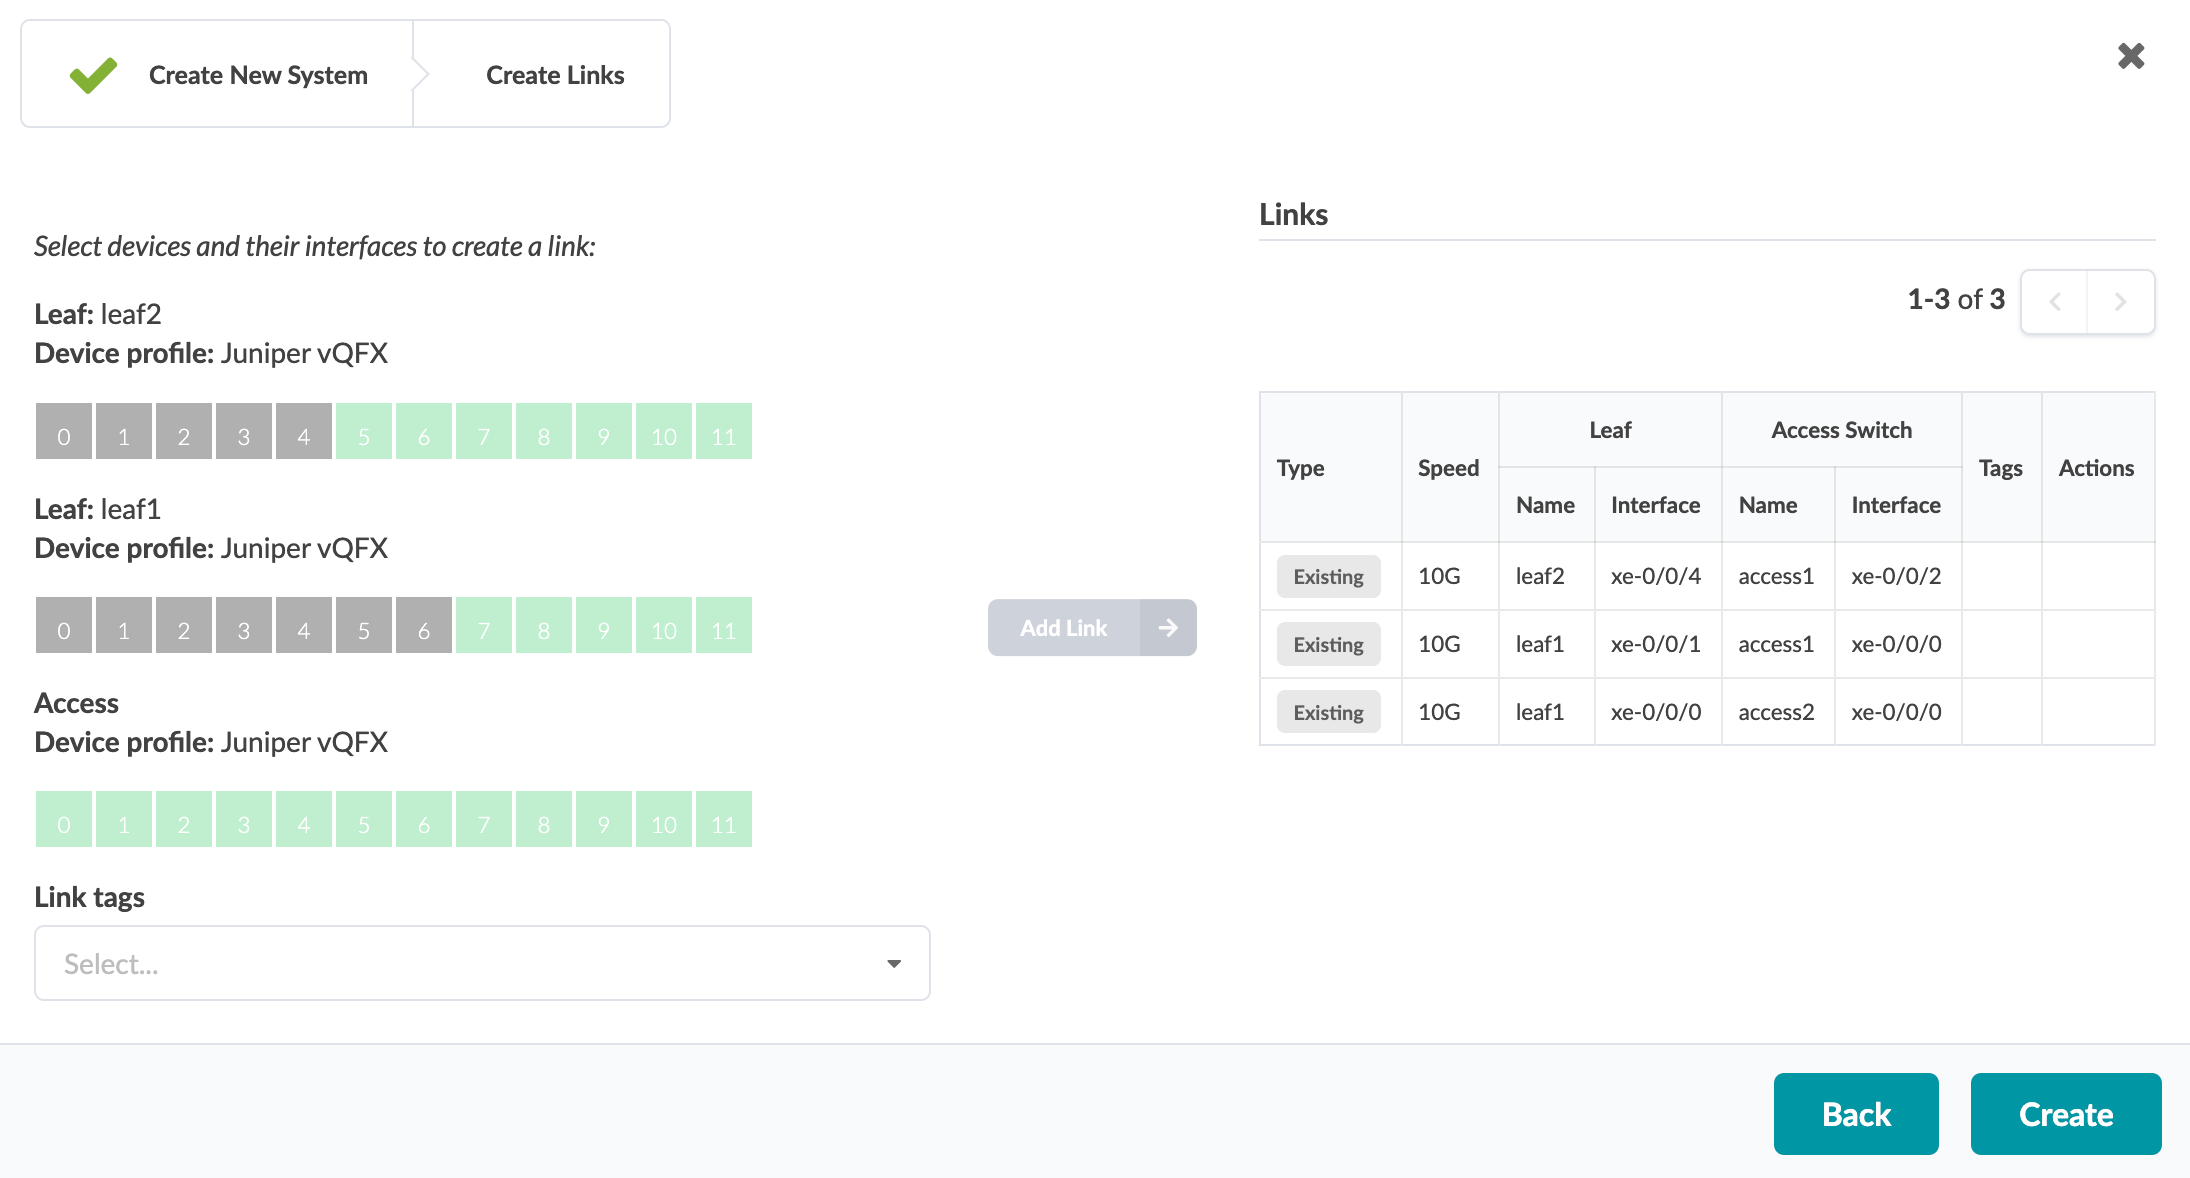
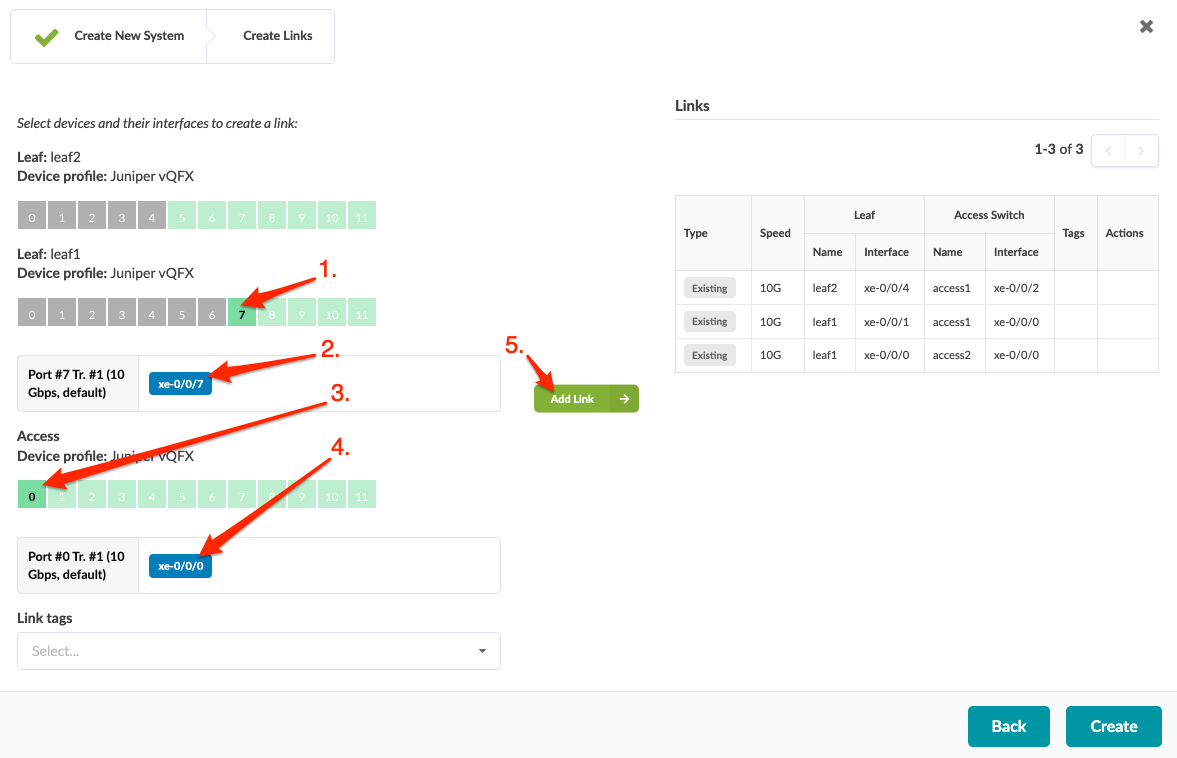
Select available ports and transformations, as applicable. The gray Add
Link button turns green.
-
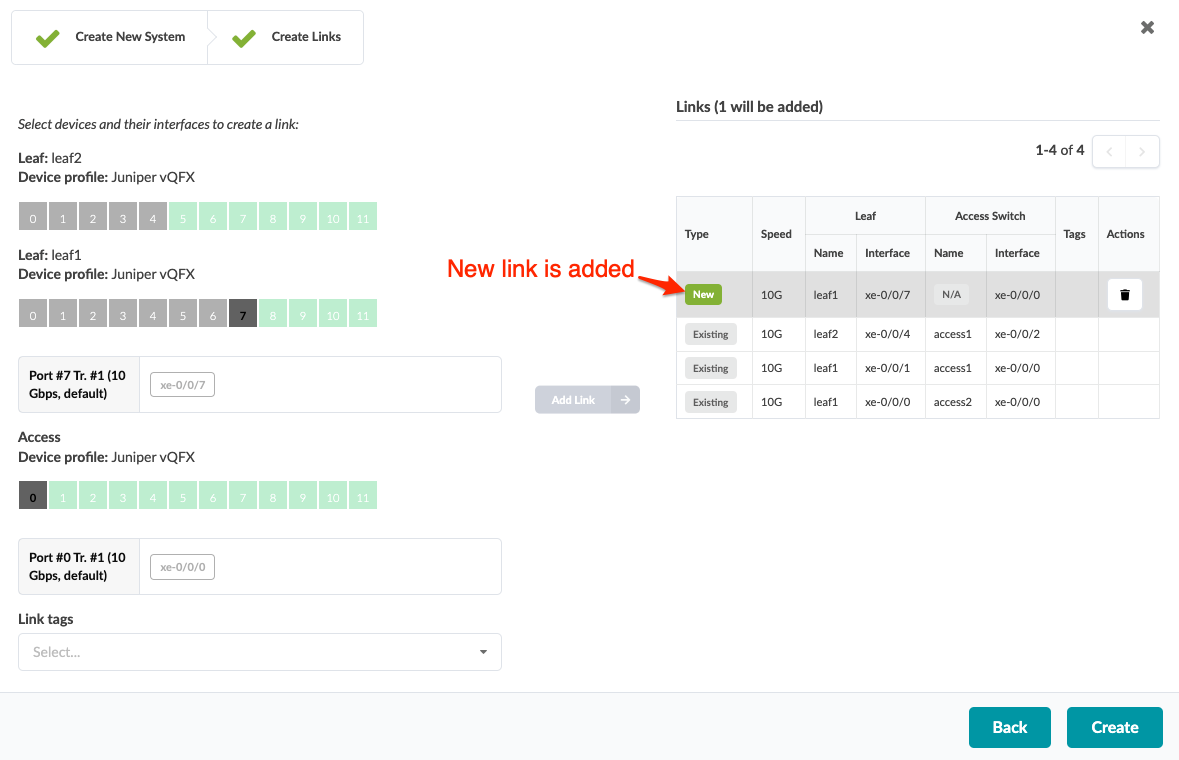
Click Add Link. The link is added to the link table.
- Click Create to stage the change and return to the Topology view.
When you're ready to activate your changes, commit them from the Uncommitted tab.
