Update Device ID Assignment (Datacenter)
Device Assignment Overview
Before devices can be assigned to a blueprint, they must have interface maps assigned to them (from the Device Profiles tab). When a device is assigned to a blueprint, it performs discovery configuration. During this phase all interfaces are changed to L3-only mode allowing interfaces to be up. There is no BGP configuration, no routing expectations, nothing that can influence the network. A device in discovery mode is benign; it does not participate in the datacenter fabric, and it does not forward any packets through it. You can then perform critical validations of network health including viewing statistics for cabling, LLDP, transceivers and more. Any issues, such as miscabling or physical link errors, cause a telemetry alarm. You can address and correct the anomalies before deploying the device.
It's common to have a committed blueprint without any deployed devices. You can deploy devices as required, in batches, one by one, or all in one go. If you want to assign devices without deploying them, set the deploy mode to Ready, which puts devices in the In Service Ready state. This configuration is called Ready Config (previously known as Discovery 2 Config).
When resetting system IDs (serial number) Discovery 1 configuration is re-applied. Before physically uninstalling the agent, it is good practice to fully erase the device configuration and uninstall the device agent.
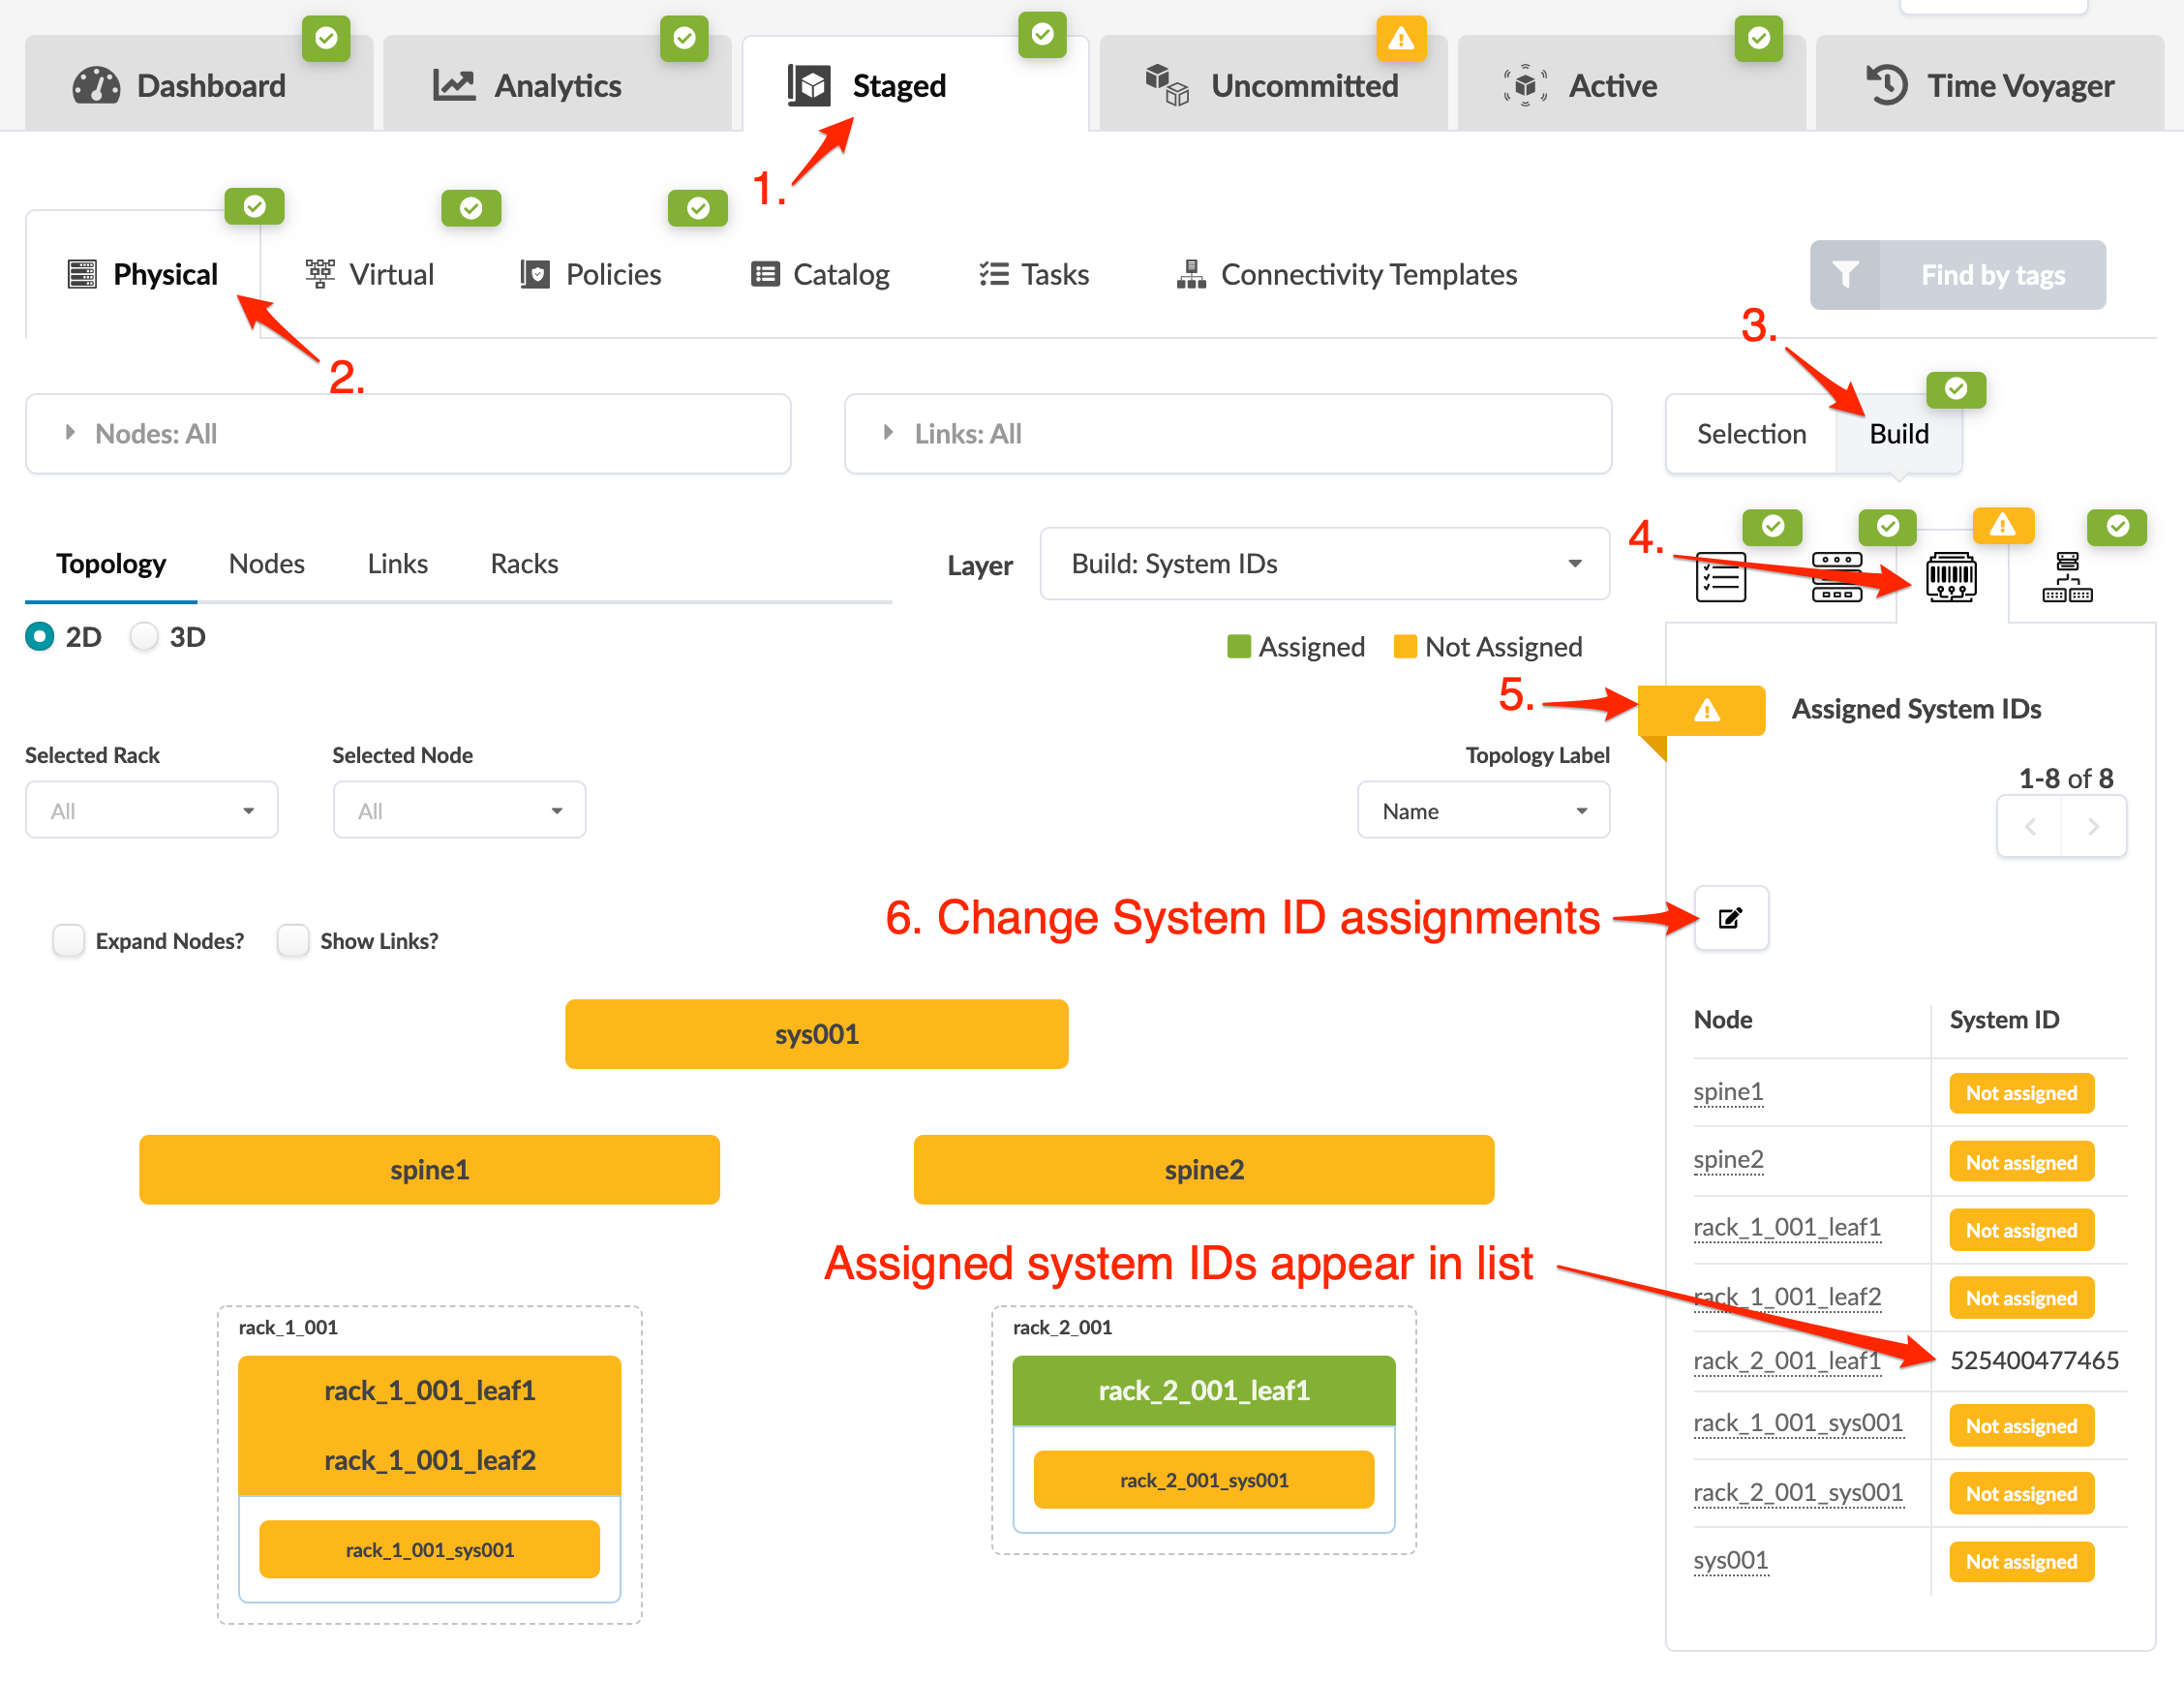
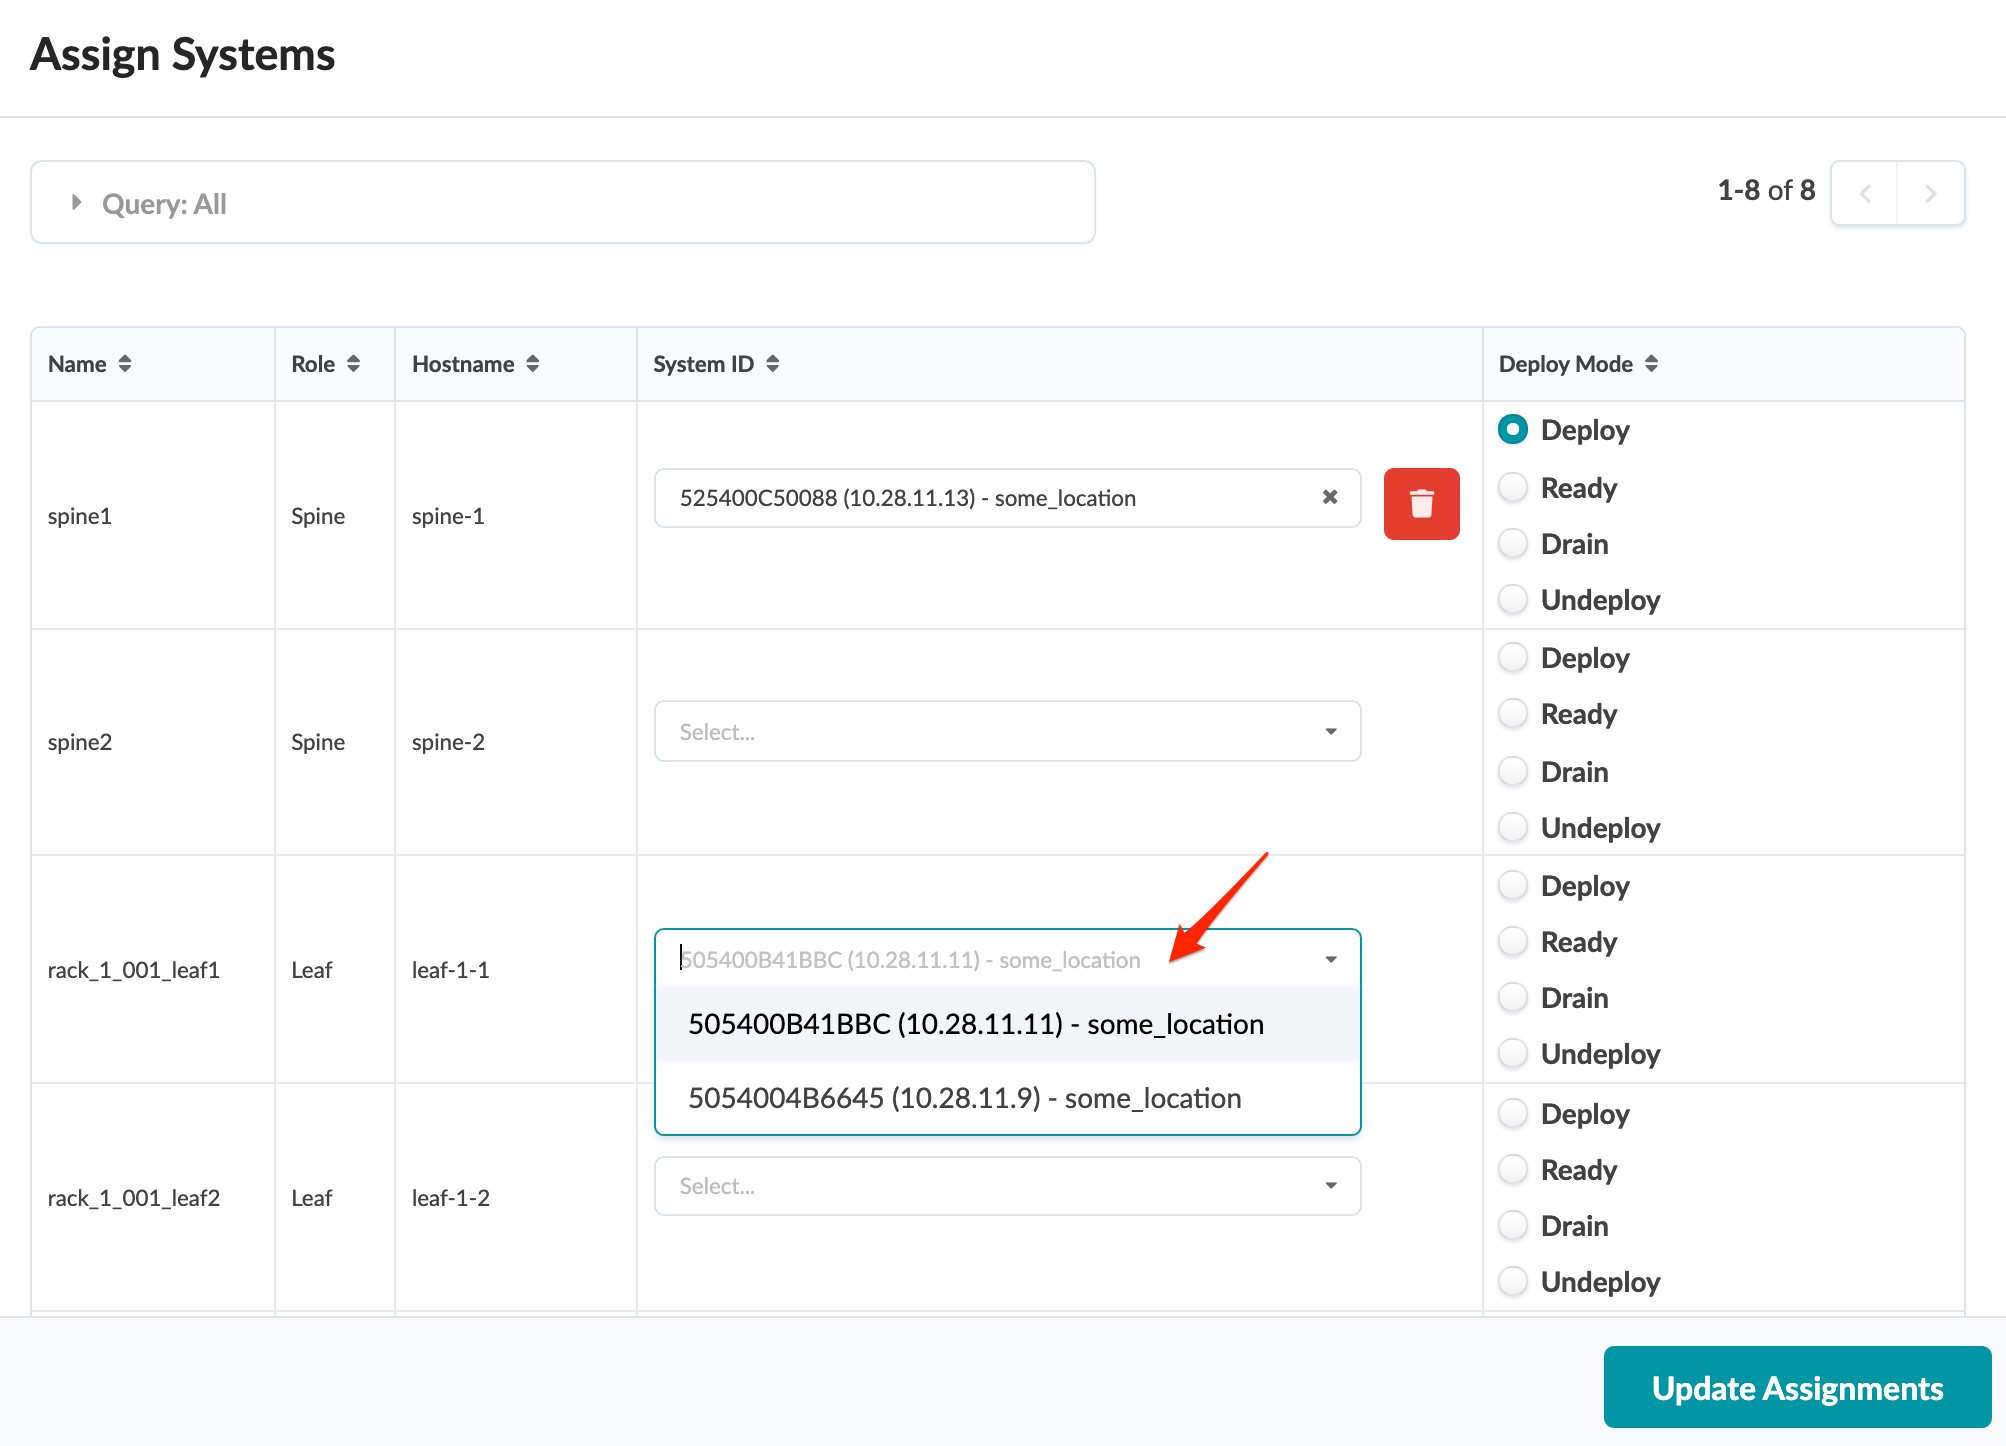
Assign Device(s) (from Devices Build Panel)
You can also use apstra-cli to bulk-assign system IDs to devices either with
a CSV text file or the blueprint set-serial-numbers
command.
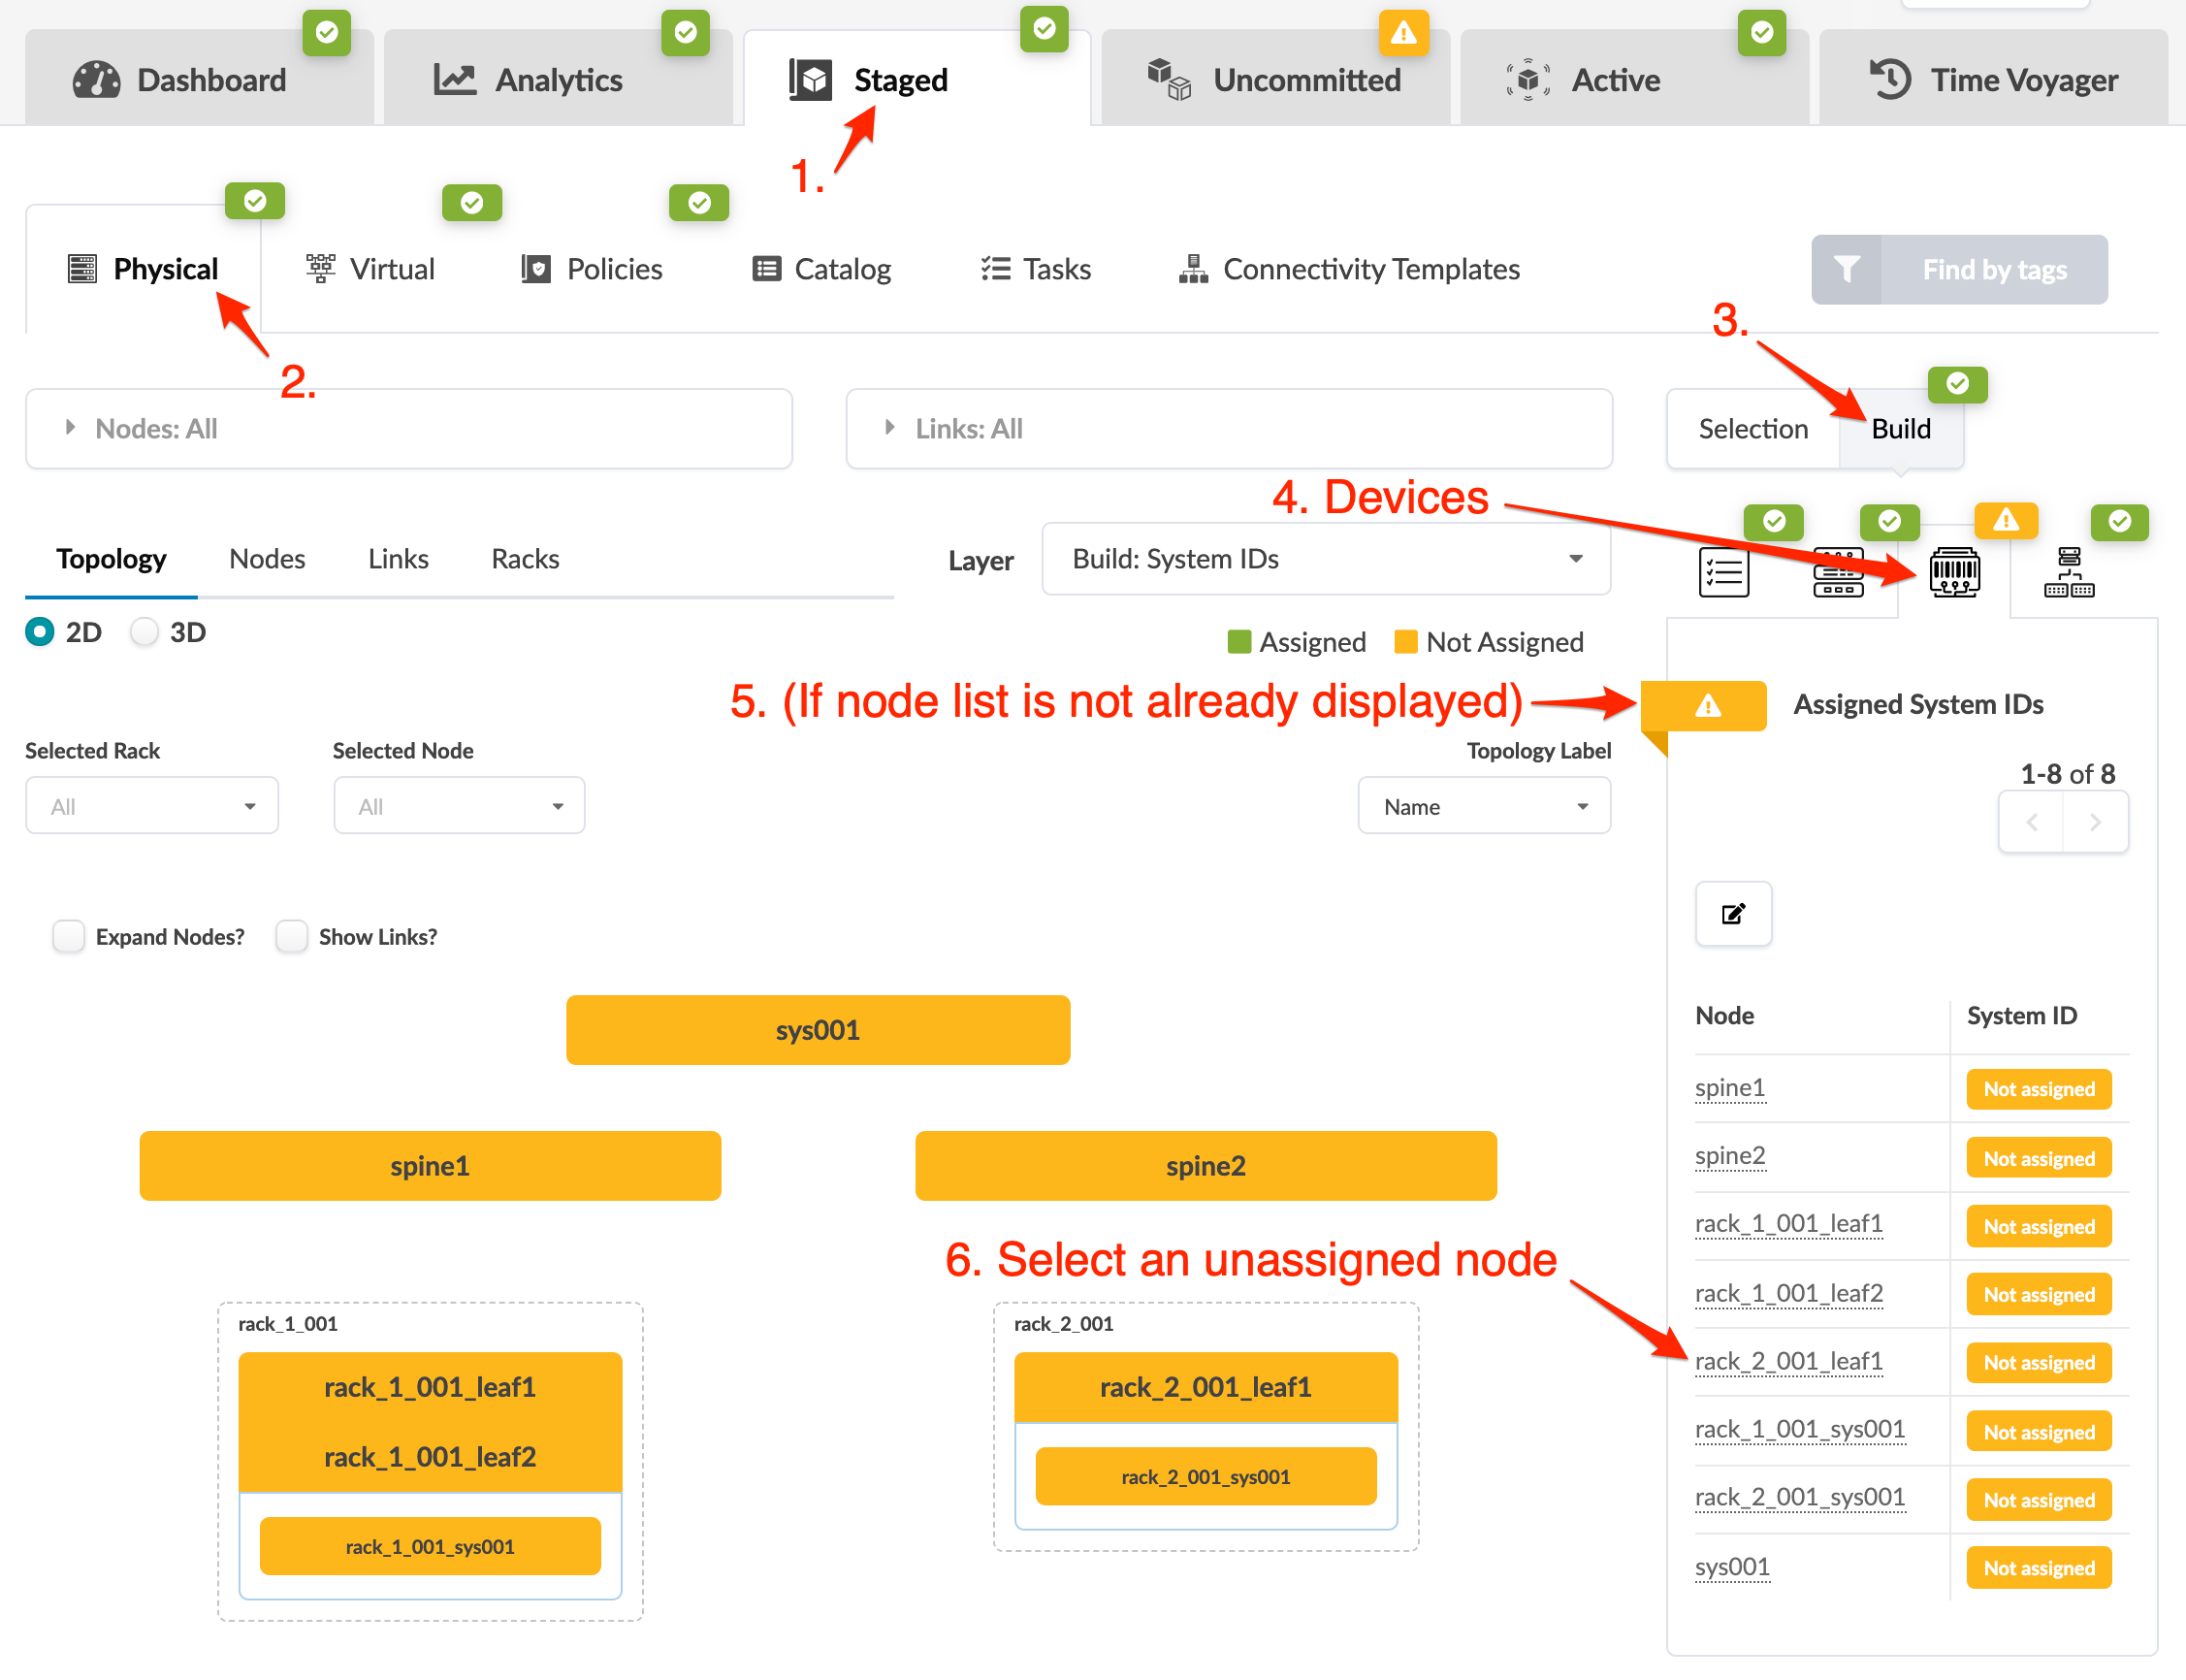
Assign One Device (from Devices Build Panel)
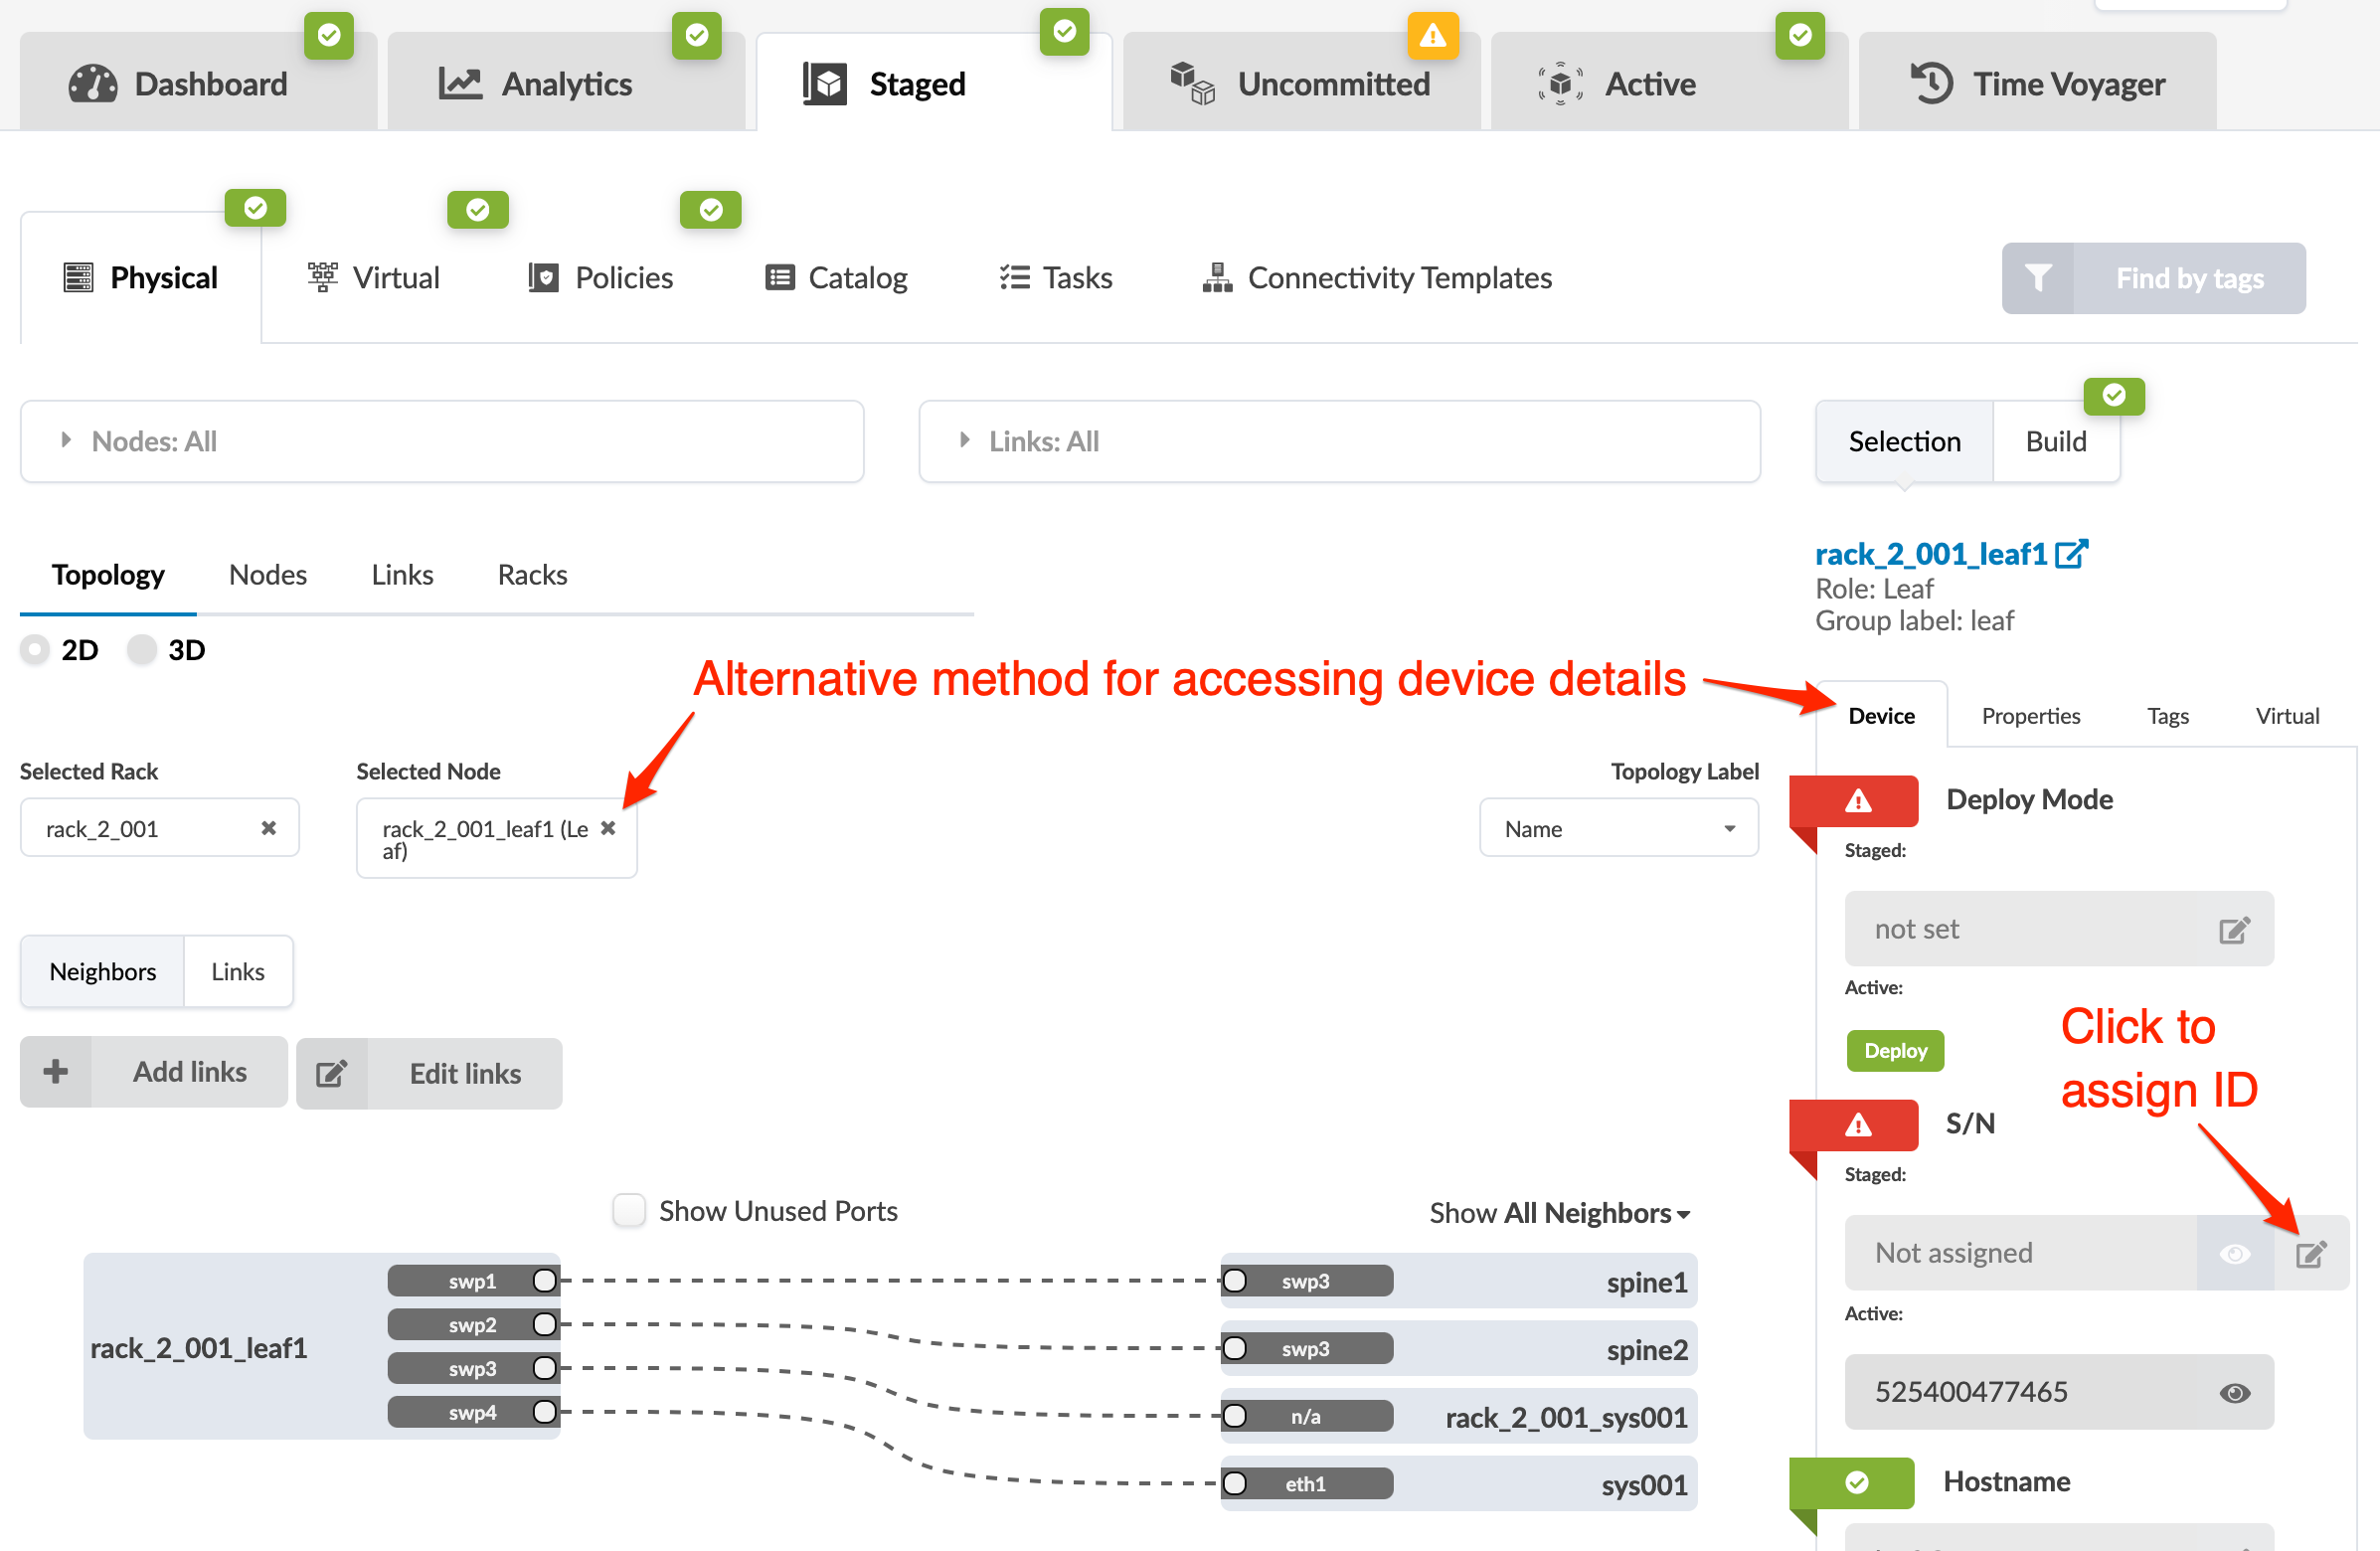
Assign One System ID (from Selection Panel)
- From the blueprint, navigate to Staged > Physical > Nodes and select a node name (not the check box). (You can narrow your search with the drop-down lists for planes, pods, and racks as applicable, as of Apstra version 4.0.)
-
Click the Device tab in the right panel (if it's not
already selected).
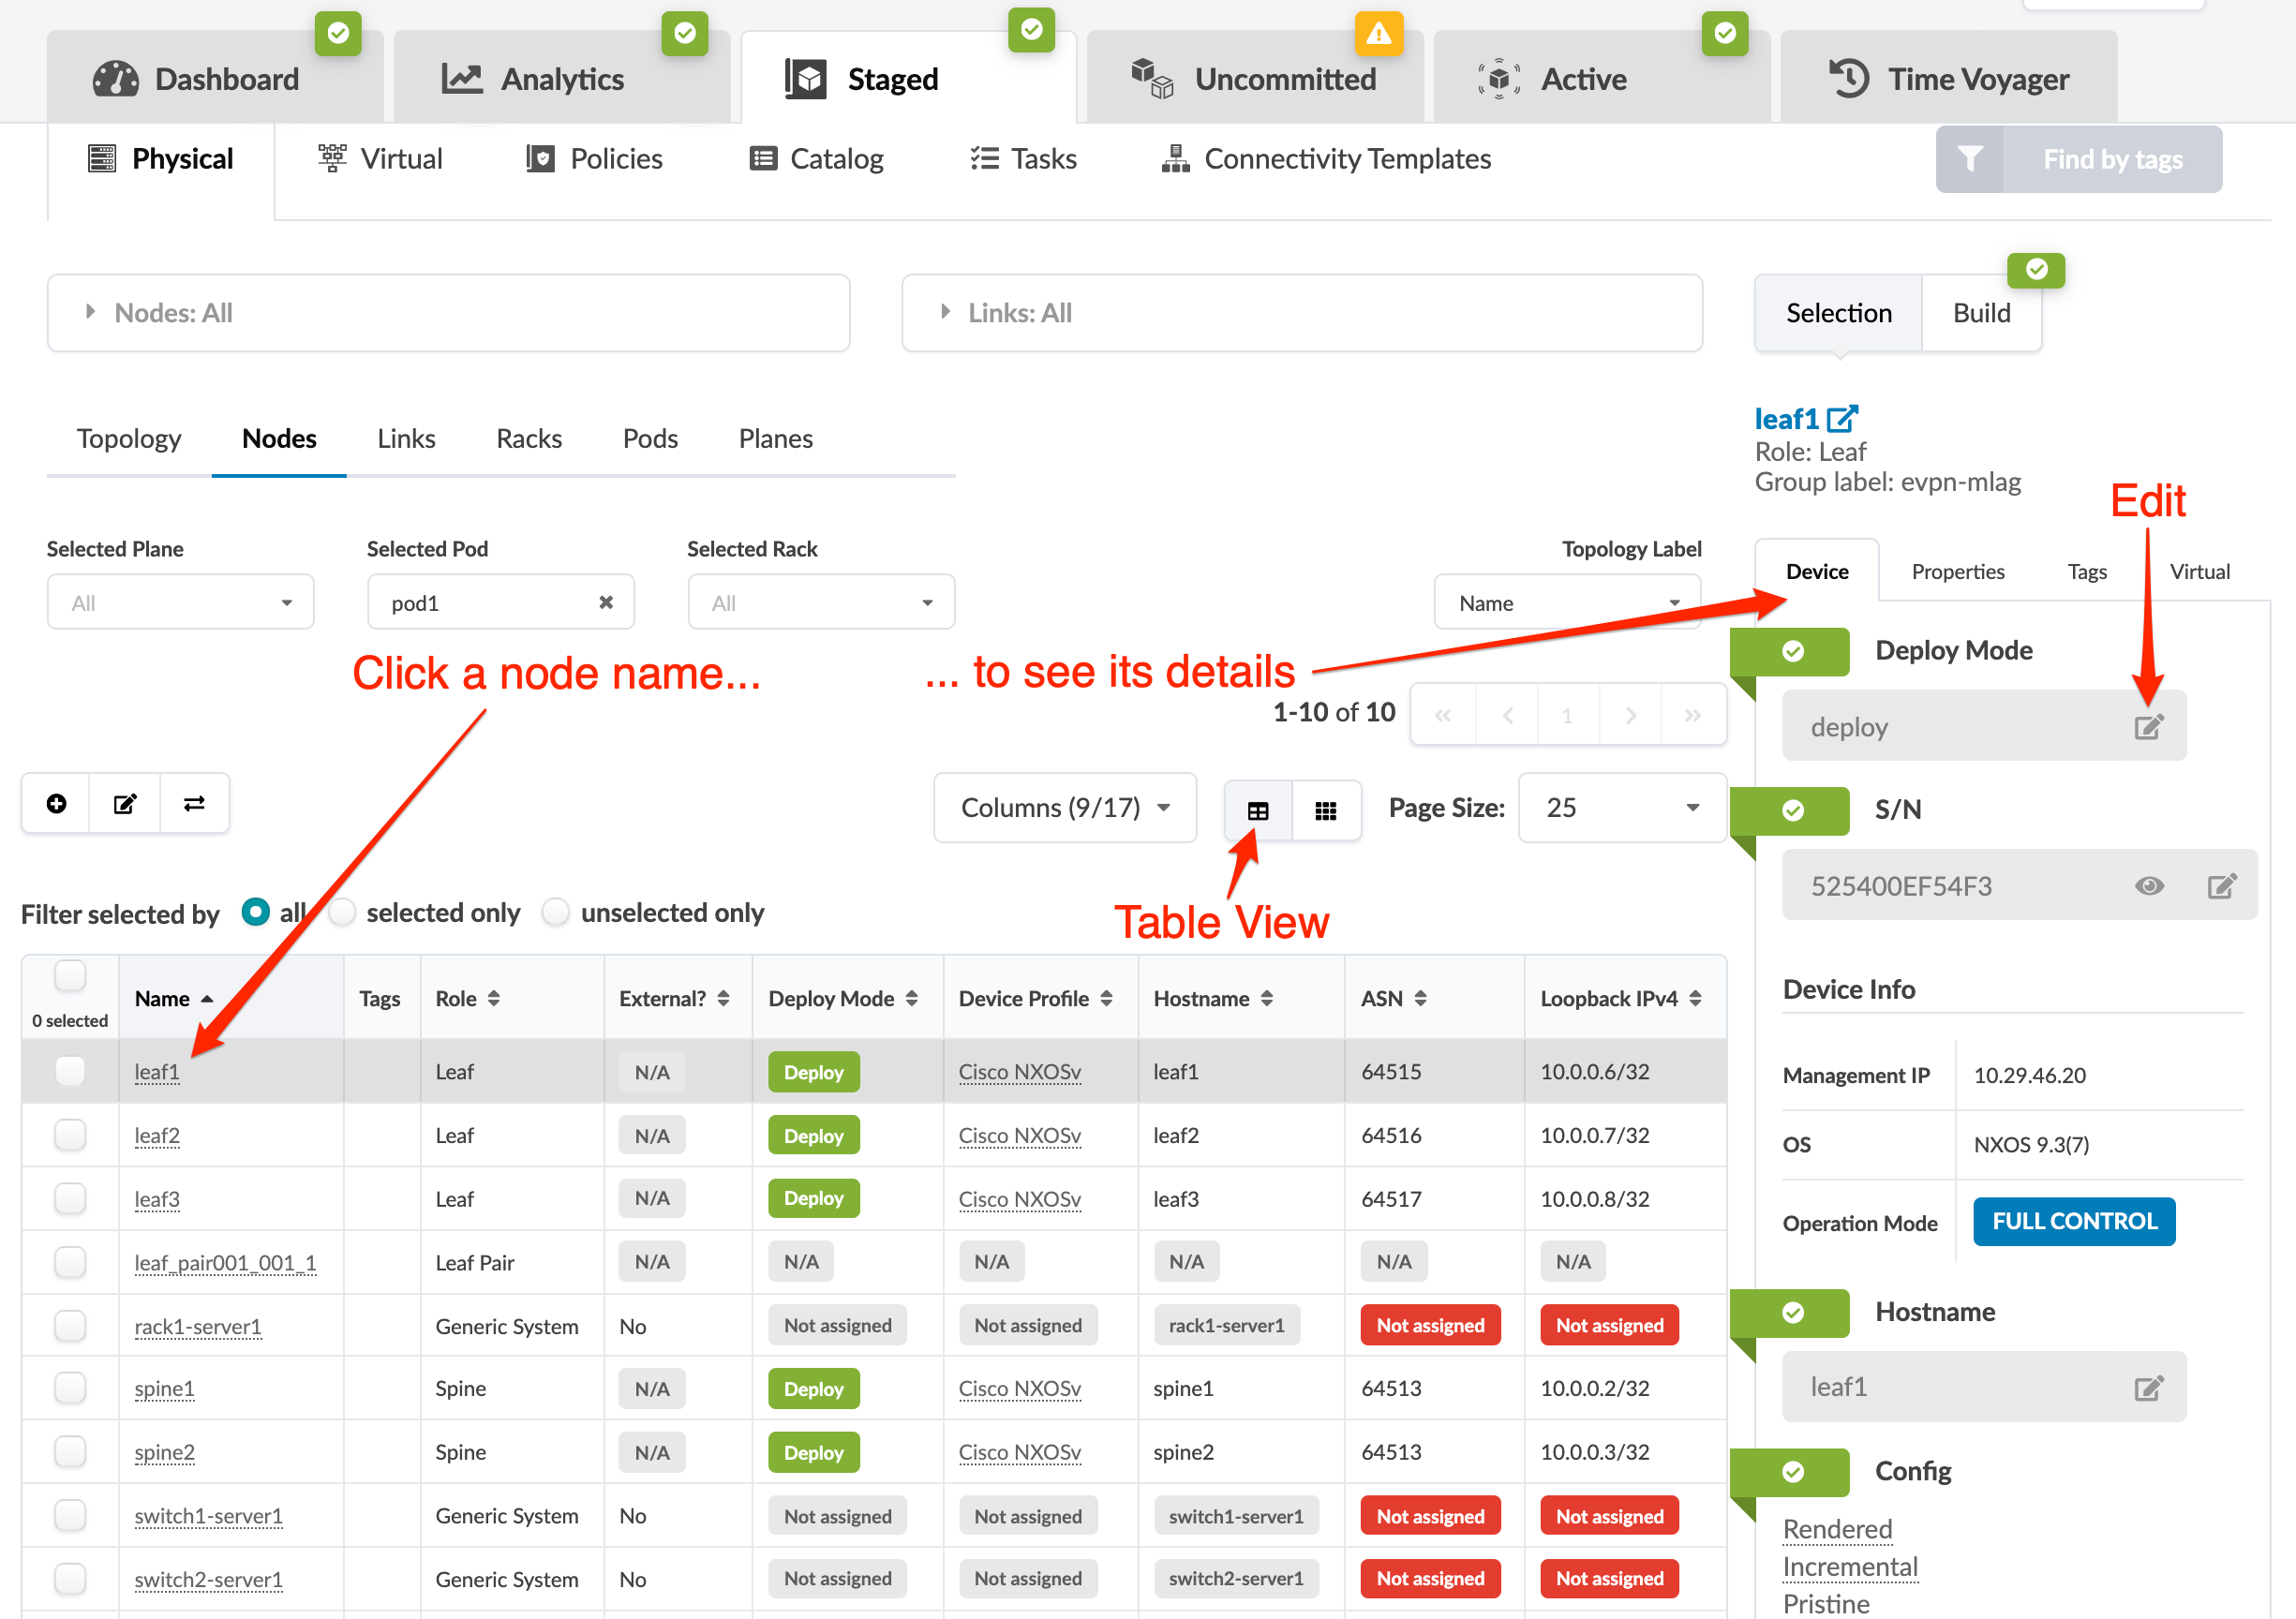
- Enter a different S/N. (You can also access configuration files from here: rendered, incremental, pristine).
- Click the Save button to stage the changes.

