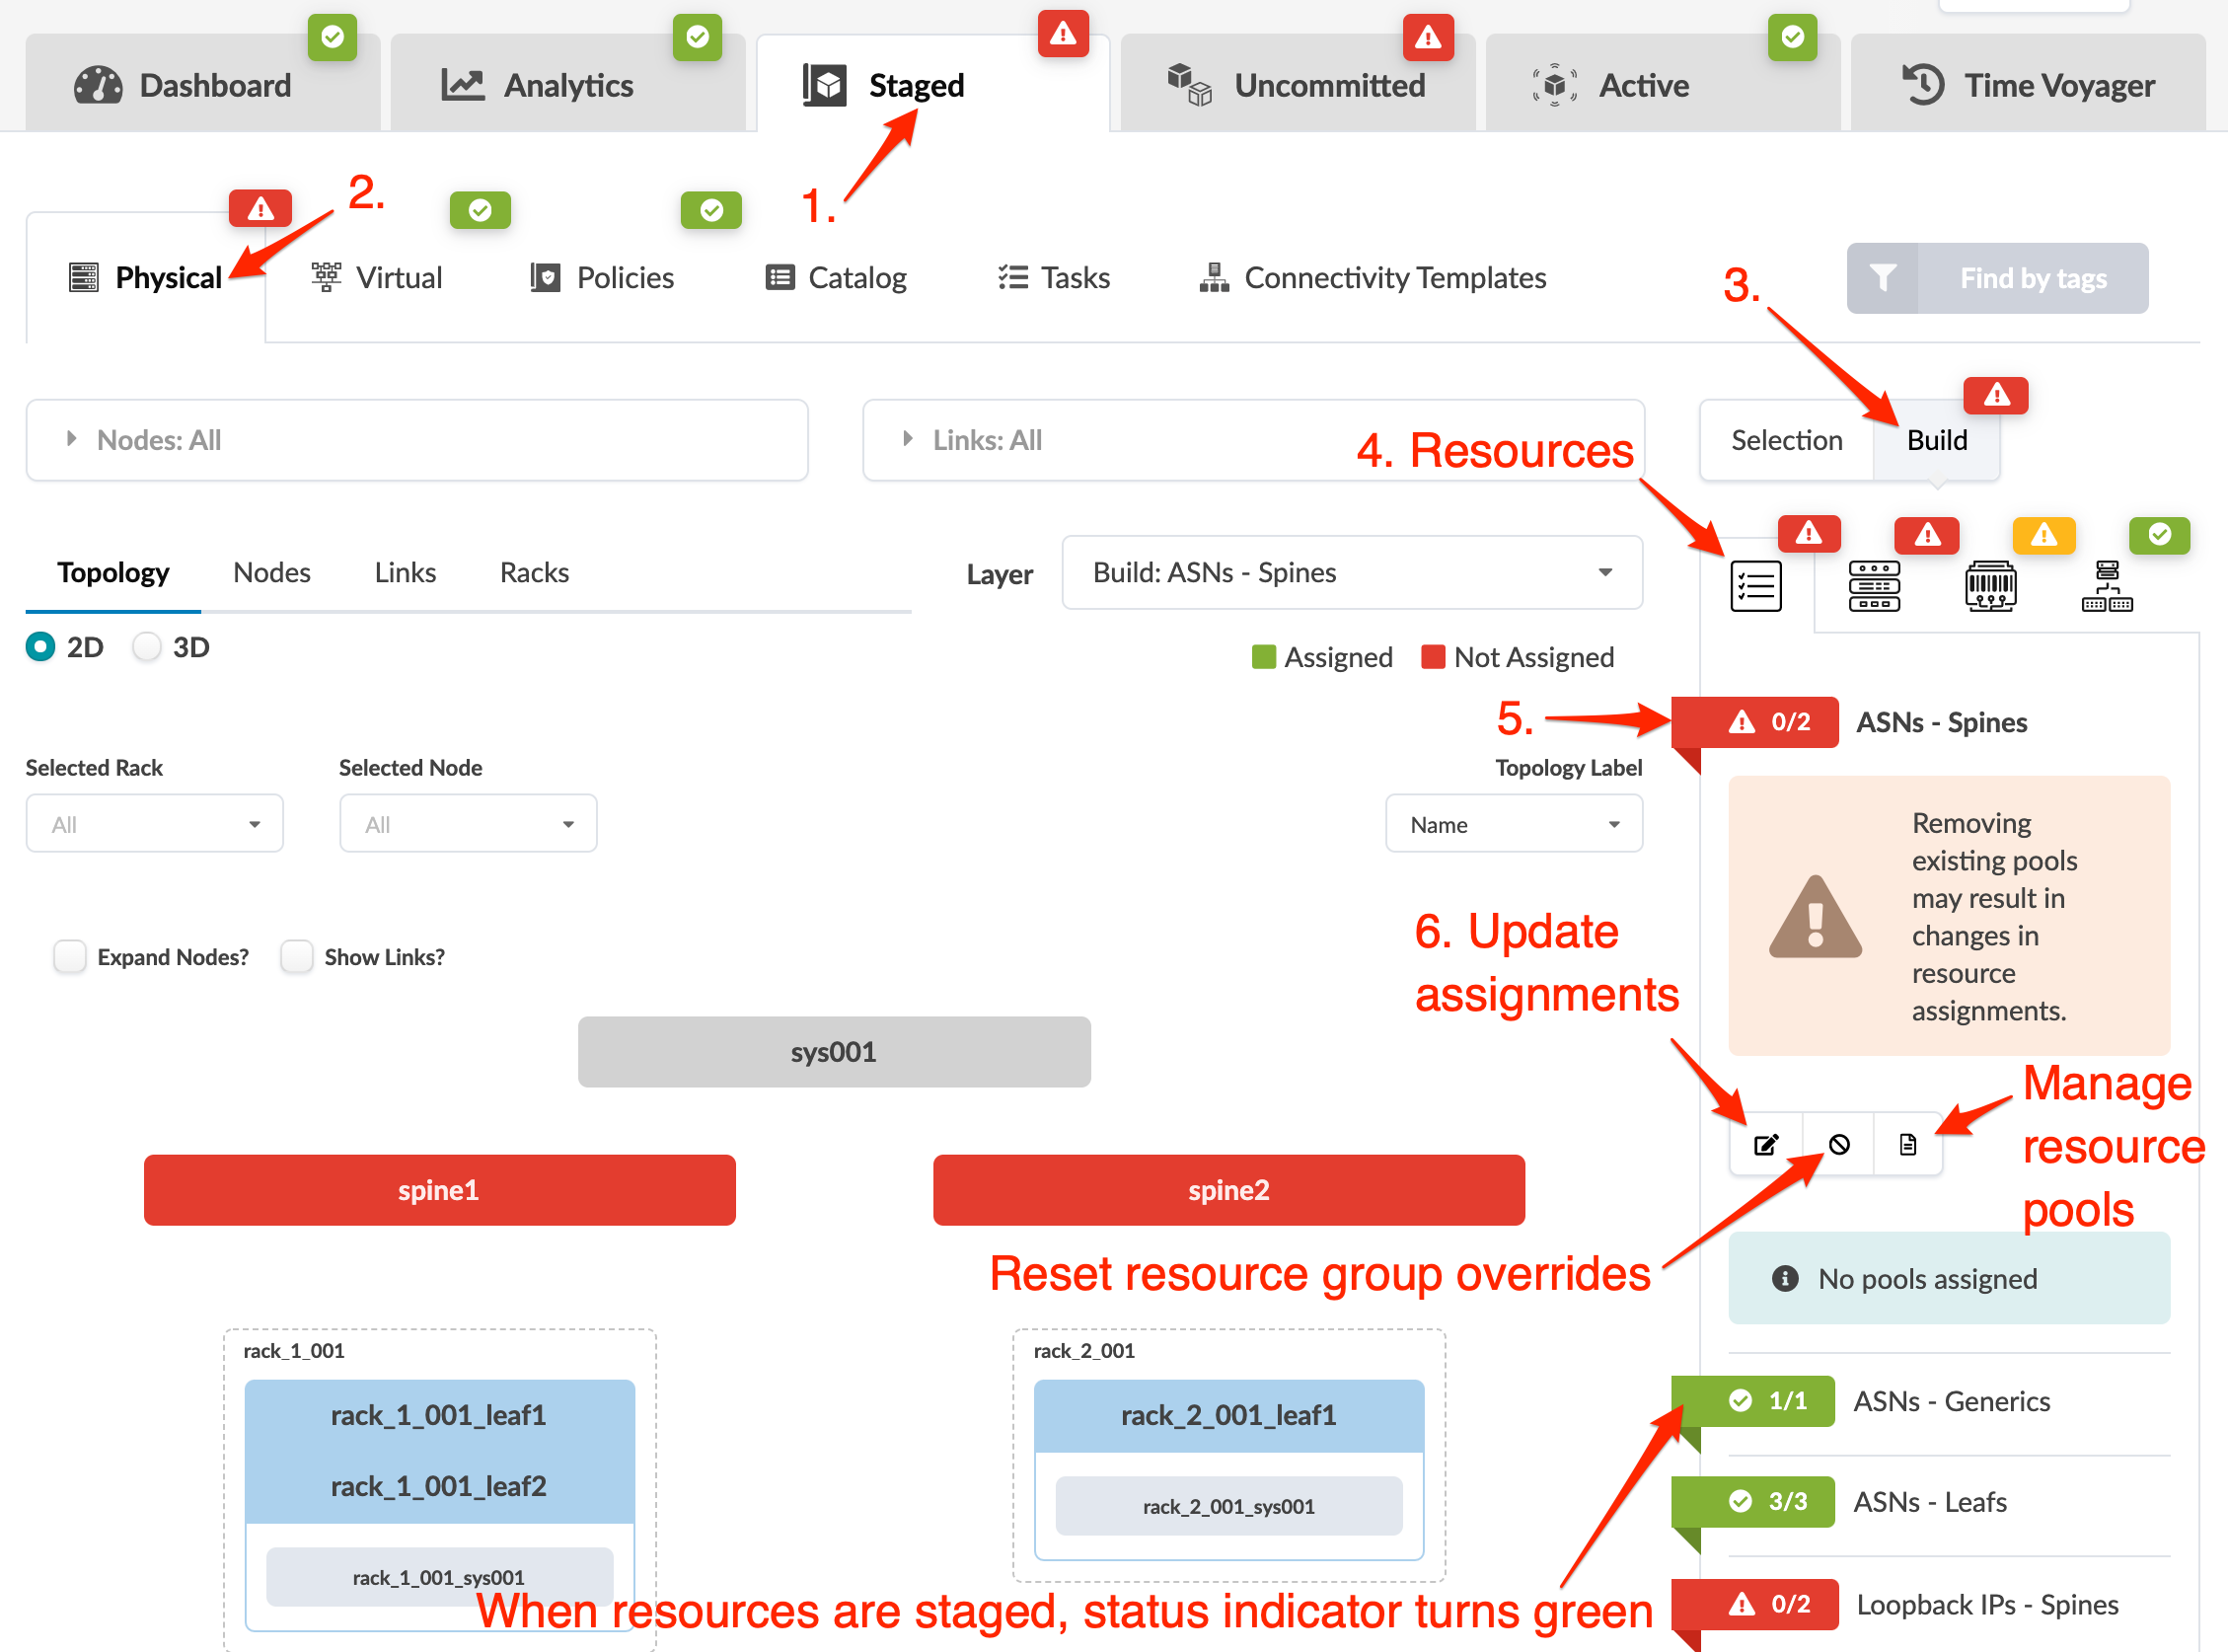
Update Physical Resource Assignments (Datacenter)
You can assign resources, release previously used resources and go to resource pool management. The resource assignment section has a convenient shortcut button, Manage resource pools, that takes you to resource pool management. From there, you can monitor resource usage and create additional resource pools, as needed.
Update Physical Resource Assignments
Reset Physical Resource Group Overrides
Certain blueprint operations require resource allocations to be retained even when you've removed a device from a blueprint. Overridden resource groups re-use previously allocated resources when a device is re-used. For example, if you've deleted a rack, then you rollback to a version with that rack, the same resources must be used. Otherwise, the topology would change (for example, it might have different IP addresses). In the case of a revert operation, the originally assigned resources appear in the table view to indicate that they have been retained (but the build section shows that no resources are assigned). Situations like this can (but do not always) result in build errors. Examples of where we want resources to persist include:
- Particular time voyager rollbacks (rack removal/addition and so on).
- Revert operations.
- Using the Update Stated Cabling Map from LLDP feature.
If you don't need to re-use the same resources, reset the resource groups by clicking the Reset resource group overrides button (shown in the overview image above). Then you can unallocate resources, and allocate new ones, as applicable.

