Edit Interface IP Address
You may need to change the interface IP address after it's been assigned. You can change it from the associated routing zone.
Accessing routing zones from the interfaces table is new in Apstra version 4.2.1. If you're using version 4.2.0, you can go directly to the associated routing zone to see and change the interface IP address.
From Main Interfaces Table (4.2.1)
-
From the blueprint, navigate to Staged > Physical >
Interfaces.
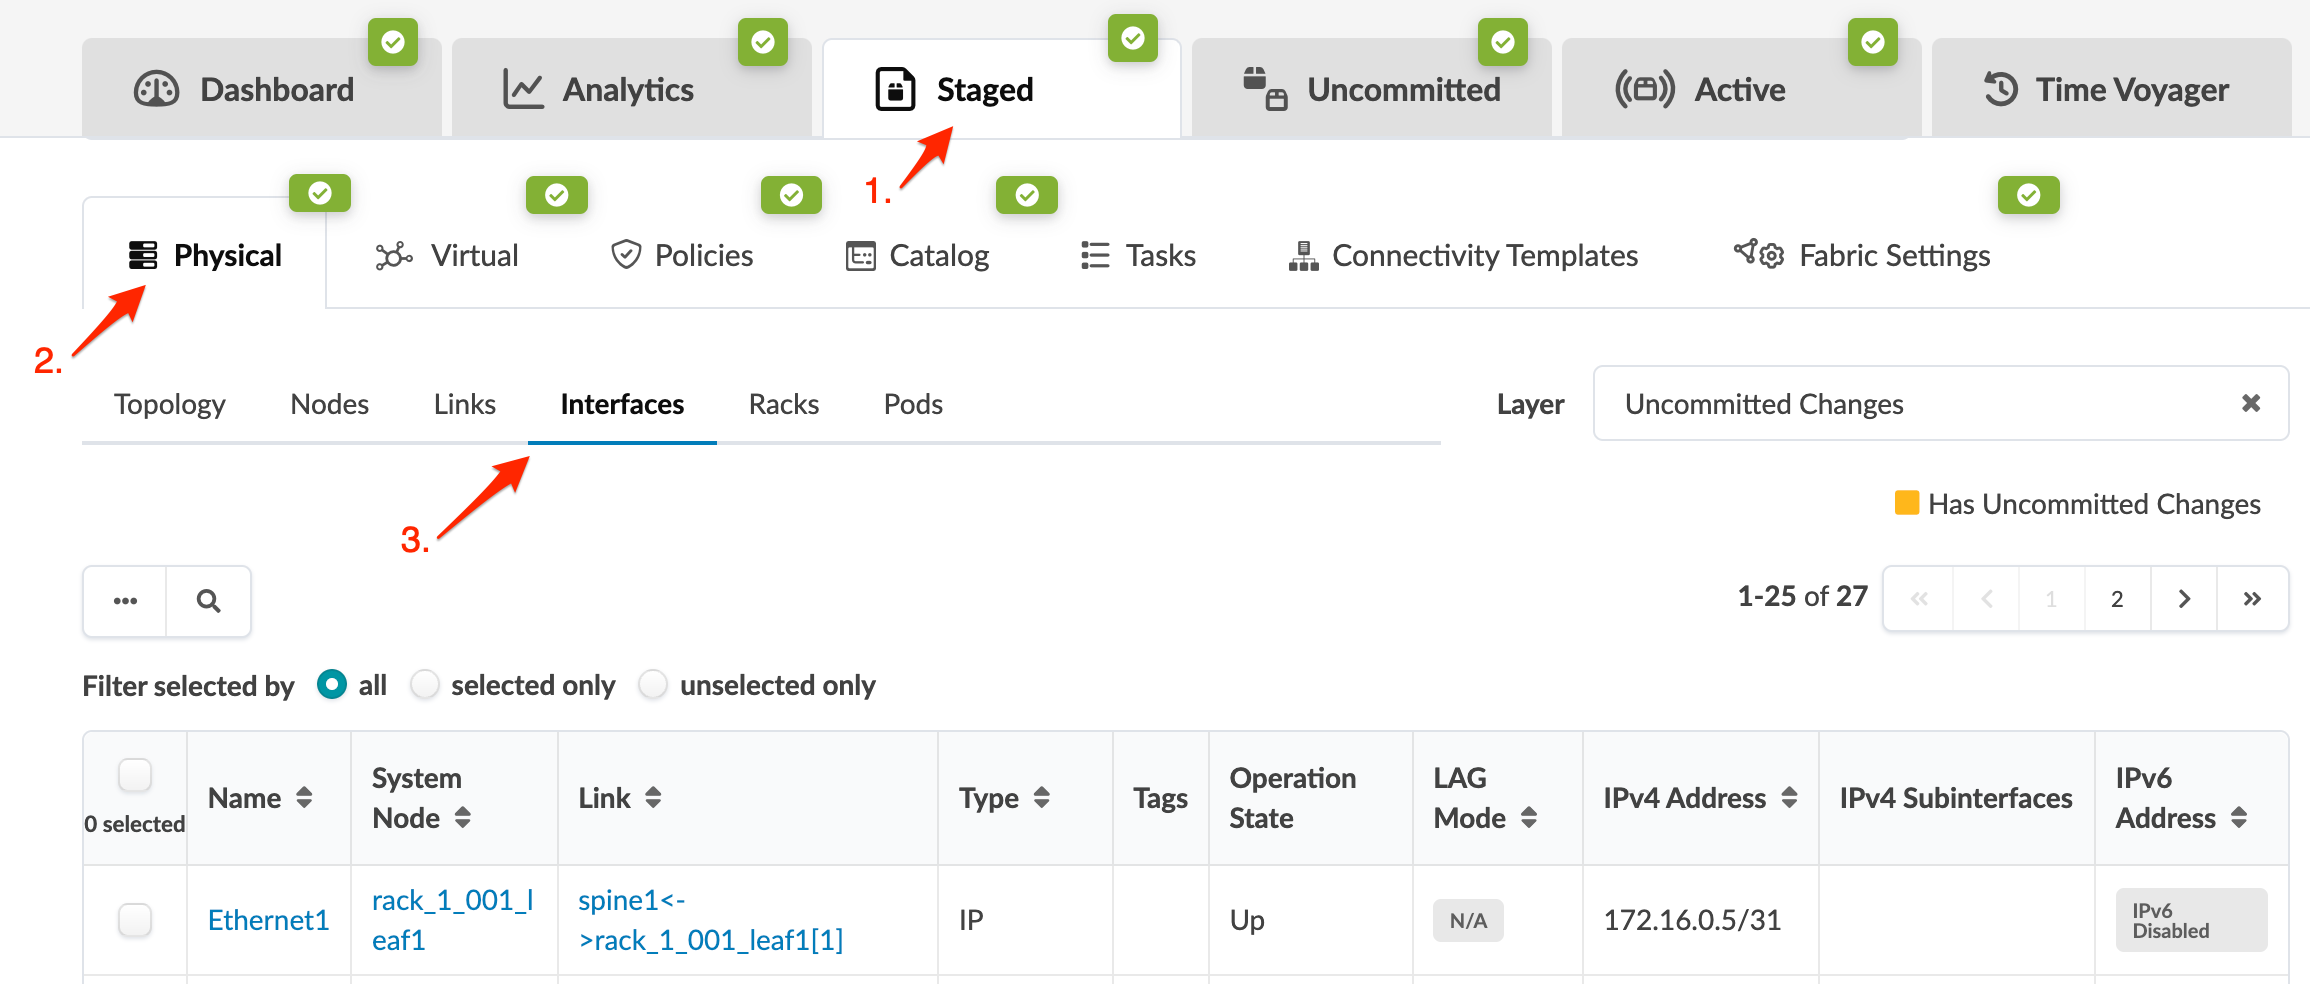
-
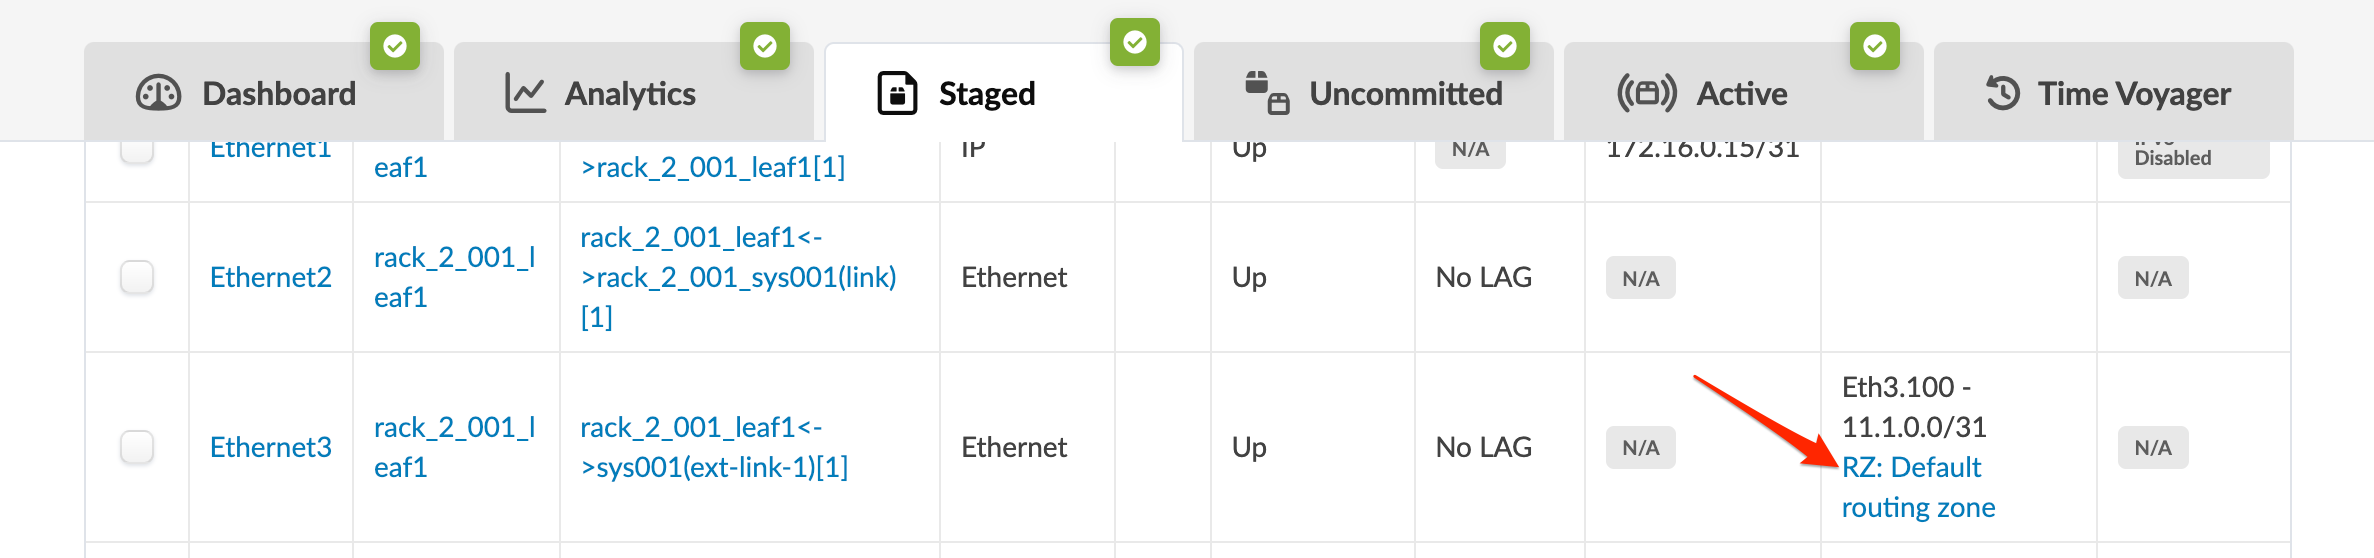
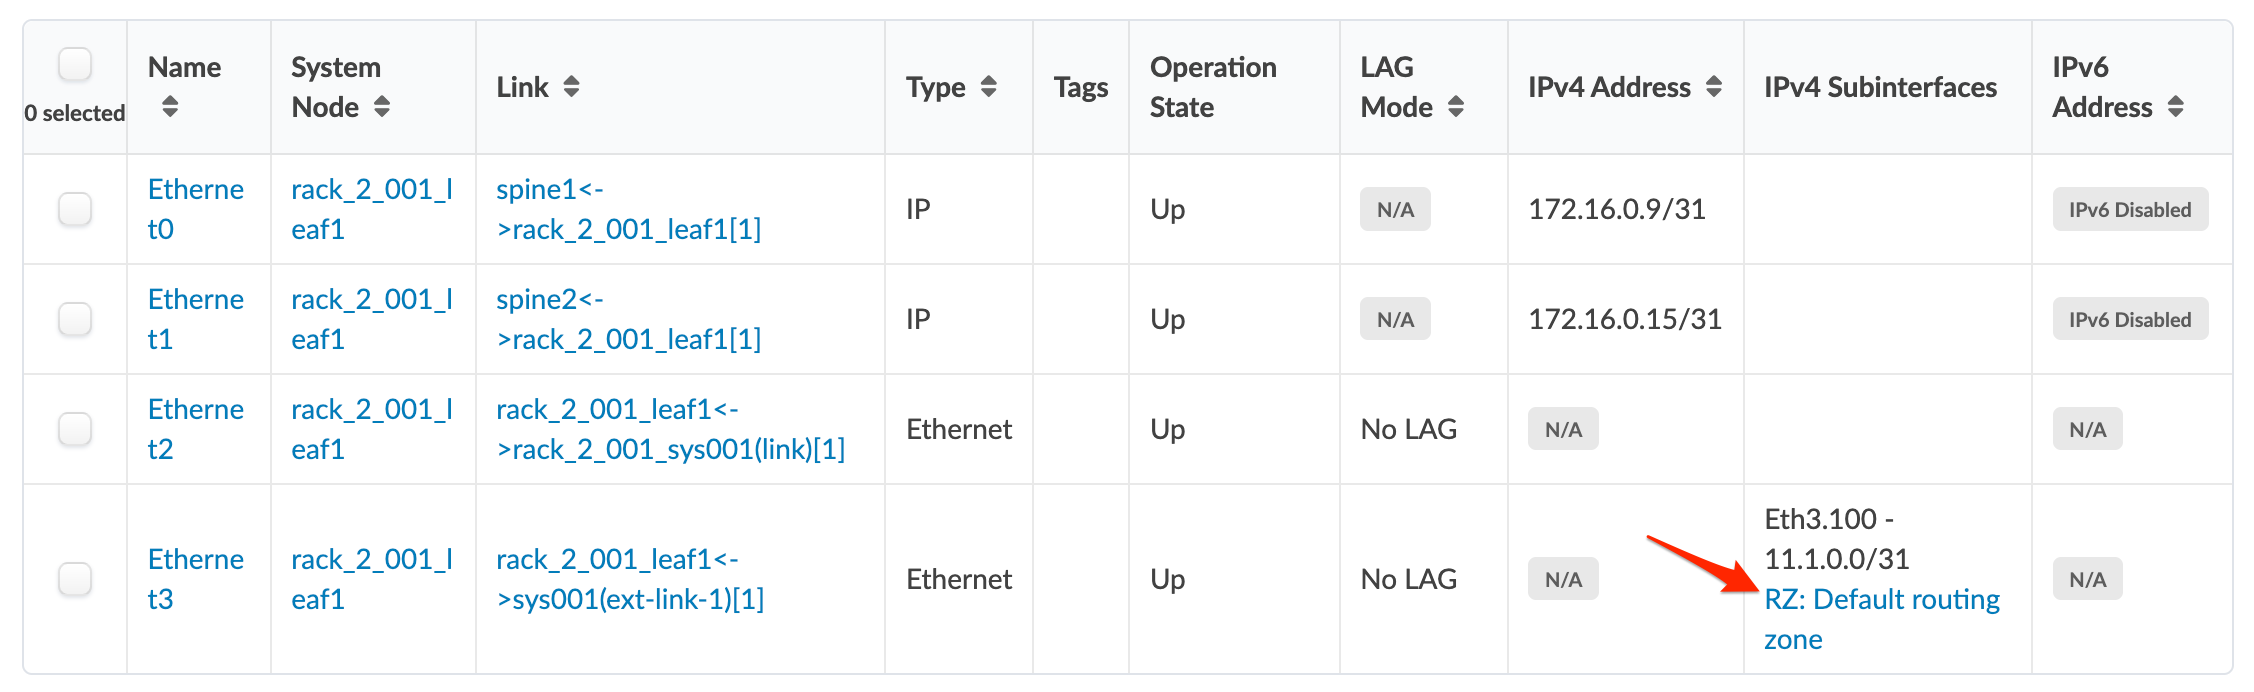
Find the applicable leaf device in the System Node
column, then click the corresponding routing zone in the IPv4
Subinterfaces column.
-
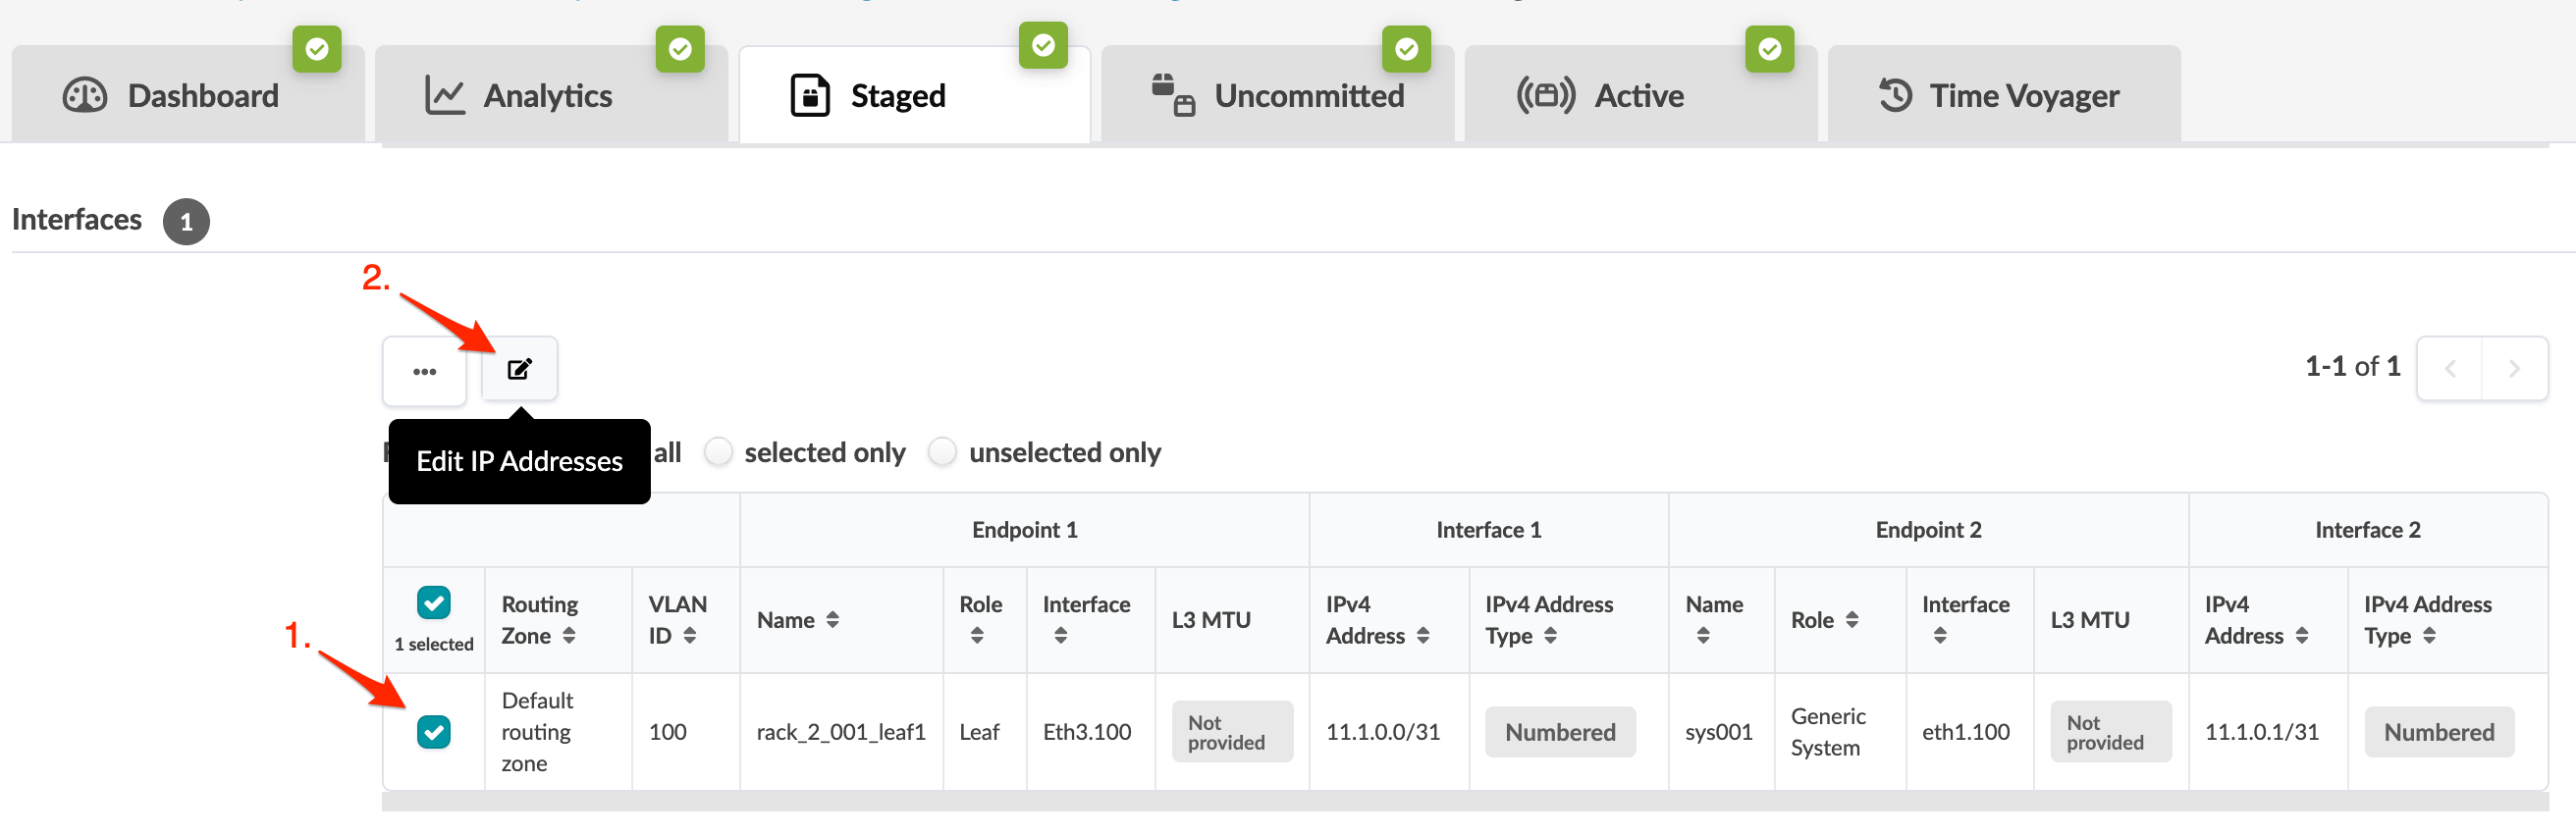
From the routing zone details that appear, scroll to the
Interfaces section, click the checkbox for the
routing zone, then click the Edit IP Addresses button
that appears above the table.
-
In the dialog that opens, change the IP addresses (and IP address type), as
applicable, then click Save to save your changes and
return to the previous screen.
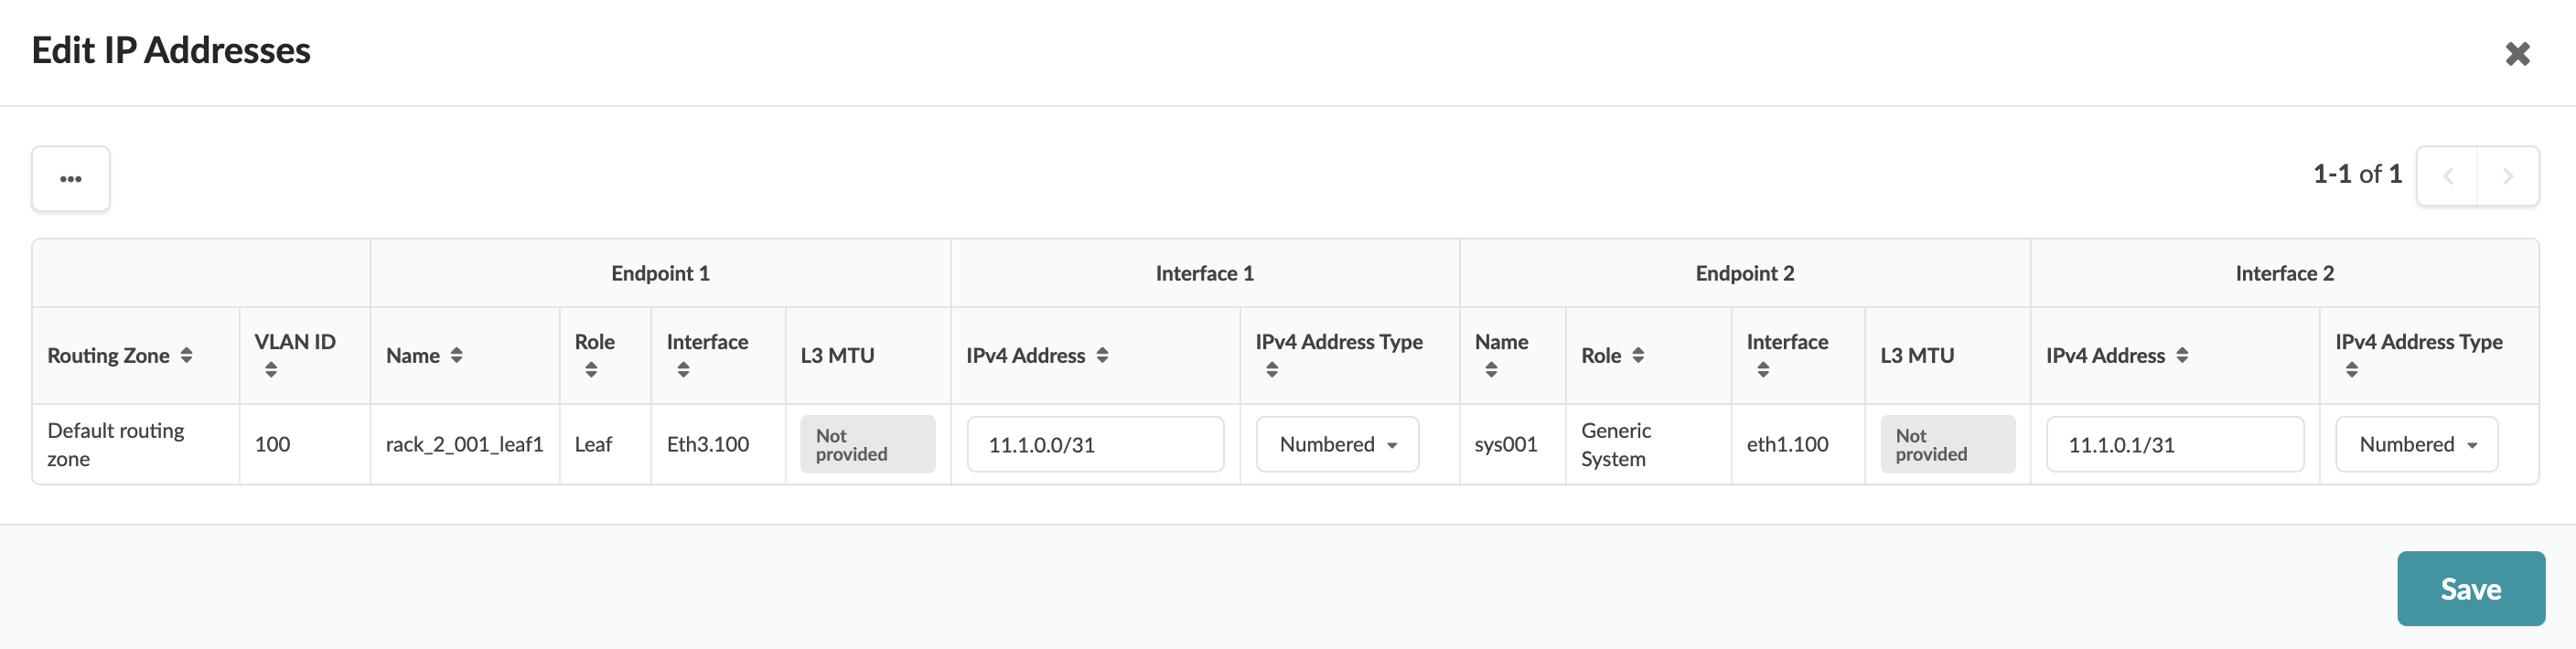
To deploy the change to the active blueprint, commit from the Uncommitted tab.
From Selection Interfaces Table (4.2.1)
-
From the blueprint, navigate to Staged > Physical >
Topology and select the leaf with the applicable
interface.
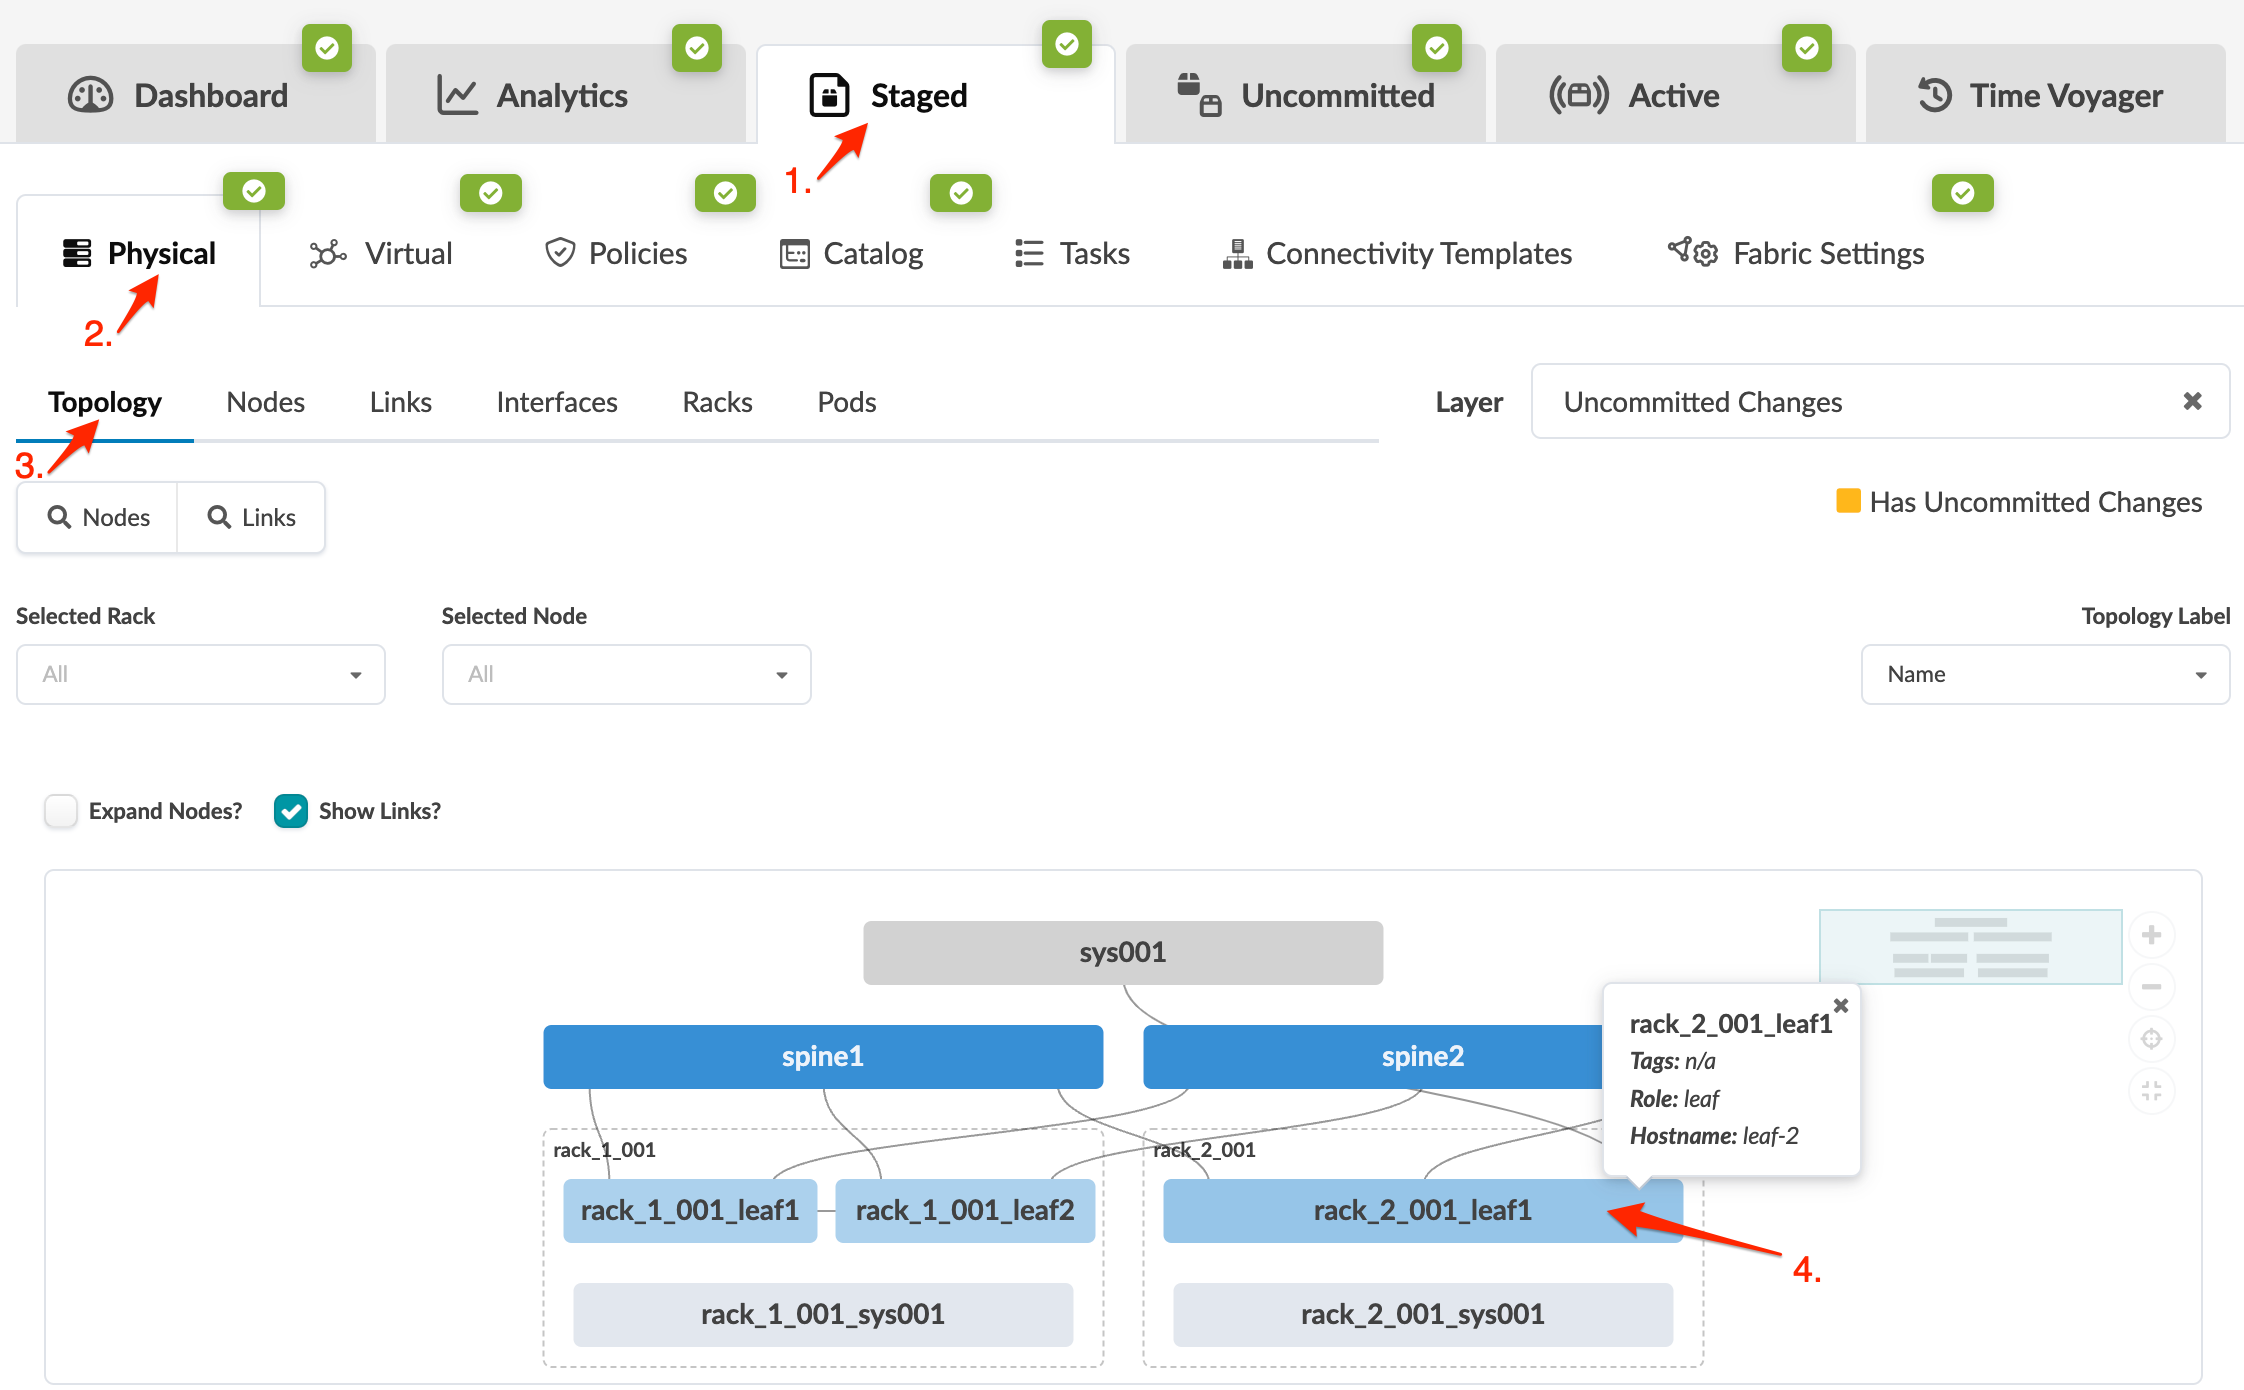
-
Above the topology for the selected node that appears, click
Interfaces (next to
Neighbors and Links) to go
to the Interfaces table just for that node.
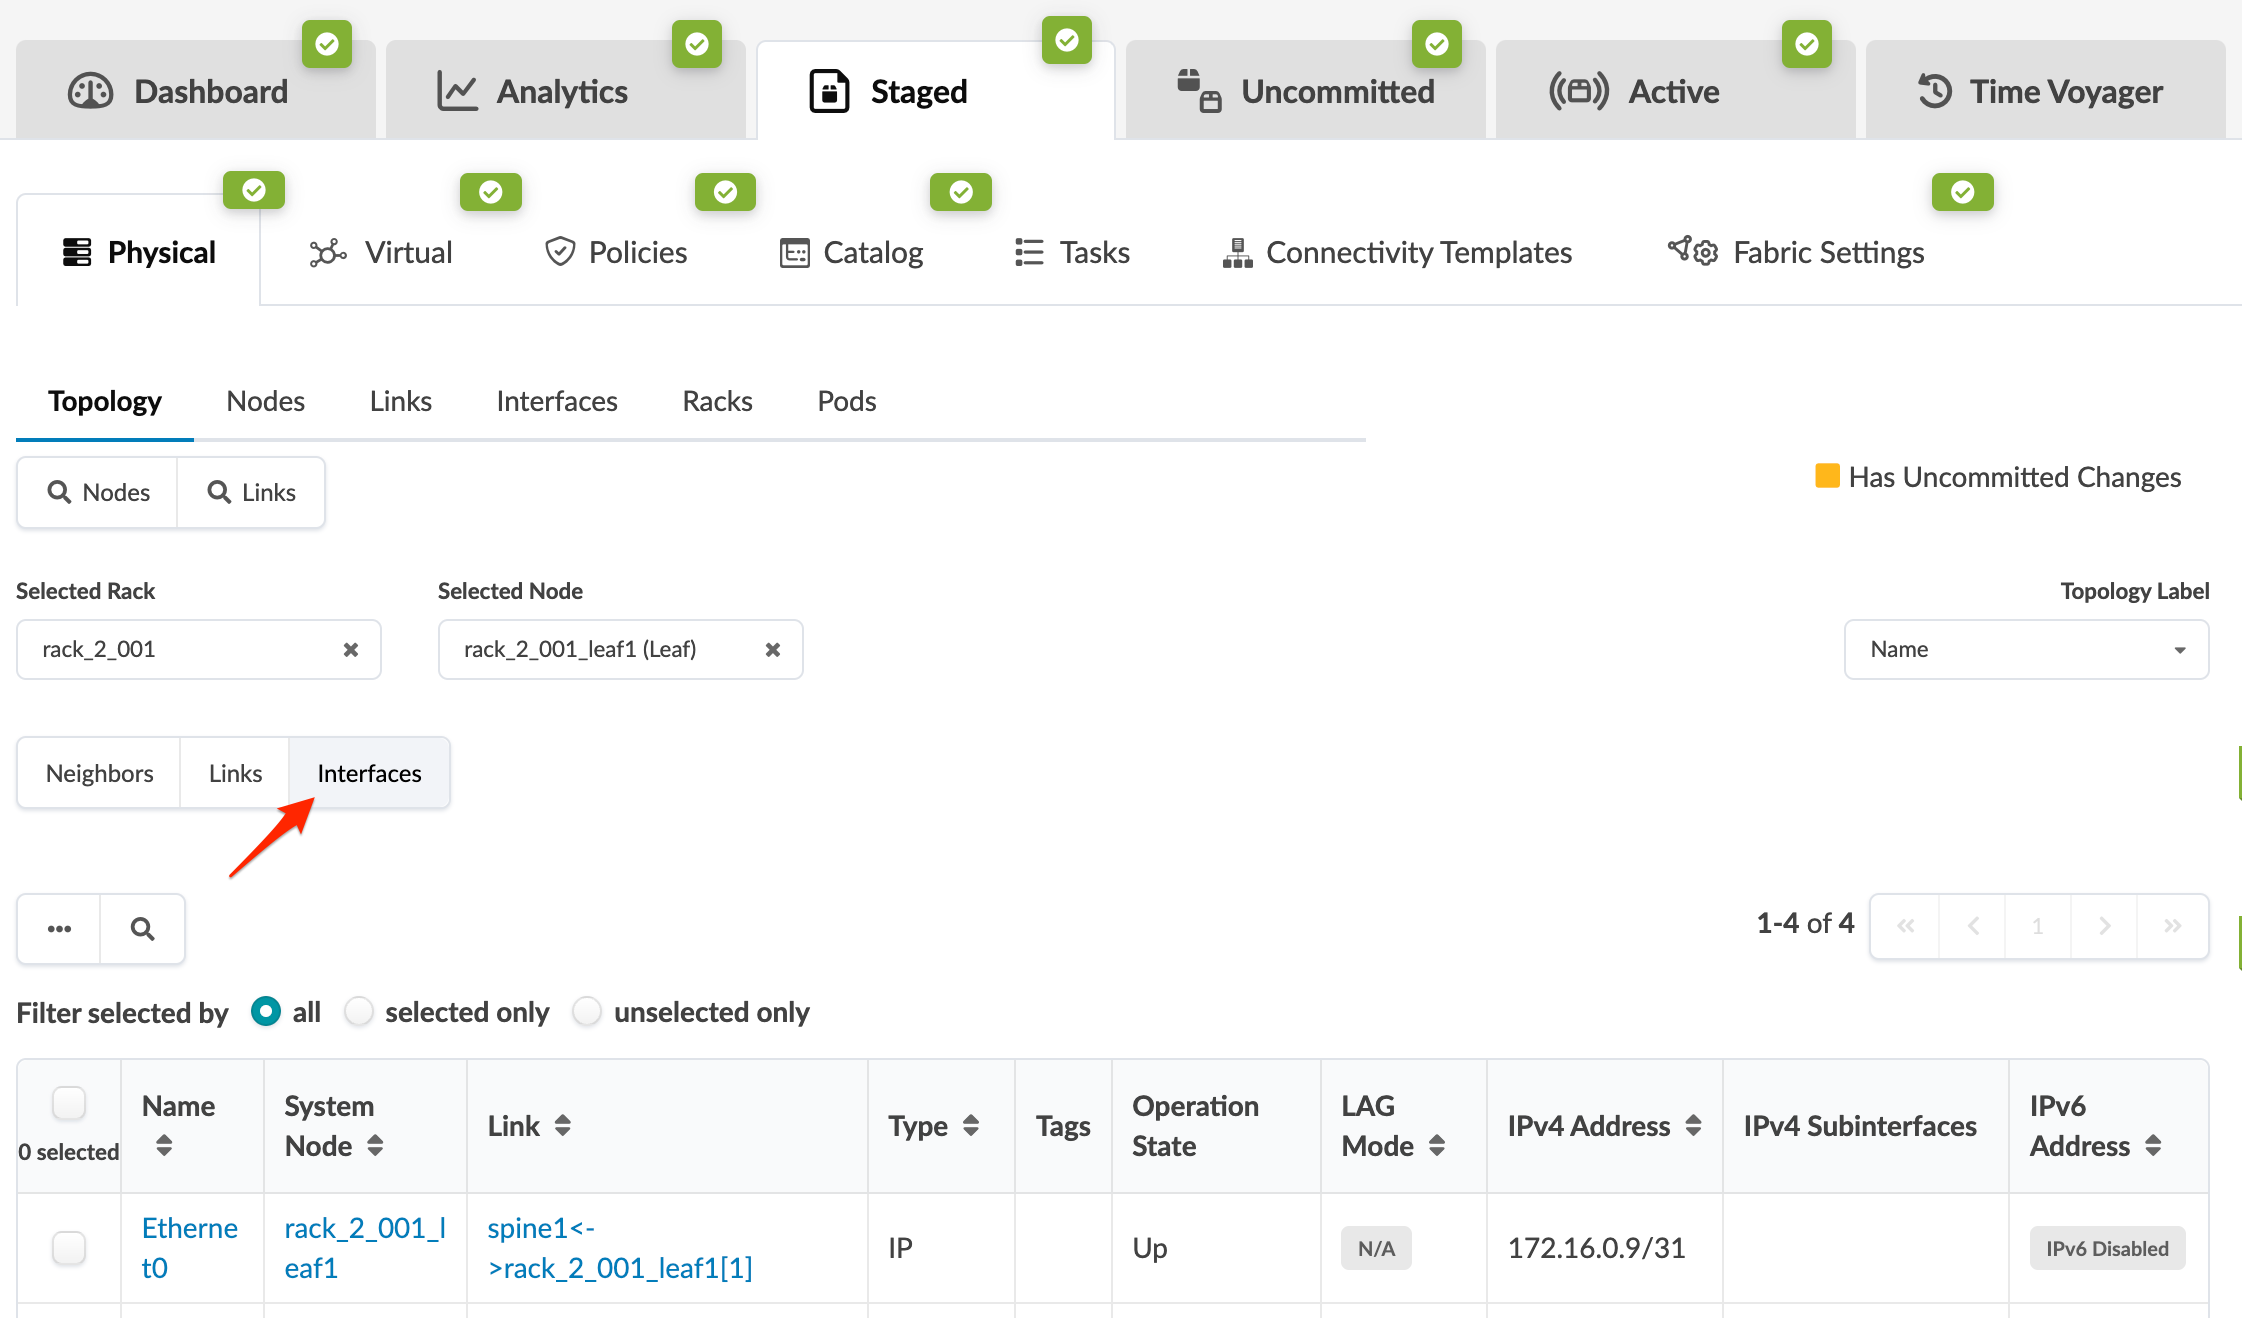
-
Click the applicable routing zone in the IPv4
Subinterfaces column (new in Apstra 4.2.1).
-
From the routing zone details that appear, scroll to the
Interfaces section, click the checkbox for the
routing zone, then click the Edit IP Addresses button
that appears above the table.
-
In the dialog that opens, change the IP addresses (and IP address type), as
applicable, then click Save to save your changes and
return to the previous screen.
To deploy the change to the active blueprint, commit from the Uncommitted tab.
Directly from Routing Zone (4.2.0/4.2.1)
-
From the blueprint, navigate to Staged > Virtual > Routing
Zones, then click the name of the VRF in the table.
-
From the routing zone details that appear, scroll to the
Interfaces section, click the checkbox for the
routing zone, then click the Edit IP Addresses button
that appears above the table.
-
Change the IP addresses (and IP address type), as applicable, then click
Save to save your changes and return to the
previous screen.
To deploy the change to the active blueprint, commit from the Uncommitted tab.